Buzzing with Joy: Adorable Bee Cake Pops Recipe
Sweet bee cake pops buzz with delightful creativity that’ll make you smile.
These adorable treats capture whimsy in every delicate bite.
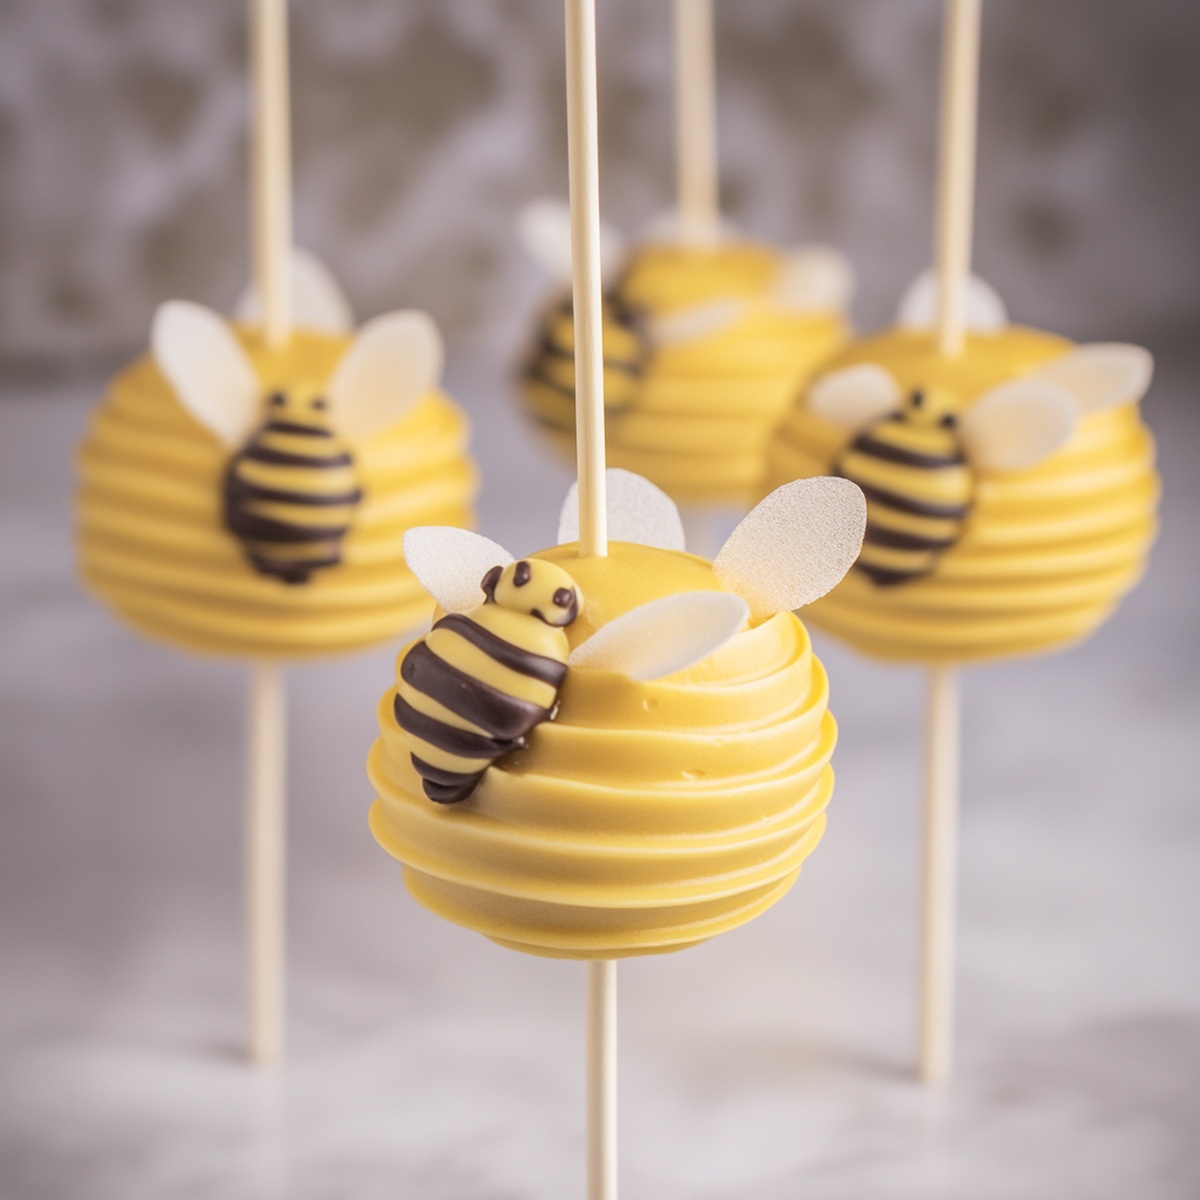
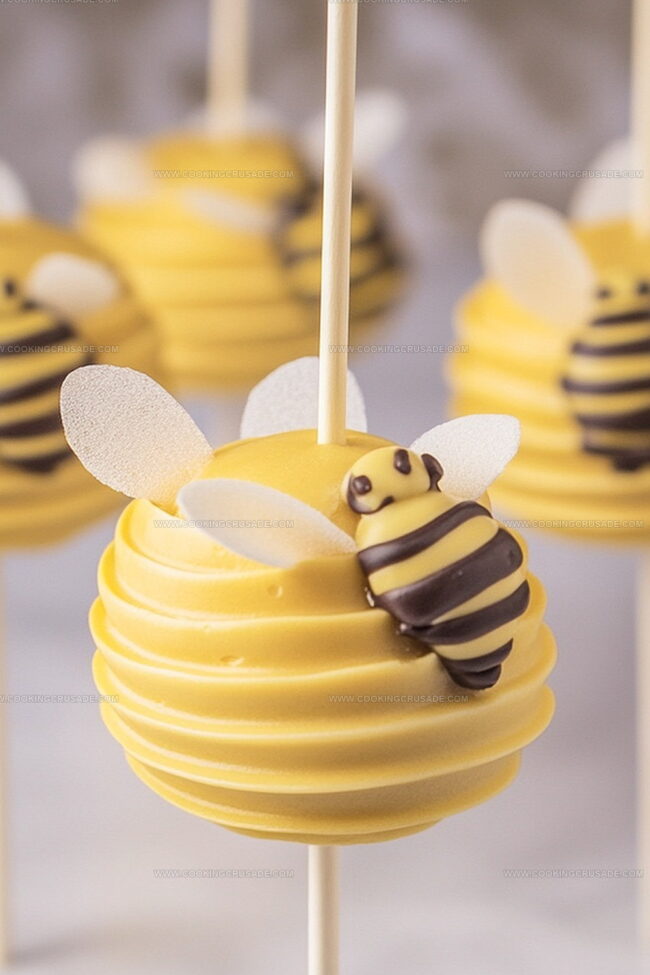
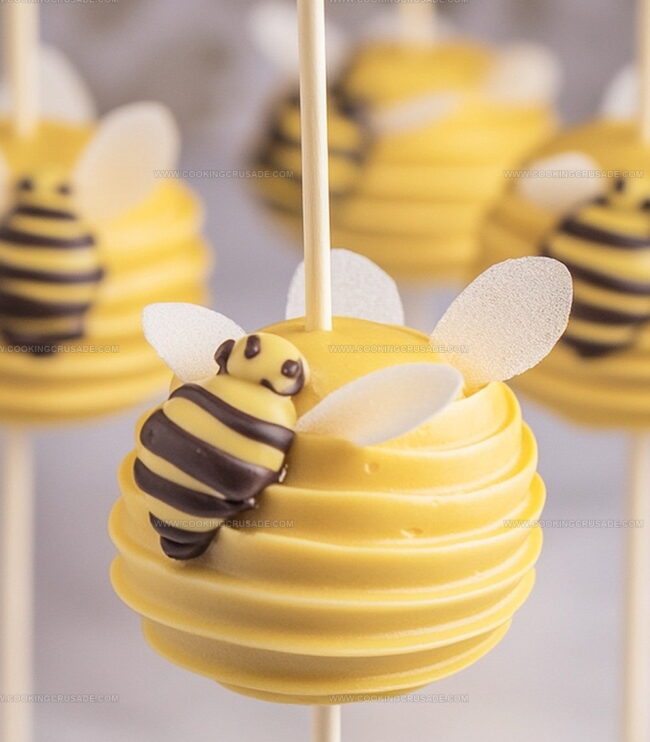
Tiny golden honey-glazed spheres decorated like cheerful little pollinators dancing on sticks.
Kids absolutely adore these charming desserts that look almost too cute to eat.
Crafting these delectable sweets requires minimal baking skills and basic decorating techniques.
Chocolate and vanilla flavors blend perfectly to create these miniature edible insects.
You’ll want to gather friends and turn this baking adventure into a playful afternoon activity.
Why Bee Cake Pops Are A Buzz-Worthy Treat
Everything You Need To Make Bee Cake Pops
Cake Base:Binding and Flavor:Coating and Decoration:Cake Pop Assembly Tools:How To Decorate And Create Bee Cake Pops
Step 1: Crumble The Cake Foundation
Grab your favorite cake and transform it into delicate crumbs. Break the cake into tiny, soft pieces until it resembles a fluffy sandy texture. Work the cake gently with your fingers in a spacious mixing bowl.
Step 2: Create Sticky Cake Mixture
Combine the cake crumbs with frosting using these ingredients:Mix thoroughly until the blend holds together perfectly without feeling too wet or dry. The consistency should be like soft play dough that can easily form into shapes.
Step 3: Craft Perfectly Round Spheres
Roll the mixture between your palms, creating smooth, uniform balls. Place these adorable spheres on a parchment-lined tray. Pop them into the refrigerator to firm up for about 15-20 minutes.
Step 4: Prepare Vibrant Coating
Melt yellow candy coating in a microwave-safe bowl. Heat in short bursts, stirring between each interval to prevent burning. Achieve a smooth, glossy liquid consistency.
Step 5: Attach Cake Pop Handles
Dip lollipop stick tips into melted coating. Gently insert each stick halfway into the chilled cake balls. Allow them to set for a few minutes, creating a secure connection.
Step 6: Luxurious Dipping Process
Carefully submerge each cake ball into the golden yellow coating. Tap gently to remove excess coating, creating a smooth, even surface. Stand each pop upright to dry completely.
Step 7: Transform Into Buzzing Bees
Decorate with these magical touches:Use precision and creativity to bring each bee cake pop to life. Pipe black stripes around the yellow base, attach adorable eyes, and craft delicate wings.
Step 8: Showcase Sweet Creations
Arrange your bee cake pops on a beautiful display stand or decorative platter. These whimsical treats are ready to delight friends and family with their charming bee-inspired design.
Tip: Store in a cool place and enjoy within 3-4 days for maximum freshness and flavor!
Tips For Smooth Coating And Cute Designs In Bee Cake Pops
How To Keep Bee Cake Pops Fresh And Firm
What Goes Well With Bee Cake Pops
Fun Variations Of Bee Cake Pops To Try
FAQs On Bee Cake Pops
These adorable treats combine fun design with delicious cake, creating cute bee-themed desserts that are perfect for parties, kids’ events, or summer gatherings.
Not at all! The recipe is beginner-friendly and requires basic baking techniques like crumbling cake, mixing, and dipping in candy melts. Anyone can create these cute bee-themed treats with some patience.
Absolutely! Homemade vanilla or yellow cake works perfectly. Just ensure the cake is completely cooled before crumbling, which helps create the right cake pop texture.
You can prepare the cake balls up to 2-3 days ahead and store them in the refrigerator. Decorate them a day before your event to ensure the candy coating and decorations set nicely.
Print
Bee Cake Pops Recipe
- Total Time: 1 hour 50 minutes
- Yield: 12 1x
Description
Sweet bee-themed cake pops buzz with whimsy and charm, offering delightful miniature treats perfect for parties. Honey-golden cake centers coated in yellow and black chocolate will enchant guests with their playful bee-inspired design.
Ingredients
Cake Base:
- 1 box cake mix (any flavor, baked according to package instructions)
- ⅓ cup (79 milliliters) frosting (vanilla or cream cheese)
Coating and Decoration:
- 2 cups (340 grams) yellow candy melts
- ¼ cup (43 grams) black candy melts or black icing
- ¼ cup (43 grams) white candy melts (for wings)
Accessories:
- Edible candy eyes
- Lollipop sticks
Instructions
- Transform the baked cake into delicate crumbs by gently breaking it apart in a spacious mixing bowl, ensuring a fine, uniform texture.
- Gradually incorporate frosting into the cake crumbs, blending meticulously until the mixture achieves a cohesive, moldable consistency that holds together without excessive moisture.
- Craft uniform spherical shapes by rolling the mixture into precise, bite-sized orbs approximately one inch in diameter. Carefully position these on a parchment-lined tray.
- Refrigerate the formed spheres to establish structural integrity, allowing them to firm up for approximately 15-20 minutes.
- Prepare the yellow candy coating by melting it in short microwave intervals, stirring thoroughly to create a smooth, glossy liquid.
- Stabilize each lollipop stick by dipping its tip into the warm candy coating, then gently inserting it midway through the chilled cake spheres.
- Submerge each prepared cake pop completely in the golden-yellow coating, allowing excess to drip off smoothly. Position vertically to set and drain.
- Design distinctive bee markings by piping elegant black stripes around the yellow surface, creating a precise, recognizable pattern.
- Enhance the whimsical design by carefully attaching miniature candy eyes using a tiny amount of melted coating as adhesive.
- Craft delicate wings by piping white candy melt ovals onto parchment paper, allowing them to solidify before delicately affixing them to the cake pop’s upper section.
- Display the completed bee cake pops on an attractive stand, ready to delight and surprise guests with their charming, intricate design.
Notes
- Chill the cake balls thoroughly to prevent cracking during coating, ensuring a smooth, professional finish.
- Adjust candy melt consistency by adding a few drops of vegetable oil for a thinner, more even coating that glides effortlessly.
- Create gluten-free versions by using gluten-free cake mix and checking candy melt ingredients for potential wheat contamination.
- Experiment with alternative flavor combinations like chocolate cake with cream cheese frosting for a unique twist on the classic bee pop design.
- Prep Time: 20 minutes
- Cook Time: 30 minutes
- Category: Desserts, Snacks
- Method: Mixing
- Cuisine: American
Nutrition
- Serving Size: 12
- Calories: 150
- Sugar: 10 g
- Sodium: 200 mg
- Fat: 6 g
- Saturated Fat: 3 g
- Unsaturated Fat: 2 g
- Trans Fat: 0 g
- Carbohydrates: 22 g
- Fiber: 1 g
- Protein: 2 g
- Cholesterol: 20 mg
James Mitchell
Founder & Recipe Developer
Expertise
Recipe Creation and Testing, Fusion Cuisine, Food Styling and Photography, Culinary Education
Education
Kendall College, Chicago, IL
The Culinary Institute of America, Hyde Park, NY
James Mitchell is the founder and fearless flavor explorer at Cooking Crusade. With a degree in Culinary Arts from Kendall College and advanced training in global gastronomy from The Culinary Institute of America, James has spent over a decade perfecting the art of recipe creation.
His background includes fine dining, private cheffing, and food styling, but his true joy comes from turning big ideas into doable recipes for home cooks. Every dish he shares is a mix of creativity, culture, and a little kitchen magic, built to bring excitement back to everyday meals.