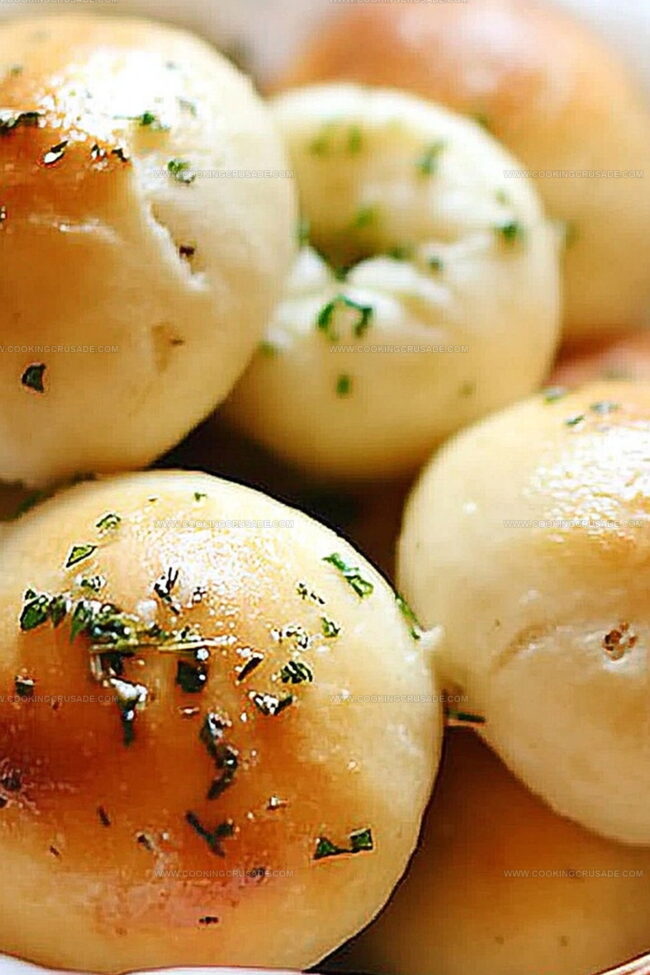
Warm, golden pastry pockets bursting with melted garlic herb cheese bombs promise a delightful culinary adventure.
These bite-sized delights deliver an explosion of flavor in every single mouthful.
Crispy on the outside and irresistibly creamy within, they make perfect appetizers for any gathering.
The combination of herbs and cheese creates a tantalizing blend that dances across your palate.
Each bomb is carefully crafted to ensure maximum taste and texture.
Rich, aromatic herbs complement the smooth, melted cheese, making these bombs an instant crowd-pleaser.
Prepare to transform an ordinary meal into an extraordinary experience with these delectable little treasures.
Quick Recipe Overview
Prep Time: 10 minutes
Cook Time: 15 minutes
Total Time: 25 minutes
Calories: 210 kcal
Servings: 9
All Ingredients For Garlic Herb Cheese Bombs
For Dough Base:
All-Purpose Flour: Creates tender, soft foundation with perfect chewy texture.
Salt: Enhances overall flavor profile and balances bread dough.
Baking Powder: Provides light, airy lift to pastry structure.
For Filling and Binding:
Cream Cheese: Delivers rich, creamy center with tangy smoothness.
Garlic: Infuses bold, aromatic punch with deep savory notes.
Fresh Herbs: Adds bright, zesty freshness with vibrant green flavor.
Mozzarella Cheese: Offers stretchy, melty core with classic cheese pull.
For Finishing Touch:
Butter: Creates golden, glossy exterior with rich flavor.
Dried Herbs: Sprinkles additional herbaceous warmth and visual appeal.
Parsley: Introduces fresh, clean garnish with subtle green accent.
Tools To Make Garlic Herb Cheese Bombs
Large mixing bowl: Essential for combining dough ingredients smoothly.
Measuring cups and spoons: Precise measurements for perfect consistency.
Baking sheet: Flat surface for evenly baking cheese bombs.
Parchment paper: Prevents sticking and ensures easy cleanup.
Rolling pin: Helps flatten and shape dough evenly.
Sharp knife or pizza cutter: Clean cutting of dough into sections.
Pastry brush: Applies melted butter or egg wash for golden finish.
Steps To Bake Garlic Herb Cheese Bombs
Warm Up the Oven Kick things off by heating your oven to a toasty 375°F, getting it ready for some delicious magic.
Prepare the Baking Surface Grab a baking sheet and line it with parchment paper, creating the perfect stage for your cheesy masterpiece.
Create Cheesy Pockets Take your soft, pillowy dough and gently stretch each piece into a small circle, creating a cozy home for the creamy filling.
Stuff with Flavor Nestle a generous dollop of herbed cheese right in the center of each dough circle, making sure it’s snugly tucked in.
Seal the Goodness Carefully fold the edges of the dough over the cheese, pinching and sealing to create perfect little parcels that won’t leak.
Brush with Shine Gently brush the tops of your bombs with a light coating of olive oil or melted butter, giving them a gorgeous golden sheen.
Sprinkle Magic Dust Dust the tops with a sprinkle of herbs and a touch of salt, adding an extra layer of mouthwatering flavor.
Bake to Perfection Slide your baking sheet into the hot oven and let the bombs transform for about 12-15 minutes, until they’re golden brown and irresistibly puffy.
Cool and Enjoy Let the bombs rest for a few minutes after baking, then serve warm and watch everyone’s eyes light up with excitement.
Flavor Ideas For Garlic Herb Cheese Bombs
Soft Cheese Magic: Use cream cheese at room temperature for easier mixing and smooth, creamy filling that spreads perfectly inside each dough pocket.
Herb Boost: Experiment with fresh herbs like rosemary, thyme, or basil to add extra flavor complexity and make the cheese bombs more aromatic.
Gluten-Free Hack: Substitute regular flour with gluten-free flour blend and use gluten-free crescent roll dough to make this recipe celiac-friendly without losing texture.
Vegan Twist: Replace dairy cheese with plant-based cream cheese alternatives and use dairy-free crescent roll dough to create a completely vegan version that’s just as delicious.
Freezer Friendly: Prepare cheese bombs ahead of time, freeze unbaked, and store in sealed containers for up to one month – perfect for quick party appetizers or unexpected guests.
Serving Garlic Herb Cheese Bombs Hot And Fresh
Cheesy Dip Delight: Serve these bombs with marinara sauce or ranch dressing for a mouthwatering appetizer that’ll have everyone reaching for more.
Brunch Brilliance: Pair these savory bombs alongside scrambled eggs or as a side to a weekend breakfast spread for a delightful morning treat.
Party Platter Perfection: Arrange these golden, crispy bombs on a wooden board with fresh herbs and sliced cherry tomatoes to create an eye-catching appetizer that’ll impress guests at any gathering.
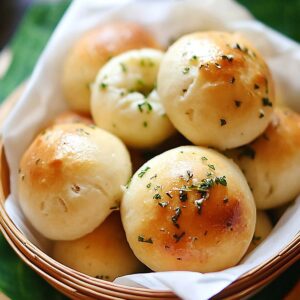
Game Day Goodness: Offer these cheese bombs as a crowd-pleasing snack during sports events, placing them in a rustic basket lined with parchment paper for easy grabbing.
Storage Help For Garlic Herb Cheese Bombs
Smart Refrigeration: Store these cheesy delights in an airtight container inside the refrigerator for up to 3-4 days, ensuring maximum flavor and texture retention.
Quick Freezing Technique: Arrange unbaked cheese bombs on a baking tray, freeze individually, then transfer to freezer bags for convenient storage up to 2 months – perfect for unexpected guests or busy weeknights.
Reheating Magic: Warm refrigerated or frozen cheese bombs in the oven at 350F for 5-7 minutes, restoring their crispy exterior and gooey cheese center, making them taste freshly baked.
Advance Prep Strategy: Assemble cheese bombs earlier in the day and keep them covered in the refrigerator, allowing you to pop them into the oven when ready to serve, saving time during meal preparation.
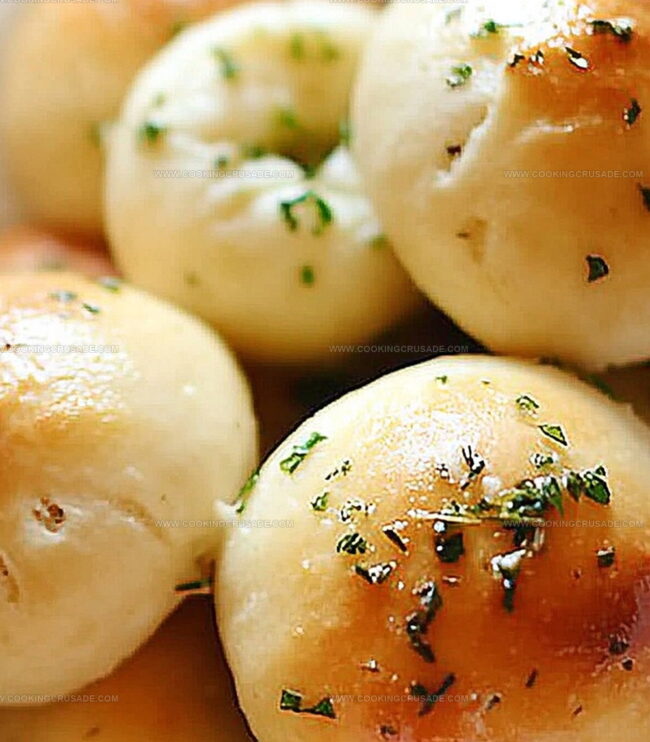
Savory garlic herb cheese bombs combine pillowy dough with melted cheese centers for an irresistible appetizer. Warm, herby, and incredibly satisfying, these bites will delight guests at any gathering.
Ingredients
Scale
1 (16 oz / 454 g) can refrigerated biscuit dough (like Pillsbury Grands)
8–10 mozzarella cheese cubes (about ½-inch each)
2 tbsps grated Parmesan cheese
3 tbsps butter, melted
1 tbsp flour (for dusting, optional)
1 tsp garlic powder
½ tsp Italian seasoning
½ tsp salt
1 tbsp chopped fresh parsley (or dried)
Marinara sauce for dipping
Instructions
Preheat: Configure the oven to 375°F (190°C) for consistent heat distribution.
Prepare Surface: Line a baking sheet with parchment paper to prevent sticking.
Shape Dough: Carefully stretch each biscuit dough piece into thin, uniform circles on a clean work surface.
Fill and Season: Position a cream cheese cube in the center of each dough circle, then sprinkle minced garlic and chopped fresh herbs over the cheese.
Seal and Form: Fold dough edges over the cheese, pinching and sealing completely, then roll into smooth spheres with no visible openings.
Enhance Exterior: Brush each bomb with melted butter, then dust with additional herbs and a light sprinkle of garlic powder.
Bake: Place cheese bombs on the prepared baking sheet, spacing them slightly apart, and bake in the preheated oven for 12-15 minutes until achieving a rich, golden-brown color.
Serve: Allow bombs to rest for 2-3 minutes after removing from the oven, then serve warm to showcase the molten cheese and fragrant herb center.
Notes
Seal Carefully: Ensure each cheese bomb is tightly sealed to prevent cheese leakage during baking, using pinching techniques with fingertips to close any potential openings.
Temperature Matters: Keep cream cheese cold before stuffing to maintain its shape and prevent excessive melting, helping maintain a perfect cheese center.
Herb Freshness: Use freshly chopped herbs for maximum flavor intensity, avoiding dried herbs which can make the bombs taste less vibrant and aromatic.
Butter Brush Technique: Apply melted butter gently and evenly to achieve a consistent golden-brown exterior, using a light hand to prevent soggy or overly greasy surfaces.
Nutritional Analysis, Dietary Accommodations, Food Writing and Blogging,
Education
University of Texas at Austin
Degree: Bachelor of Science in Nutrition
Focus: Emphasis on dietary planning, food science, and the relationship between nutrition and health.
Institute of Culinary Education, New York, NY
Program: Plant-Based Culinary Arts Certificate
Focus: Specialized training in vegetarian and vegan cooking techniques, emphasizing whole foods and sustainability.
Olivia Bennett is Cooking Crusade’s go-to expert for nutritious, feel-good food. Based in Austin, she blends her degree in Nutrition from the University of Texas with plant-based culinary training from the Institute of Culinary Education.
Olivia’s recipes are all about balance: vibrant, wholesome, and easy-to-love dishes that work for all kinds of eaters. Her mission is simple: to make healthy eating approachable and genuinely tasty, with tips that support your lifestyle, not complicate it.

Olivia Bennett
Co-Founder & Content Creator
Expertise
Nutritional Analysis, Dietary Accommodations, Food Writing and Blogging,
Education
University of Texas at Austin
Institute of Culinary Education, New York, NY
Olivia Bennett is Cooking Crusade’s go-to expert for nutritious, feel-good food. Based in Austin, she blends her degree in Nutrition from the University of Texas with plant-based culinary training from the Institute of Culinary Education.
Olivia’s recipes are all about balance: vibrant, wholesome, and easy-to-love dishes that work for all kinds of eaters. Her mission is simple: to make healthy eating approachable and genuinely tasty, with tips that support your lifestyle, not complicate it.