The Easiest Cake Pop Recipe: Bite-Sized Joy on a Stick
A delightful cake pop recipe that turns ordinary baking into a sweet adventure.
Sweet moments often start with simple ingredients and a dash of creativity.
Friends will adore these bite-sized treats that blend nostalgia with playful design.
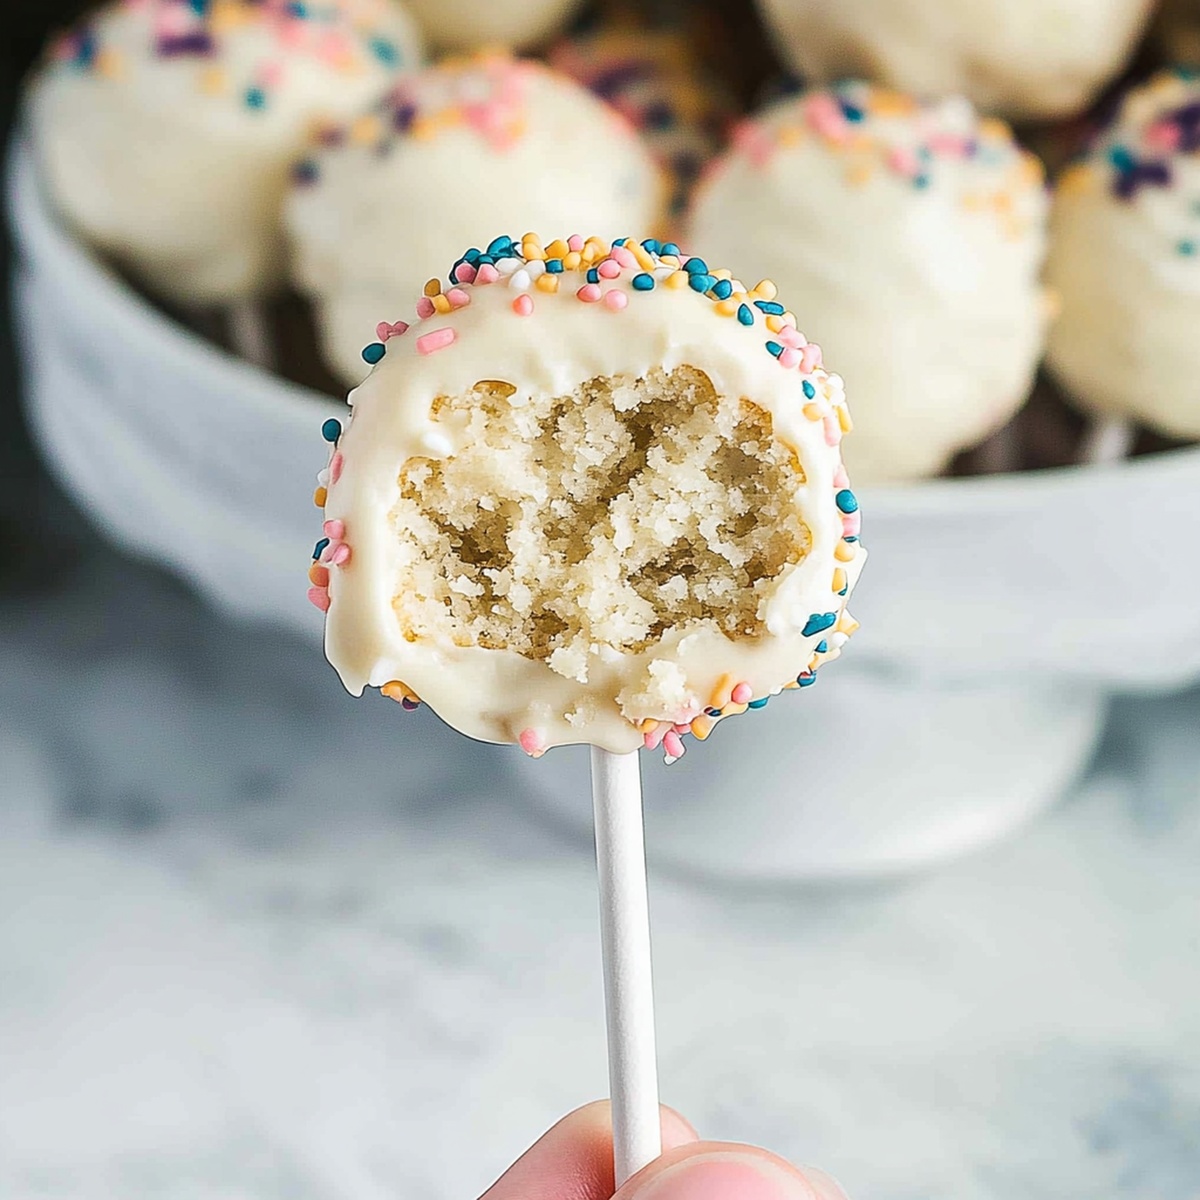
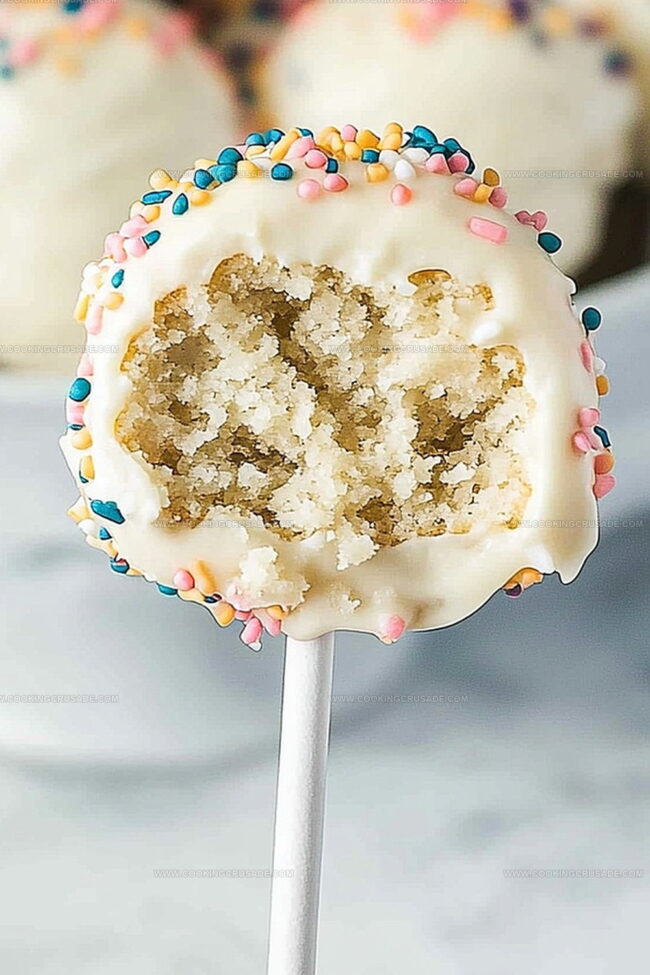
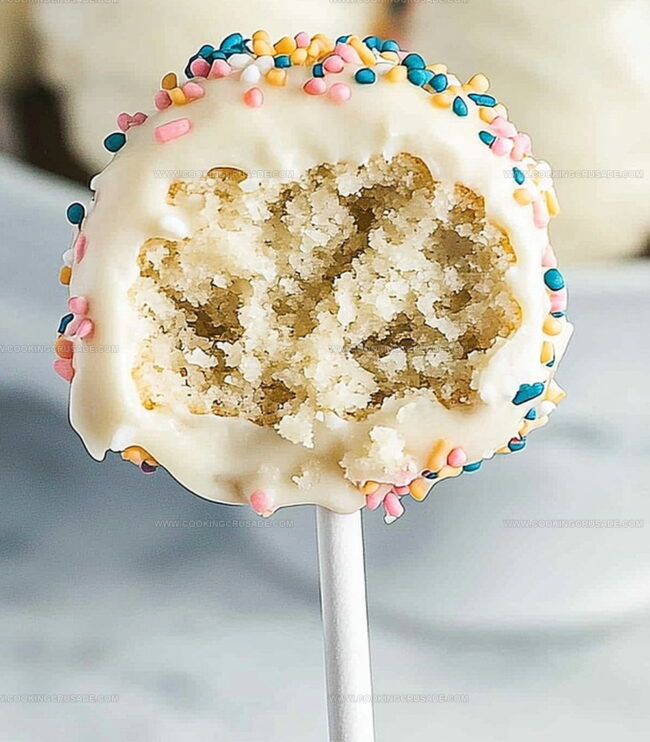
Crafting delicate spheres of moist cake, coated in smooth chocolate and decorated with personal flair.
Kids and adults alike find these miniature desserts irresistibly charming.
Each cake pop becomes a canvas for your imagination, ready to surprise and delight.
You can transform an afternoon into a memorable celebration with these magical little confections.
Grab your mixing bowl and let the baking magic begin!
What Makes Easy Cake Pop Recipe So Fun To Make
Everything You Need For Easy Cake Pop Recipe
Cake Base Ingredients:Binding and Moisture Ingredients:Coating and Decoration Ingredients:Simple Steps To Follow For Easy Cake Pop Recipe
Start with your favorite boxed cake mix and prepare it according to the package instructions. Bake it with a little love, then let it cool completely on a wire rack before moving on.
Once cooled, break the cake into fine crumbs using your hands or a fork. Aim for a soft, fluffy texture. Transfer the crumbs to a large mixing bowl.
Add frosting to the cake crumbs, along with a splash of vanilla extract if desired. Mix until the texture is moist and holds together when pressed—just right for shaping, not soggy.
Scoop and roll the mixture into small, even balls. Set them on a parchment-lined baking sheet and chill in the fridge for 30 minutes or in the freezer for 15 minutes to firm up.
Melt chocolate or candy melts using a microwave or double boiler. Stir until completely smooth. Add a little vegetable oil if the coating feels too thick.
Dip the tip of each cake pop stick into the melted chocolate, then gently insert it into each chilled cake ball. Let them sit for a few minutes to secure the stick in place.
Dip each cake ball into the melted chocolate, swirling for full coverage. Gently tap off any excess coating. While still wet, add your favorite sprinkles or toppings.
Stand the cake pops upright in a holder or styrofoam block. Let the coating set completely. Once firm, they’re ready to enjoy, cute, sweet, and totally irresistible!
Best Tips For Easy Cake Pop Recipe
Store Easy Cake Pop Recipe Without The Mess
What Goes Great With Easy Cake Pop Recipe
New Versions Of Easy Cake Pop Recipe To Try
FAQs About Easy Cake Pop Recipe
Chilling helps the cake balls firm up, making them easier to handle and preventing them from falling apart when dipped in chocolate. It ensures a smoother coating and more stable cake pop.
Absolutely! Homemade cake works perfectly. Just ensure the cake is cooled completely and crumbled into fine, even crumbs for the best texture and consistency.
If too dry, add a bit more frosting. If too wet, add more cake crumbs. The perfect consistency should hold together when pressed but not be overly sticky or crumbly.
Not really. You’ll need basic baking tools like a baking sheet, parchment paper, cake pop sticks, and a way to stand the pops upright while they dry (like a Styrofoam block or cake pop stand).
Print
Easy Cake Pop Recipe
- Total Time: 1 hour 15 minutes
- Yield: 24 1x
Description
Delightful Chocolate Cake Pops bring sprinkles of joy to party tables with irresistible bite-sized charm. Sweet chocolate-coated treats offer perfect handheld indulgence for celebrations and casual snacking.
Ingredients
Main Ingredients:
- 1 box cake mix (any flavor)
- ½ cup frosting (store-bought or homemade)
- 2 cups chocolate or candy melts (any color)
Baking Ingredients:
- 3 eggs
- ⅓ cup vegetable oil
- ½ cup water
Decorative Ingredients:
- Sprinkles or decorations (optional)
- Cake pop sticks
Instructions
- Transform the freshly baked cake into fine, uniform crumbs using your fingertips or a fork, ensuring no large chunks remain.
- Gradually incorporate frosting into the cake crumbles, mixing thoroughly until the texture resembles moist sand that can be easily compressed into compact spheres.
- Delicately form consistent, palm-sized spheres by gently rolling the mixture between your hands, creating smooth, uniform cake balls without cracks or uneven surfaces.
- Stabilize the cake spheres by placing them on a chilled parchment-lined tray, then refrigerate for approximately 25-35 minutes to enhance structural integrity.
- Prepare the coating by melting chocolate or candy melts in a microwave-safe vessel, stirring periodically to achieve a silky, glossy consistency.
- Dip cake pop sticks’ tips into the melted chocolate, then carefully insert them midway into each chilled cake sphere, allowing the chocolate to act as an adhesive.
- Submerge each cake pop completely in the molten chocolate, ensuring total coverage while gently rotating to eliminate excess drips.
- Immediately embellish with decorative sprinkles or desired toppings while the chocolate coating remains wet and receptive.
- Position cake pops vertically in a specialized holder or foam block, permitting them to solidify and maintain their elegant, spherical shape.
Notes
- Prevent cake crumbs from becoming too dry by adding frosting gradually, ensuring a perfect moldable consistency that holds together without falling apart.
- Use room temperature cake and frosting for easier mixing and better texture, helping the cake balls stick together more effectively.
- Chill cake balls thoroughly before dipping to prevent cracking and ensure a smooth, professional-looking chocolate coating that adheres perfectly.
- Experiment with different frosting flavors and cake varieties to create unique combinations, making each batch of cake pops a delightful surprise for your taste buds.
- Prep Time: 45 minutes
- Cook Time: 30 minutes
- Category: Desserts, Snacks
- Method: Baking
- Cuisine: American
Nutrition
- Serving Size: 24
- Calories: 150
- Sugar: 10g
- Sodium: 200mg
- Fat: 7g
- Saturated Fat: 3g
- Unsaturated Fat: 4g
- Trans Fat: 0g
- Carbohydrates: 20g
- Fiber: 1g
- Protein: 2g
- Cholesterol: 30mg
James Mitchell
Founder & Recipe Developer
Expertise
Recipe Creation and Testing, Fusion Cuisine, Food Styling and Photography, Culinary Education
Education
Kendall College, Chicago, IL
The Culinary Institute of America, Hyde Park, NY
James Mitchell is the founder and fearless flavor explorer at Cooking Crusade. With a degree in Culinary Arts from Kendall College and advanced training in global gastronomy from The Culinary Institute of America, James has spent over a decade perfecting the art of recipe creation.
His background includes fine dining, private cheffing, and food styling, but his true joy comes from turning big ideas into doable recipes for home cooks. Every dish he shares is a mix of creativity, culture, and a little kitchen magic, built to bring excitement back to everyday meals.