
The Creamiest Easy Cheesecake Cups Recipe for Sweet Fans
My culinary experiments with light and creamy cheesecake cups always bring unexpected joy to dessert lovers.
Sweet moments happen when simple ingredients blend into magical treats.
These delightful little cups look stunning without complicated preparation techniques.
Guests will appreciate how quickly you can whip up these delectable individual desserts.
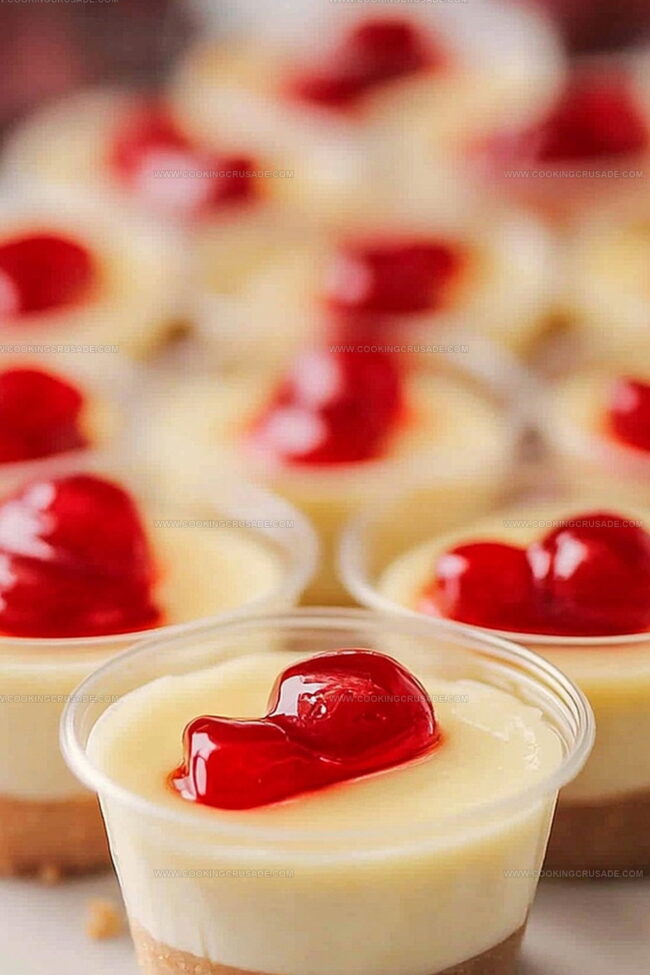
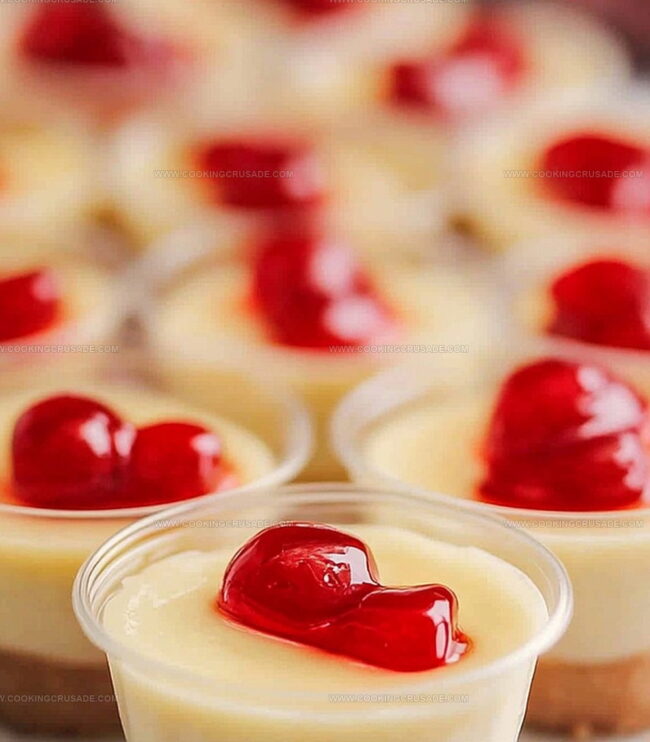
Compact and perfectly portioned, each cheesecake cup delivers rich flavor in one elegant bite.
Quick mixing and minimal baking time make this recipe perfect for spontaneous gatherings.
You’ll impress everyone with these darling, smooth desserts that feel both sophisticated and comforting.
Grab a mixing bowl and let’s create something deliciously memorable together!
Why Easy Cheesecake Cups Are a Quick Crowd-Pleaser
What Goes Into These No-Fuss Cheesecake Cups
Crust Ingredients:Filling Ingredients:Topping Ingredients:Instructions for Assembling Cheesecake Cups
Step 1: Crush Graham Crackers
Grab a rolling pin or food processor and transform graham crackers into fine crumbs. The goal is creating a sandy texture that will become your delicious base.
Combine these ingredients in a mixing bowl. Press the mixture firmly into small serving cups or muffin liners. Compact the crust so it holds together perfectly. Pop the cups into the refrigerator to set while preparing the filling.
Step 2: Whip Creamy Filling
In a spacious mixing bowl, blend cream cheese until ultra-smooth. Add powdered sugar and vanilla extract, mixing until the texture becomes silky and light.
In a separate bowl, whip the heavy cream until it forms beautiful, sturdy peaks. Carefully fold the whipped cream into the cream cheese mixture, creating a cloud-like filling.
Step 3: Fill and Chill Cheesecake Cups
Carefully spoon or pipe the dreamy filling over the chilled graham cracker crusts. Smooth the tops using a small spatula or the back of a spoon. Place the cups in the refrigerator and let them set for at least one hour.
Step 4: Decorate and Devour
Before serving, crown your cheesecake cups with delightful toppings. Consider fresh berries, chocolate shavings, caramel drizzle, or crushed nuts. Each cup becomes a personal dessert masterpiece ready to be enjoyed!
Tips for Rich, Smooth Cheesecake Texture
How to Store Cups Without Cracking Tops
Tasty Add-Ons for Cheesecake Cups
Custom Cheesecake Cup Flavor Ideas
Easy Cheesecake Cup FAQs
Absolutely! You can prepare these cups up to 2 days in advance and store them in the refrigerator. Just add fresh toppings right before serving to keep everything looking and tasting perfect.
No special equipment is required. You can use small serving cups, muffin liners, or even mason jars. A hand mixer or stand mixer helps, but you can also mix by hand with a bit more effort.
Fresh berries, chocolate shavings, caramel sauce, crushed cookies, or a sprinkle of cinnamon work wonderfully. Choose toppings that complement each other and add a fun, personal touch to your dessert.
Yes! Simply use gluten-free graham crackers or swap with almond flour or gluten-free cookie crumbs for the crust. The rest of the recipe remains the same, making it an easy adaptation for gluten-sensitive guests.
Print
Easy Cheesecake Cups Recipe
- Total Time: 1 hour 10 minutes
- Yield: 4 1x
Description
Delightful Cheesecake Cups bring creamy indulgence straight from classic American dessert traditions. Silky smooth filling nestled in crisp graham cracker crusts promises pure dessert bliss you won’t want to miss.
Ingredients
Main Ingredients:
- 8 ounces (225 grams) cream cheese, softened
- 1 cup graham cracker crumbs
- ½ cup heavy whipping cream
Sweeteners:
- ⅓ cup powdered sugar
- 2 tablespoons granulated sugar
Binding and Flavoring Ingredients:
- 4 tablespoons unsalted butter, melted
- 1 teaspoon vanilla extract
Toppings:
- Fresh berries (strawberries, blueberries, raspberries)
- Chocolate chips
- Chocolate sauce
- Caramel sauce
- Crushed cookies
- Whipped cream
Instructions
- Craft the foundation by blending graham cracker crumbs with sugar and melted butter until the mixture reaches a uniform consistency. Delicately distribute the crumbly base into small serving vessels, pressing firmly to create a compact layer that will serve as the cheesecake’s structural platform.
- Transform cream cheese into a silky canvas by vigorously beating it with powdered sugar and vanilla extract until the mixture achieves a luxurious, velvety texture. In a parallel process, whip heavy cream to stiff, billowing peaks that will introduce ethereal lightness to the dessert.
- Merge the whipped cream and cream cheese mixture with gentle, deliberate folding motions, ensuring a harmonious integration that maintains the delicate airiness of the whipped cream.
- Elegantly transfer the luscious filling into the prepared cups, using either a spoon or piping technique to create smooth, even surfaces. Carefully place the assembled desserts into the refrigerator, allowing them to set and develop their distinctive creamy structure for a minimum of one hour.
- Just before serving, embellish the chilled cheesecake cups with an array of personal favorite toppings, transforming these miniature desserts into a personalized culinary masterpiece ready to delight the senses.
Notes
- Swap graham crackers with gluten-free alternatives like almond flour or crushed gluten-free cookies for celiac or gluten-sensitive diners.
- Use a food processor to create uniformly fine crumbs for a more consistent and compact crust texture.
- Ensure cream cheese is at room temperature to prevent lumps and create a smoother, silkier filling.
- Stabilize whipped cream by adding a tablespoon of powdered sugar during whipping to maintain structure and prevent weeping.
- Customize toppings like fresh berries, chocolate shavings, or caramel sauce to match individual preferences or seasonal availability.
- Prepare these cups in advance and store in the refrigerator for up to 3 days, making them perfect for meal prep or entertaining.
- Use silicone muffin liners for easy removal and a clean presentation without sticking.
- Prep Time: 10 minutes
- Cook Time: 1 hour
- Category: Desserts, Snacks
- Method: Mixing
- Cuisine: American
Nutrition
- Serving Size: 4
- Calories: 360
- Sugar: 20 g
- Sodium: 150 mg
- Fat: 24 g
- Saturated Fat: 14 g
- Unsaturated Fat: 8 g
- Trans Fat: 0 g
- Carbohydrates: 30 g
- Fiber: 1 g
- Protein: 4 g
- Cholesterol: 70 mg
James Mitchell
Founder & Recipe Developer
Expertise
Recipe Creation and Testing, Fusion Cuisine, Food Styling and Photography, Culinary Education
Education
Kendall College, Chicago, IL
The Culinary Institute of America, Hyde Park, NY
James Mitchell is the founder and fearless flavor explorer at Cooking Crusade. With a degree in Culinary Arts from Kendall College and advanced training in global gastronomy from The Culinary Institute of America, James has spent over a decade perfecting the art of recipe creation.
His background includes fine dining, private cheffing, and food styling, but his true joy comes from turning big ideas into doable recipes for home cooks. Every dish he shares is a mix of creativity, culture, and a little kitchen magic, built to bring excitement back to everyday meals.