
Campfire Magic: Whip Up Gooey S’mores Bars Recipe Today!
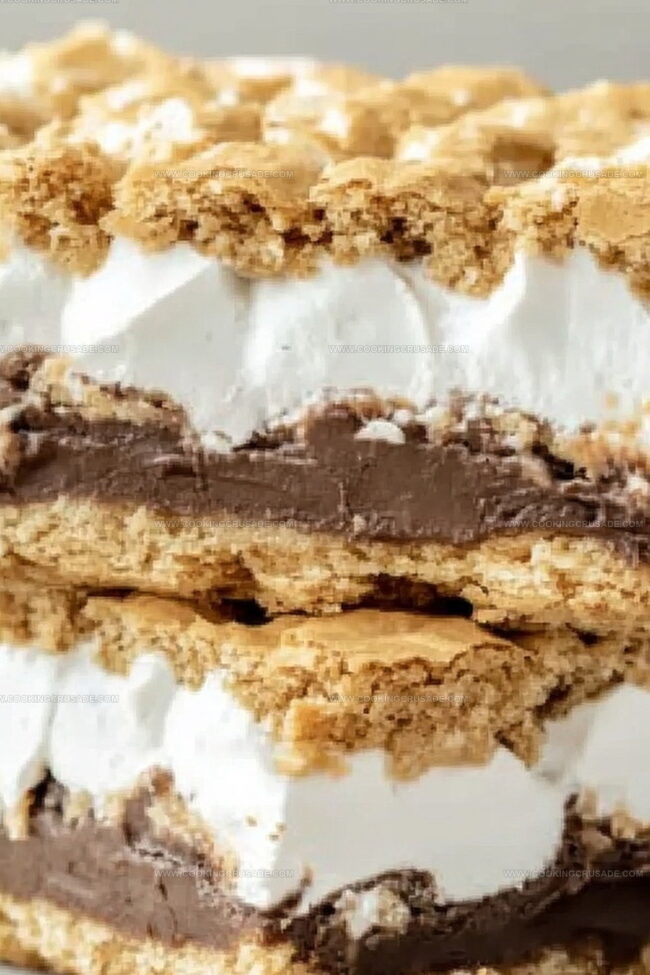
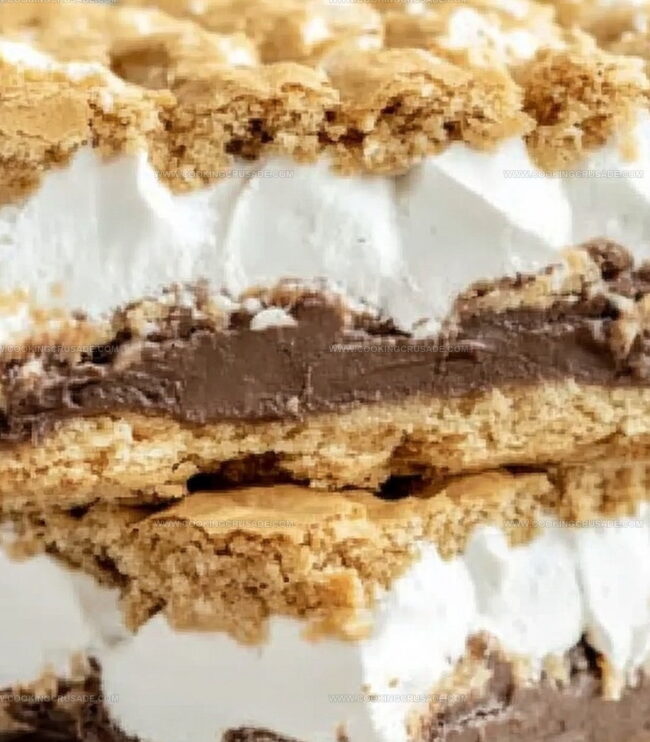
Chocolate, graham crackers, and gooey marshmallows combine in this irresistible smores bars recipe that captures the essence of summer campfire magic.
Sweet memories flood back with each decadent bite of these nostalgic treats.
The classic combination of rich chocolate and pillowy marshmallows melts together perfectly in this easy dessert.
Simple ingredients transform into a crowd-pleasing delicacy that takes minimal effort to create.
Layers of sweet, crunchy, and creamy textures make these bars impossible to resist.
No campfire needed to enjoy this delightful dessert that brings outdoor fun straight to your kitchen.
You’ll want to make a double batch because these smores bars disappear faster than you can slice them.
Quick Recipe Overview
Ingredients For Smores Bars Recipe
For Base and Flavor:For Dry Structure:For Decadent Filling:Tools To Make Smores Bars Recipe
Steps To Bake Smores Bars Recipe
Get your oven cozy at 350F and prep a 9×13 baking dish with a parchment paper blanket or a quick spray of grease.
In a big mixing bowl, dance the butter and sugars together until they’re fluffy clouds. Gently fold in eggs one by one, then splash in vanilla for extra magic.
Grab another bowl and mix your dry ingredients like a culinary artist, blending flour, graham cracker bits, baking powder, and salt. Slowly marry these with your wet mixture until everything looks harmonious.
Spread half the dough across the pan like a cozy blanket. Scatter chocolate chips and marshmallows generously, then crumble the remaining dough on top, pressing gently to create a dreamy landscape.
Send your creation into the oven for 25-30 minutes. Watch for a golden-brown top and marshmallows turning delightfully gooey.
Allow the bars to cool completely, then cut into squares. Serve at room temperature or warm them up for an extra indulgent treat that’ll make taste buds dance.
Tips To Improve Smores Bars Recipe
Fun Ways To Serve Smores Bars Recipe
Storage Help For Smores Bars Recipe
Print
Epic Smores Bars Recipe
- Total Time: 45 minutes
- Yield: 13 1x
Description
S’mores bars blend graham cracker crust, chocolate, and marshmallow into a nostalgic dessert. Campfire memories come alive with each gooey, chocolatey bite you’ll savor.
Ingredients
- 2 ½ cups (590 ml) all-purpose flour
- 2 cups (340 g) semi-sweet chocolate chips (or chopped chocolate bars)
- 2 cups (100 g) mini marshmallows
- 1 ½ cups (180 g) graham cracker crumbs (about 10 full crackers)
- 1 cup (200 g) granulated sugar
- 1 cup (2 sticks or 226 g) unsalted butter, softened
- ½ cup (100 g) brown sugar (light or dark)
- 2 large eggs
- 2 tsps vanilla extract
- 1 tsp baking powder
- ½ tsp salt
- Extra graham cracker pieces
Instructions
- Oven Preparation: Preheat the oven to 350°F (175°C) and line a 9×13-inch pan with parchment paper or lightly grease the surface.
- Wet Ingredient Fusion: Cream butter, granulated sugar, and brown sugar until light and fluffy. Integrate eggs one at a time, ensuring complete incorporation after each addition. Blend in vanilla extract to enhance the aromatic profile.
- Dry Ingredient Integration: Whisk together flour, graham cracker crumbs, baking powder, and salt in a separate bowl. Gradually fold the dry ingredients into the wet mixture, creating a uniform dough.
- Layer Construction: Spread half the dough evenly across the prepared pan. Sprinkle chocolate chips and marshmallows generously over the base layer. Crumble the remaining dough on top, gently pressing to create a rustic, textured surface.
- Baking and Cooling Process: Bake for 25-30 minutes until the top achieves a golden-brown hue and marshmallows melt into a gooey consistency. Allow the bars to cool completely in the pan, ensuring clean and precise cutting.
- Serving Suggestion: Cut into individual squares, ready to be enjoyed at room temperature or warmed for an extra decadent treat.
Notes
- Optimize Mixing Technique: Cream butter and sugars thoroughly until light and fluffy, which creates a smoother, more consistent bar texture with better rise and softness.
- Prevent Marshmallow Burning: Cover the top loosely with aluminum foil halfway through baking to protect marshmallows from excessive browning while ensuring even cooking.
- Control Moisture Balance: Allow bars to cool completely before cutting to help set the structure and prevent crumbling, giving cleaner, more defined squares with intact layers.
- Customize Dietary Needs: Swap traditional ingredients with gluten-free graham cracker crumbs, dairy-free chocolate chips, and vegan marshmallows to accommodate different dietary restrictions without compromising taste.
- Prep Time: 15 minutes
- Cook Time: 30 minutes
- Category: Desserts, Snacks
- Method: Baking
- Cuisine: American
Nutrition
- Serving Size: 13
- Calories: 400
- Sugar: 30 g
- Sodium: 150 mg
- Fat: 20 g
- Saturated Fat: 12 g
- Unsaturated Fat: 8 g
- Trans Fat: 0 g
- Carbohydrates: 50 g
- Fiber: 2 g
- Protein: 4 g
- Cholesterol: 60 mg
Olivia Bennett
Co-Founder & Content Creator
Expertise
Nutritional Analysis, Dietary Accommodations, Food Writing and Blogging,
Education
University of Texas at Austin
Institute of Culinary Education, New York, NY
Olivia Bennett is Cooking Crusade’s go-to expert for nutritious, feel-good food. Based in Austin, she blends her degree in Nutrition from the University of Texas with plant-based culinary training from the Institute of Culinary Education.
Olivia’s recipes are all about balance: vibrant, wholesome, and easy-to-love dishes that work for all kinds of eaters. Her mission is simple: to make healthy eating approachable and genuinely tasty, with tips that support your lifestyle, not complicate it.