
Flaky Homemade All Butter Pie Crust Recipe: Baking Magic!
Baking the perfect flaky all butter pie crust recipe requires precision and a touch of culinary magic.
Butter, flour, and a few simple ingredients come together to create a golden, delicate pastry that melts in your mouth.
Cold ingredients and gentle handling are the secret to achieving that coveted flaky texture.
Professional bakers and home cooks alike know the importance of technique in crafting an exceptional pie crust.
Salt and ice water play crucial roles in developing the ideal consistency.
This recipe transforms ordinary ingredients into a sublime base for both sweet and savory pies.
Prepare to elevate your baking skills and impress everyone at the table with this classic, foolproof crust.
Quick Recipe Overview
Everything In All Butter Pie Crust
For Dry Base:For Fat Component:For Liquid Binding:Essential Tools For All Butter Pie Crust
Steps To Prepare All Butter Pie Crust Perfectly
Mix flour, salt, and sugar in a spacious mixing bowl until evenly combined.
Toss cold, chunked butter into the flour blend and mash using a pastry blender or fingertips until the mixture resembles rough, bumpy crumbs with tiny butter bits scattered throughout.
Gently splash in chilled water, one splash at a time, stirring softly after each addition. Stop adding liquid when the dough feels cohesive and can be pressed together without falling apart.
Squish the dough into a round shape, slice into two equal portions, and flatten each into a smooth disc. Wrap each disc in plastic film and park in the refrigerator for at least one hour.
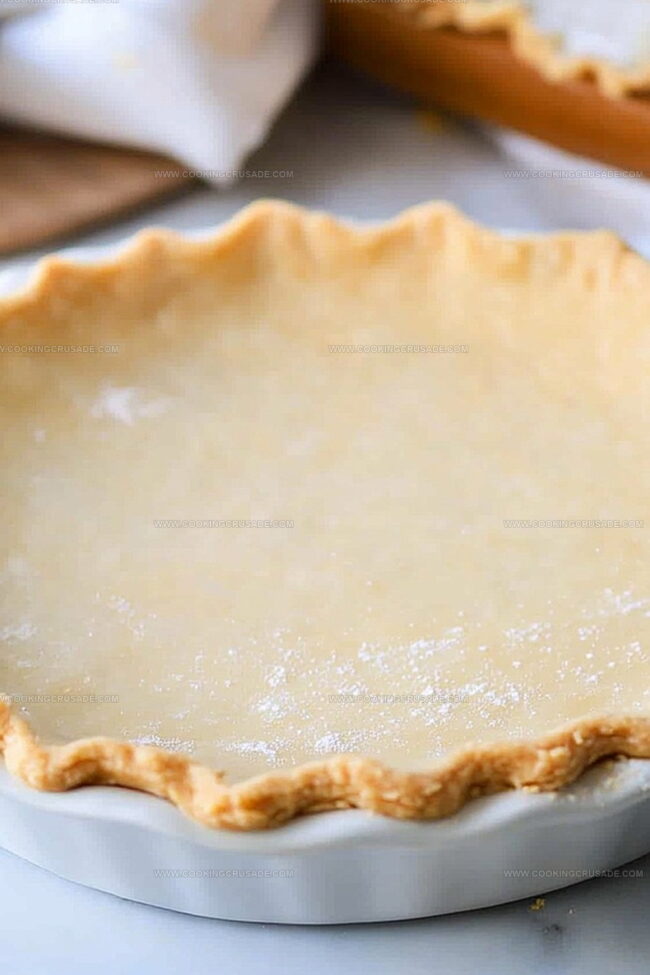
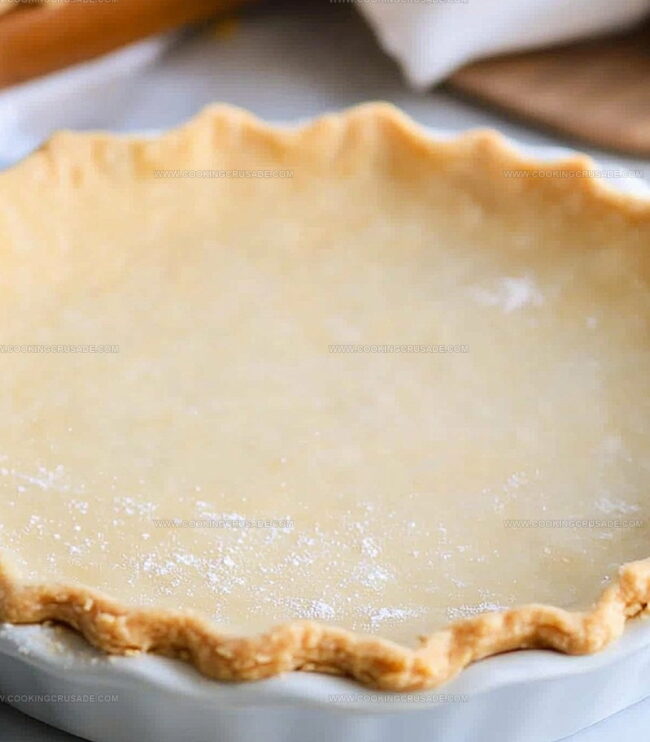
Dust your work surface with flour and roll out one disc into a thin, circular shape large enough to cover your pie pan. Carefully transfer the dough, trim the edges, and create a decorative crimped border.
For a crispy base, warm the oven to 375°F. Line the crust with parchment, fill with pie weights, and bake for 15 minutes. Remove weights and continue baking 5-7 minutes until golden and crisp.
Tips To Nail Your All Butter Pie Crust
Serve All Butter Pie Crust With Any Filling
How To Store All Butter Pie Crust Smartly
Print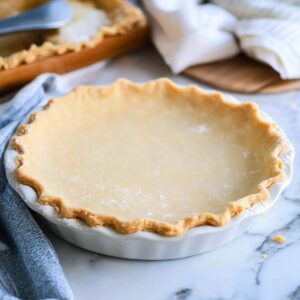
Flaky All Butter Pie Crust Recipe
- Total Time: 1 hour 15 minutes
- Yield: 2 1x
Description
Homemade all butter pie crust delivers flaky, tender perfection with just four simple ingredients. Crisp edges and rich butter flavor make this classic pastry essential for bakers seeking authentic, delicious pie foundations.
Ingredients
- 2.5 cups (590 ml) all-purpose flour
- 1 cup (226 g or 2 sticks) unsalted butter, cold and cubed
- 1 tbsp granulated sugar (omit for savory pies)
- 1 tsp salt
- 6–8 tbsps ice water
Instructions
- Dry Ingredient Fusion: Whisk flour, salt, and sugar in a large mixing bowl until uniformly blended, creating a consistent dry base.
- Butter Integration: Introduce cold, cubed butter into the flour mixture, methodically breaking it down using a pastry blender or fingertips until the texture transforms into coarse, crumbly fragments with visible butter pockets.
- Dough Hydration: Gradually add ice-cold water, gently folding and incorporating each addition until the dough forms a cohesive, malleable mass that holds together without crumbling or becoming overly wet.
- Dough Preparation: Divide the delicate dough into two equal portions, shaping each into a flattened circular disc, then wrap individually in plastic film for refrigeration.
- Chilling and Resting: Refrigerate the dough discs for at least one hour, allowing gluten networks to relax and butter to solidify, which ensures a flaky, tender crust.
- Dough Shaping and Placement: Roll out a chilled dough disc on a flour-dusted surface into a thin, 12-inch circular sheet, carefully transferring it to a 9-inch pie dish, trimming excess edges and crimping the border for an elegant finish.
- Pre-Baking Preparation: For recipes requiring a pre-baked crust, preheat the oven to 375°F, line the dough with parchment paper, fill with ceramic weights, and bake until the edges turn a rich, golden-brown color.
Notes
- Chill Butter Strategically: Cut butter into small cubes and freeze for 10-15 minutes before mixing to ensure maximum coldness and optimal flaky texture.
- Minimize Handling: Work quickly and touch the dough minimally to prevent butter from warming, which can result in a tough, dense crust instead of a light, crispy result.
- Master Moisture Balance: Add water sparingly and incrementally; the perfect dough should hold together when gently squeezed without feeling wet or crumbly – aim for a delicate, cohesive consistency.
- Resting is Crucial: Refrigerating the dough allows gluten to relax and butter to firm up, guaranteeing a tender, flaky crust with clean, defined edges during baking.
- Prep Time: 15 minutes
- Cook Time: 1 hour
- Category: Desserts
- Method: Mixing
- Cuisine: American
Nutrition
- Serving Size: 2
- Calories: 690
- Sugar: 2 g
- Sodium: 290 mg
- Fat: 55 g
- Saturated Fat: 35 g
- Unsaturated Fat: 20 g
- Trans Fat: 0 g
- Carbohydrates: 54 g
- Fiber: 2 g
- Protein: 7 g
- Cholesterol: 110 mg
Olivia Bennett
Co-Founder & Content Creator
Expertise
Nutritional Analysis, Dietary Accommodations, Food Writing and Blogging,
Education
University of Texas at Austin
Institute of Culinary Education, New York, NY
Olivia Bennett is Cooking Crusade’s go-to expert for nutritious, feel-good food. Based in Austin, she blends her degree in Nutrition from the University of Texas with plant-based culinary training from the Institute of Culinary Education.
Olivia’s recipes are all about balance: vibrant, wholesome, and easy-to-love dishes that work for all kinds of eaters. Her mission is simple: to make healthy eating approachable and genuinely tasty, with tips that support your lifestyle, not complicate it.