
Fresh Mint Oreo Balls Recipe: Sweet Bites of Cool Bliss
Cool summer evenings call for a delightful no-bake mint oreo balls treat that melts in your mouth.
Creamy, decadent, and packed with chocolate and mint flavors, these bite-sized desserts capture everyone’s attention.
Crushing oreo cookies creates the perfect base for this simple yet irresistible confection.
The smooth cream cheese binds the ingredients together, creating a rich and indulgent texture.
Chilled to perfection, these mint oreo balls offer a refreshing twist on traditional desserts.
Rolling them in chocolate coating adds an extra layer of deliciousness that makes them impossible to resist.
Grab a plate and prepare to savor every single delectable bite of these crowd-pleasing treats.
Quick Recipe Overview

What You’ll Use In Mint Oreo Balls
For Base Ingredients:For Coating Ingredients:For Garnish Ingredients:Tools To Make Mint Oreo Balls Quickly
How To Roll Mint Oreo Balls The Easy Way
Toss Mint Oreos into a food processor and pulse until they transform into a fine, sandy texture. The crumbs should look uniform and delicate.
Mix the Oreo crumbs with softened cream cheese in a mixing bowl. Combine thoroughly until the mixture becomes a cohesive, moldable dough that holds together easily.
Roll small portions of the mixture between your palms, creating smooth, uniform balls. Place these tempting treats on a parchment-lined tray and slide into the freezer for a quick 20-minute chill.
Select your favorite chocolate and gently melt it in short microwave bursts, stirring between each interval. Keep the temperature low to prevent burning.
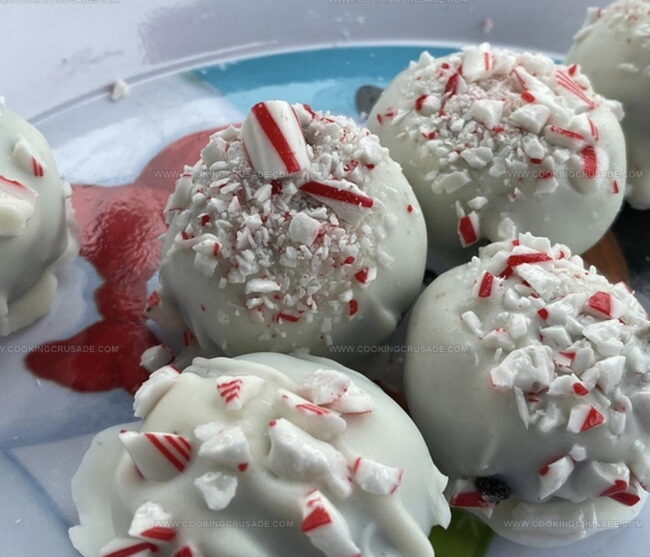
Carefully submerge each chilled ball into the molten chocolate using a fork. Allow excess chocolate to drip off before placing back on the tray. Sprinkle with reserved Oreo crumbs or festive green sprinkles while the chocolate remains wet.
Refrigerate the coated treats until the chocolate sets completely. Serve these cool, creamy bites directly from the fridge for maximum enjoyment.
Tips For Fresh Mint Oreo Balls
Serve Mint Oreo Balls Cool And Creamy
Keep Mint Oreo Balls Chilled Just Right
Print
Frosty Mint Oreo Balls Recipe
- Total Time: 40 minutes
- Yield: 37 1x
Description
Mint oreo balls combine creamy chocolate and refreshing mint in a delightful no-bake dessert perfect for holidays or casual gatherings. Chocolate lovers will savor these bite-sized treats that offer rich flavor and smooth texture in one delectable package.
Ingredients
- 1 package (15.25 oz / 432 g) mint oreo cookies (about 36 oreos)
- 8 oz (226 g) cream cheese, softened
- 12 oz (340 g) semi-sweet or white chocolate chips
- 1 tsp (5 ml) coconut oil or vegetable shortening (optional, for smoother chocolate)
- Green sprinkles, crushed oreos, or melted white chocolate (for garnish)
Instructions
- Mint Oreo Preparation: Pulverize Mint Oreo cookies in a food processor until achieving a fine, uniform powder. Reserve a small portion of crumbs for potential garnishing.
- Mixture Creation: Blend the ground Oreo cookies with softened cream cheese in a mixing bowl, kneading until the mixture forms a cohesive, moldable texture that easily maintains its shape.
- Shaping and Chilling: Craft compact, truffle-sized spheres from the mixture and arrange on a parchment-lined tray. Freeze for 25 minutes to solidify the structure and enhance handling.
- Chocolate Coating Preparation: Melt chocolate chips with coconut oil in a microwave-safe bowl, stirring intermittently to create a smooth, glossy chocolate mixture without scorching.
- Dipping and Decorating: Submerge each chilled Oreo sphere completely in melted chocolate using a fork or dipping tool. Allow excess coating to drip off, then place on parchment. While chocolate remains wet, sprinkle reserved Oreo crumbs, green decorative sprinkles, or drizzle white chocolate for visual enhancement.
- Final Chilling and Serving: Refrigerate the chocolate-coated treats for 35-40 minutes until the coating hardens completely. Remove from refrigeration and serve chilled. Store in an airtight container for extended enjoyment.
Notes
- Crumb Consistency Matters: Use a food processor to achieve ultra-fine Oreo cookie crumbs, ensuring a smooth, even texture that helps bind ingredients perfectly.
- Chill for Stability: Freezing the formed balls before coating prevents crumbling and makes chocolate dipping significantly easier, creating a more professional look.
- Chocolate Coating Technique: Melt chocolate slowly and stir frequently to avoid burning, using coconut oil for a glossy, smooth finish that adheres perfectly to the Oreo balls.
- Temperature Control is Key: Keep treats chilled throughout preparation and storage to maintain optimal texture and prevent melting, ensuring a delightful, firm bite every time.
- Prep Time: 10 minutes
- Cook Time: 30 minutes
- Category: Desserts, Snacks
- Method: Mixing
- Cuisine: American
Nutrition
- Serving Size: 37
- Calories: 150
- Sugar: 15g
- Sodium: 70mg
- Fat: 8g
- Saturated Fat: 4g
- Unsaturated Fat: 3g
- Trans Fat: 0g
- Carbohydrates: 19g
- Fiber: 1g
- Protein: 2g
- Cholesterol: 15mg
Olivia Bennett
Co-Founder & Content Creator
Expertise
Nutritional Analysis, Dietary Accommodations, Food Writing and Blogging,
Education
University of Texas at Austin
Institute of Culinary Education, New York, NY
Olivia Bennett is Cooking Crusade’s go-to expert for nutritious, feel-good food. Based in Austin, she blends her degree in Nutrition from the University of Texas with plant-based culinary training from the Institute of Culinary Education.
Olivia’s recipes are all about balance: vibrant, wholesome, and easy-to-love dishes that work for all kinds of eaters. Her mission is simple: to make healthy eating approachable and genuinely tasty, with tips that support your lifestyle, not complicate it.