Nutty Chocolate Indulgence: Hazelnut Thumbprint Cookies Recipe
Soft, buttery cookies dance with rich chocolate hazelnut spread in this irresistible treat.
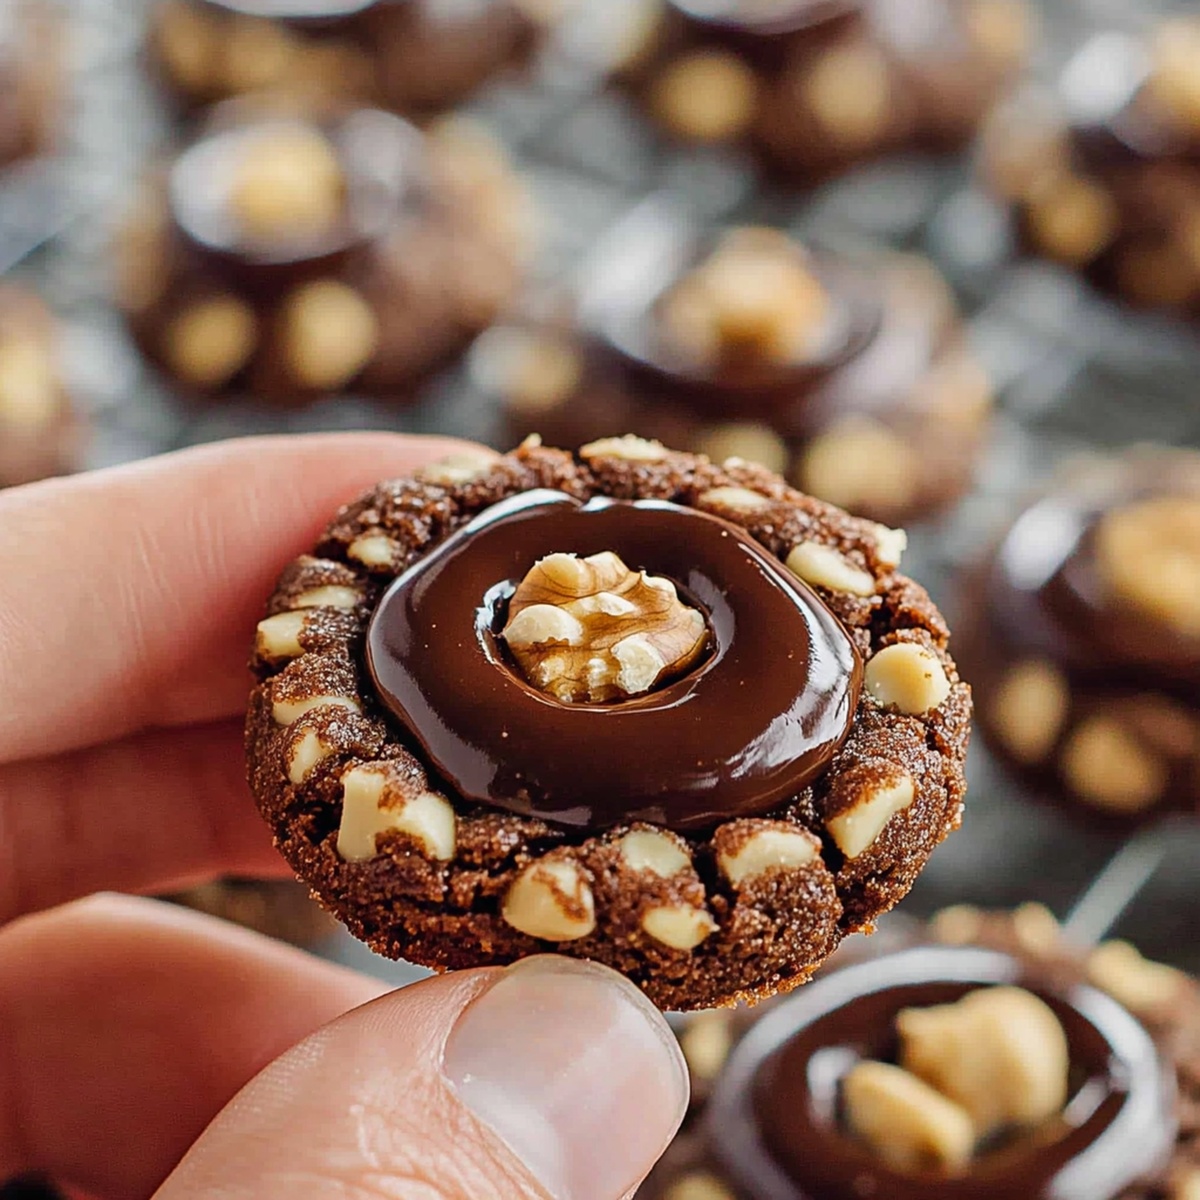
These delightful thumbprint cookies invite pure indulgence at first bite.
Decadent swirls of chocolate nestle perfectly in tender, crumbly cookie bases.
Bakers adore how simple ingredients create such elegant results.
The nutty, sweet flavor profile makes these cookies an instant crowd-pleaser.
Each bite promises a melt-in-your-mouth experience that transforms an ordinary moment into something extraordinary.
Serve these delectable morsels and watch smiles bloom across the room.
Quick Recipe Overview

Inside Scoop On Chocolate Hazelnut Thumbprint Cookies
For Base Ingredients:For Dry Ingredients:For Filling and Finishing:Tools To Make Chocolate Hazelnut Thumbprint Cookies
Steps To Bake Chocolate Hazelnut Thumbprint Cookies

Crank your oven to a toasty 350F and line a baking sheet with parchment paper for smooth cookie magic.
Whip butter and sugars together until they transform into a fluffy cloud-like mixture that looks irresistibly smooth.
Gently blend in egg and vanilla, stirring until everything looks perfectly combined and smells heavenly.
Whisk flour, salt, baking powder, and chopped hazelnuts in a separate bowl, creating a delightful dry mixture.
Roll dough into adorable one-inch balls, spacing them generously on the baking sheet to let them breathe.
Press your thumb or a small spoon into each cookie’s center, making a cute little pocket for chocolate goodness.
Pop the tray into the oven for 10-12 minutes until edges turn a beautiful golden hue. After removing, press centers again to enhance the thumbprint.
Once cookies cool completely, dollop chocolate hazelnut spread into each delightful indentation, creating a mouthwatering final touch.
Tips To Fill Chocolate Hazelnut Thumbprint Cookies Just Right
Serve Chocolate Hazelnut Thumbprint Cookies Anytime
Keep Chocolate Hazelnut Thumbprint Cookies Fresh
Print
Gooey Chocolate Hazelnut Thumbprint Cookies Recipe
- Total Time: 27 minutes
- Yield: 25 1x
Description
Indulgent chocolate hazelnut thumbprint cookies combine rich cocoa with creamy nutella centers. Crisp edges and buttery texture create an irresistible treat you’ll crave with afternoon coffee or evening dessert.
Ingredients
- 2 cups (480 ml) all-purpose flour
- 1 cup (230 g) unsalted butter, softened
- ½ cup (100 g) granulated sugar
- ½ cup (100 g) brown sugar, packed
- ½ cup (60 g) finely chopped toasted hazelnuts
- ½ cup (120 ml) Nutella or homemade chocolate hazelnut spread
- 1 large egg
- 1 tsp vanilla extract
- ½ tsp salt
- ½ tsp baking powder
- ¼ cup (30 g) chopped toasted hazelnuts
- Powdered sugar
Instructions
- Preheat Setup: Warm the oven to 350F (175C) and line a baking sheet with parchment paper for optimal cookie preparation.
- Sugar Fusion: Whip softened butter with granulated and brown sugars using an electric mixer until the mixture becomes fluffy and pale, creating a light base for the cookies.
- Liquid Integration: Blend egg and vanilla extract into the butter-sugar mixture, ensuring a smooth and uniform consistency.
- Dry Ingredient Fusion: Whisk flour, salt, baking powder, and finely chopped hazelnuts together in a separate bowl to distribute ingredients evenly.
- Dough Formation: Combine dry and wet ingredients, gently folding until a cohesive dough develops, taking care not to overmix.
- Cookie Shaping: Craft uniform 1-inch dough balls, arranging them strategically on the prepared baking sheet with adequate spacing.
- Thumbprint Creation: Delicately press an indentation into each cookie’s center using your thumb or a teaspoon, forming a perfect receptacle for filling.
- Baking Process: Slide the cookie sheet into the preheated oven, baking for 10-12 minutes until edges turn a delicate golden hue.
- Finishing Touches: Immediately after removing from the oven, reinforce the cookie centers’ indentations and allow complete cooling.
- Chocolate Hazelnut Finale: Generously fill each cooled cookie’s center with chocolate hazelnut spread, using a spoon or piping bag for precise, elegant application.
Notes
- Chill the Dough: Refrigerate the cookie dough for 30 minutes before shaping to prevent spreading and maintain a perfect round shape during baking.
- Perfect Thumbprint Technique: Use the back of a small measuring spoon for a more uniform and precise indentation, creating a consistent well for the chocolate hazelnut filling.
- Prevent Cracking: Gently reshape the thumbprint immediately after baking while cookies are still warm to ensure a smooth, clean center for filling.
- Customize Filling Options: Swap chocolate hazelnut spread with alternative spreads like caramel, fruit preserves, or white chocolate for diverse flavor variations.
- Prep Time: 15 minutes
- Cook Time: 12 minutes
- Category: Desserts, Snacks
- Method: Baking
- Cuisine: American
Nutrition
- Serving Size: 25
- Calories: 183
- Sugar: 10 g
- Sodium: 85 mg
- Fat: 10 g
- Saturated Fat: 6 g
- Unsaturated Fat: 4 g
- Trans Fat: 0 g
- Carbohydrates: 21 g
- Fiber: 1 g
- Protein: 2 g
- Cholesterol: 26 mg
Olivia Bennett
Co-Founder & Content Creator
Expertise
Nutritional Analysis, Dietary Accommodations, Food Writing and Blogging,
Education
University of Texas at Austin
Institute of Culinary Education, New York, NY
Olivia Bennett is Cooking Crusade’s go-to expert for nutritious, feel-good food. Based in Austin, she blends her degree in Nutrition from the University of Texas with plant-based culinary training from the Institute of Culinary Education.
Olivia’s recipes are all about balance: vibrant, wholesome, and easy-to-love dishes that work for all kinds of eaters. Her mission is simple: to make healthy eating approachable and genuinely tasty, with tips that support your lifestyle, not complicate it.