
Sizzling Grilled Cheeseburger Wraps Recipe: Cozy Handheld Joy
Wrapping your favorite grilled cheeseburger in a soft tortilla for an unexpected twist on a classic.
The comfort of a juicy burger meets the convenience of a handheld meal.
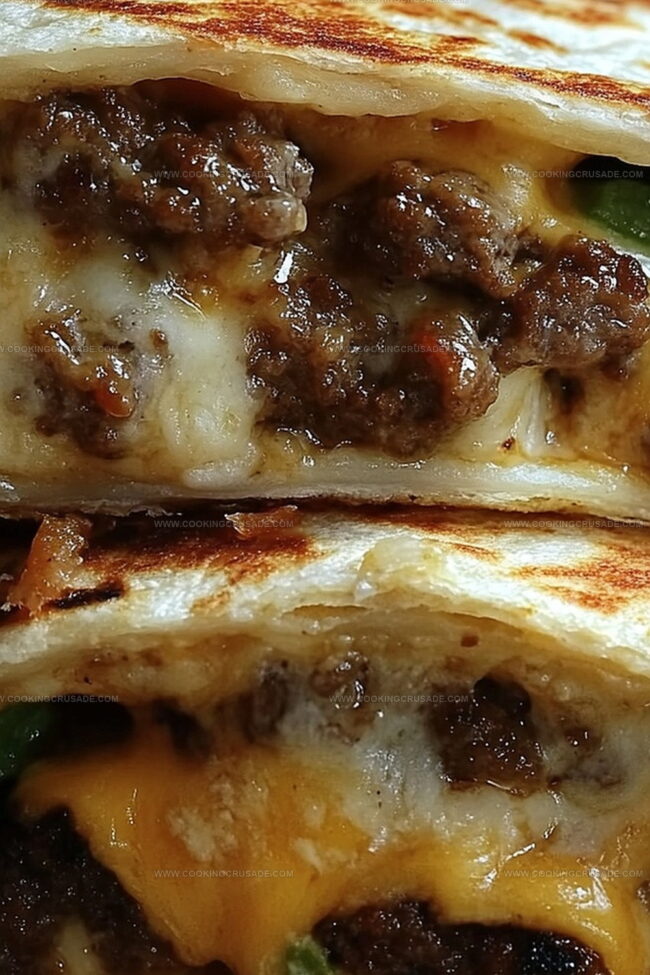
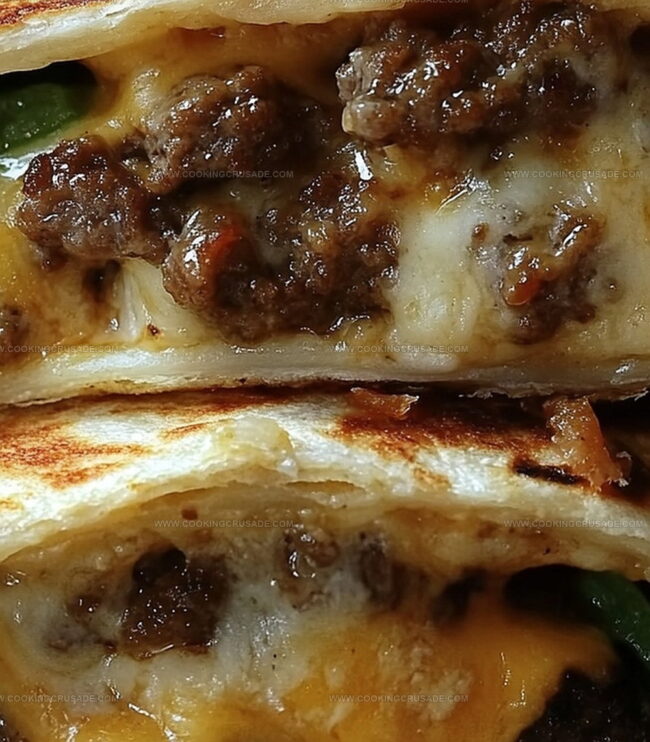
Crispy edges and melted cheese peek out from a warm tortilla, promising deliciousness in every bite.
Weeknight dinners just got way more exciting with this simple yet ingenious creation.
No grill needed, just a skillet and a few ingredients to transform your typical burger experience.
These wraps pack all the flavors you love into a compact, easy-to-devour package.
Let’s turn an ordinary meal into something extraordinary that will have everyone asking for seconds.
Why Grilled Cheeseburger Wraps Hit The Spot
Grilled Cheeseburger Wraps Ingredient List
Main Protein:Wrap and Seasonings:Toppings and Cheese:Step-By-Step Guide To Grilled Cheeseburger Wraps
Step 1: Brown the Beef Mixture
Heat a large skillet and toss in ground beef with diced onions. Cook until the meat transforms into a delicious golden brown and onions become soft and translucent. Drain any extra grease. Sprinkle in these flavor boosters:Stir everything together and let the mixture simmer for a couple more minutes. Set aside to cool slightly.
Step 2: Build the Flavor Foundation
Grab a soft tortilla and spread a canvas of tangy condiments right in the center:Create a colorful layer of fresh ingredients:Spoon the seasoned beef mixture generously across the tortilla. Shower the top with a blanket of shredded cheese.
Step 3: Wrap Like a Pro
Fold the sides of the tortilla inward, creating a snug envelope. Roll from the bottom up, ensuring a tight, secure wrap that holds all the delicious ingredients.
Step 4: Grill to Golden Perfection
Warm a skillet or grill pan over medium heat. Lightly grease with butter or cooking spray. Place the wraps seam-side down, creating a sizzling sound. Cook for 2-3 minutes on each side, pressing gently with a spatula. Watch for a beautiful golden-brown color and melted cheese.
Step 5: Serve and Enjoy
Slice the wraps diagonally and serve immediately. Complement with crispy french fries, a fresh garden salad, or your favorite dipping sauce. Get ready for a flavor explosion!
Pro Tips To Improve Grilled Cheeseburger Wraps
How To Save And Reheat Grilled Cheeseburger Wraps
Sides That Go Well With Grilled Cheeseburger Wraps
Different Takes On Grilled Cheeseburger Wraps
Grilled Cheeseburger Wraps FAQs
These wraps combine all the classic burger flavors in a convenient, handheld format. Instead of a bun, you get a crispy grilled tortilla that’s packed with seasoned beef, melted cheese, and all your favorite burger toppings.
You can prepare the beef mixture in advance and store it in the refrigerator for up to 2 days. When ready to eat, simply assemble and grill the wraps for a quick meal.
Absolutely! Kids love these wraps because they’re easy to eat, customizable, and taste just like a cheeseburger. You can let them choose their own toppings and help with rolling the wraps.
Yes, you can substitute the ground beef with ground turkey, chicken, or even a plant-based meat alternative to suit your dietary preferences.
Print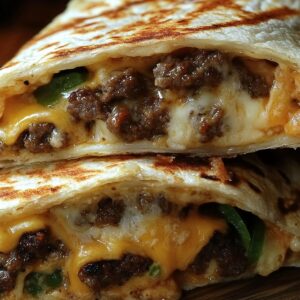
Grilled Cheeseburger Wraps Recipe
- Total Time: 30 minutes
- Yield: 4 1x
Description
Sizzling grilled cheeseburger wraps bring classic American comfort to your dinner table with a portable twist. Meaty, cheesy goodness wrapped in a warm tortilla delivers a mouthwatering meal you’ll crave again and again.
Ingredients
Main Proteins and Cheese:
- 1 pound (450 grams) ground beef
- 1 ½ cups (150 grams) shredded cheddar or American cheese
Seasonings and Aromatics:
- 1 small onion, finely chopped
- 1 tablespoon Worcestershire sauce
- 1 teaspoon garlic powder
- 1 teaspoon paprika
- Salt and pepper, to taste
Wrap and Topping Ingredients:
- 4 large flour tortillas
- Lettuce leaves
- Sliced tomatoes
- Dill pickles (optional)
- Ketchup and mustard (or your favorite burger sauce)
Grilling Ingredient:
- 1 tablespoon butter or cooking spray
Instructions
- Fire up a robust skillet over medium flame, introducing ground beef and diced onions. Sizzle and brown the meat while softening the aromatics, ensuring to eliminate excess grease through careful draining.
- Enhance the beef mixture with robust Worcestershire sauce, garlic powder, paprika, salt, and pepper. Allow the seasonings to meld and intensify for approximately two minutes, then remove from heat and let the filling cool slightly.
- Select a fresh tortilla and create a flavor foundation by spreading tangy ketchup and mustard across the center. Layer crisp lettuce leaves, juicy tomato slices, and zesty pickle rounds as a vibrant base.
- Generously distribute the seasoned beef mixture over the vegetable layer, creating an even coverage. Sprinkle shredded cheese to ensure maximum melting potential.
- Craft the wrap by folding the tortilla’s sides inward, then rolling from the bottom to create a compact, secure package that will prevent ingredient spillage during grilling.
- Prepare a skillet or grill pan with a light coating of butter or cooking spray. Position the wraps seam-side down, allowing direct contact with the heated surface.
- Grill each side for 2-3 minutes, applying gentle pressure with a spatula to achieve a golden, crispy exterior and ensure the cheese melts completely.
- Once perfectly grilled, slice the wraps diagonally and serve immediately. Complement with crispy fries, a fresh salad, or your preferred dipping sauce for a complete meal experience.
Notes
- Customize the beef blend by mixing ground chuck with ground sirloin for deeper flavor complexity and leaner protein.
- Select tortillas wisely – larger flour tortillas provide better wrapping structure and prevent ingredient spillage during grilling.
- Control meat seasoning intensity by gradually adding Worcestershire sauce and adjusting spice levels to personal taste preferences.
- Pre-warm tortillas slightly before assembling to enhance flexibility and prevent cracking during wrapping process.
- Experiment with cheese varieties like smoked cheddar or pepper jack for unexpected flavor dimensions and exciting taste profiles.
- Reduce cooking fat by using lean ground beef (90/10) and draining excess grease thoroughly after browning to create healthier wrap version.
- Allow beef mixture to cool momentarily before assembling wraps to prevent tortilla softening and maintain crisp grilling texture.
- Try dairy-free alternatives like plant-based cheese or nutritional yeast for lactose-intolerant or vegan diet adaptations.
- Prep Time: 10 minutes
- Cook Time: 20 minutes
- Category: Lunch, Dinner, Snacks
- Method: Grilling
- Cuisine: American
Nutrition
- Serving Size: 4
- Calories: 560
- Sugar: 3 g
- Sodium: 800 mg
- Fat: 32 g
- Saturated Fat: 15 g
- Unsaturated Fat: 17 g
- Trans Fat: 0 g
- Carbohydrates: 40 g
- Fiber: 2 g
- Protein: 30 g
- Cholesterol: 90 mg
James Mitchell
Founder & Recipe Developer
Expertise
Recipe Creation and Testing, Fusion Cuisine, Food Styling and Photography, Culinary Education
Education
Kendall College, Chicago, IL
The Culinary Institute of America, Hyde Park, NY
James Mitchell is the founder and fearless flavor explorer at Cooking Crusade. With a degree in Culinary Arts from Kendall College and advanced training in global gastronomy from The Culinary Institute of America, James has spent over a decade perfecting the art of recipe creation.
His background includes fine dining, private cheffing, and food styling, but his true joy comes from turning big ideas into doable recipes for home cooks. Every dish he shares is a mix of creativity, culture, and a little kitchen magic, built to bring excitement back to everyday meals.