Grandma’s Golden Bisquick Chicken Pot Pie Recipe for Dinner
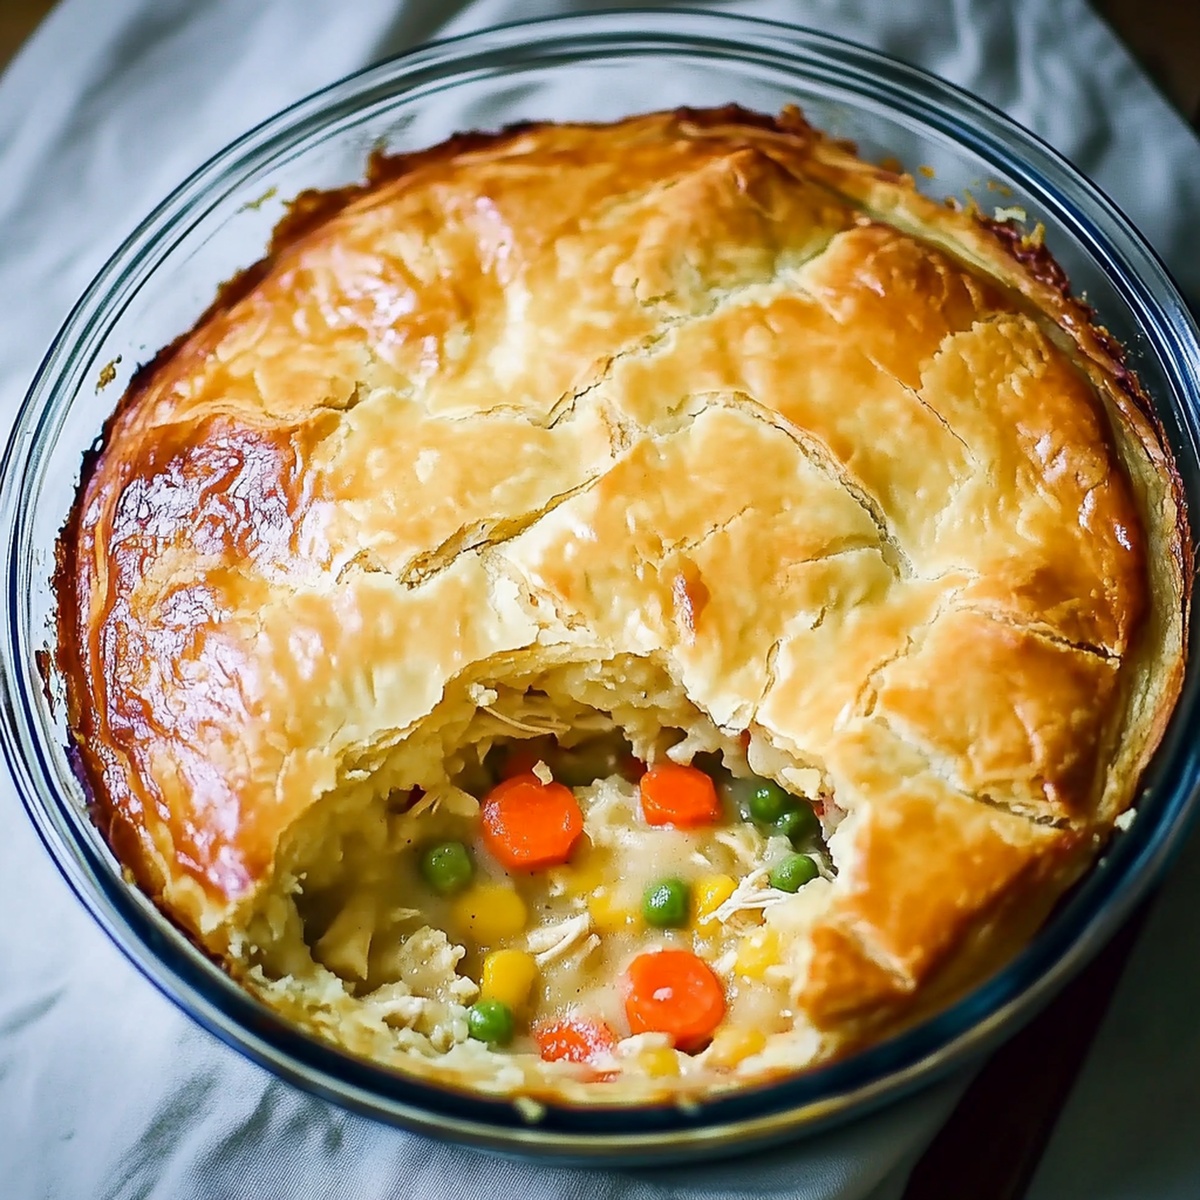
Comfort food takes center stage with this delightful bisquick chicken pot pie recipe that promises to warm your soul.
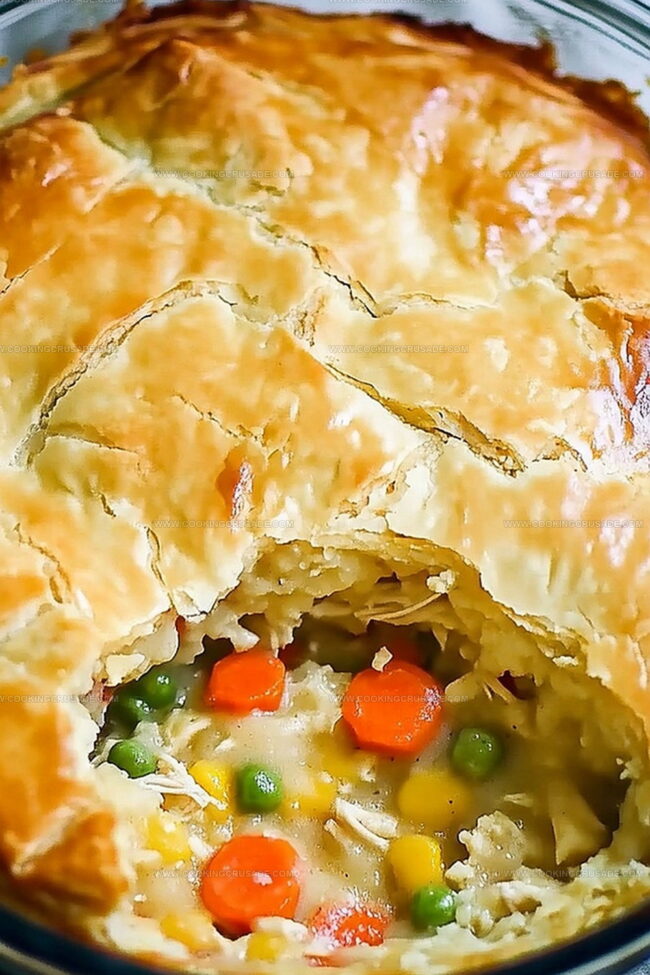
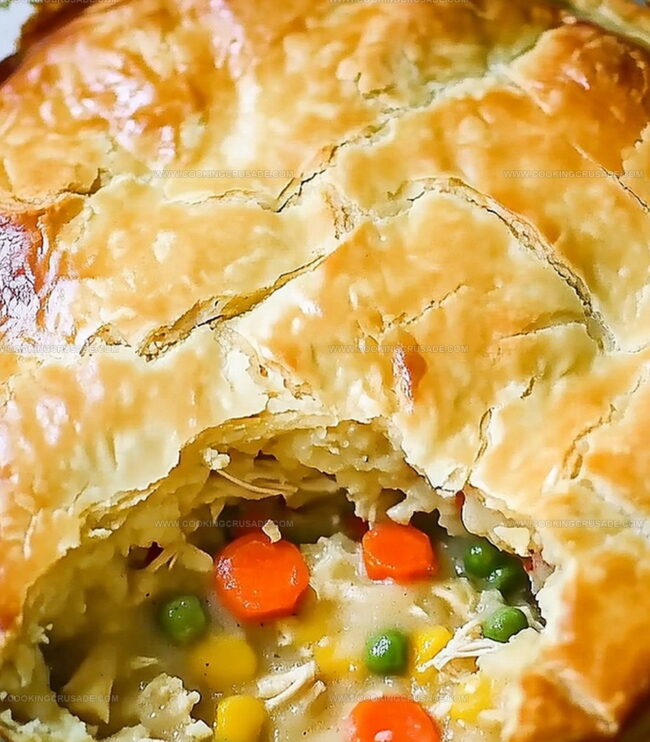
Tender chunks of chicken mingle with a rich, creamy filling, creating a mouthwatering experience.
Flaky golden crust embraces a medley of vegetables and savory seasonings.
Home cooks adore this simplified version that delivers maximum flavor with minimal effort.
The magic of bisquick creates an effortless yet impressive meal that feels like a warm hug on a chilly evening.
Simple ingredients come together to craft a dish that will have everyone asking for seconds.
This pot pie is your ticket to a satisfying, home-cooked meal that celebrates classic comfort food.
Quick Recipe Overview
What Goes In Bisquick Chicken Pot Pie
For Filling Base:For Crust and Binding:For Optional Enhancement:Kitchen Items For Bisquick Chicken Pot Pie
Easy Instructions For Bisquick Chicken Pot Pie
Fire up your oven to a toasty 400 degrees and give your baking dish a quick spray of cooking oil to prevent sticking.
Toss together tender chicken pieces, colorful vegetables, and creamy soup in a mixing bowl, blending until everything is perfectly combined. Pour this delicious mixture into your prepared dish.
In another bowl, blend Bisquick mix with milk and egg, whisking until the batter becomes smooth and silky.
Generously pour the Bisquick batter across the top of your chicken mixture, making sure it covers the entire surface evenly.
Slide the dish into the preheated oven and bake for 30-35 minutes. You’ll know it’s ready when the top turns a beautiful golden brown and the filling starts bubbling with deliciousness.
Allow the pot pie to cool for a quick 5 minutes, then scoop out generous portions and savor the comforting warmth of your homemade meal.
Tips To Change Up Bisquick Chicken Pot Pie
How To Serve Bisquick Chicken Pot Pie Warm
Store Bisquick Chicken Pot Pie With Ease
Print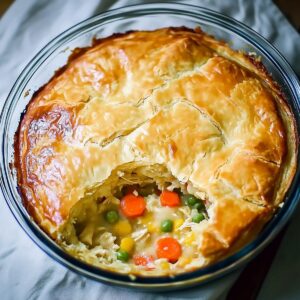
Hearty Bisquick Chicken Pot Pie Recipe
- Total Time: 40 minutes
- Yield: 5 1x
Description
Hearty chicken pot pie with Bisquick creates a comforting classic that blends creamy filling and flaky crust. Home cooks can easily prepare this satisfying meal with simple ingredients and minimal kitchen effort.
Ingredients
- 1 cup chopped or shredded cooked chicken
- 1.25 cups (298 ml / 1 ¼ cups) thawed and drained frozen mixed vegetables
- 1 can (10.5 oz / 298 g) condensed cream of chicken soup
- 1 cup Bisquick mix
- ½ cup (120 ml) milk
- 1 large egg
Instructions
- Preheat and Prepare: Set the oven to 400F (200C) and lightly coat a 9-inch pie dish with cooking spray to ensure easy release.
- Blend Filling Components: In a mixing bowl, combine shredded chicken, mixed vegetables, and condensed chicken soup, thoroughly mixing until ingredients are evenly distributed and create a harmonious filling.
- Create Bisquick Batter: Whisk Bisquick mix, milk, and beaten egg until the mixture transforms into a smooth, velvety texture without any lumps or inconsistencies.
- Layer and Assemble: Carefully pour the Bisquick batter over the chicken and vegetable mixture, spreading it uniformly to completely cover the filling and create a seamless base.
- Bake and Monitor: Transfer the pie dish to the preheated oven and bake for 30-35 minutes, watching for a rich golden-brown crust and bubbling edges that signal the filling has heated thoroughly.
- Rest and Serve: Remove from the oven and let the pot pie rest for 5 minutes, allowing the filling to stabilize and ensuring clean, appetizing portions when served warm.
Notes
- Optimize Chicken Texture: Shred chicken finely and ensure it’s fully cooked before mixing with other ingredients to prevent dryness and maintain tender, juicy consistency.
- Manage Vegetable Moisture: Drain canned or frozen vegetables completely to prevent excess liquid that could make the pot pie soggy and compromise the crust’s crispness.
- Control Batter Consistency: Whisk Bisquick mixture carefully, avoiding overmixing to maintain a light, fluffy crust that doesn’t become dense or tough during baking.
- Customize Dietary Needs: Substitute regular milk with almond or oat milk for lactose-free version, and use gluten-free Bisquick mix for a celiac-friendly alternative.
- Prep Time: 10 minutes
- Cook Time: 30 minutes
- Category: Dinner
- Method: Baking
- Cuisine: American
Nutrition
- Serving Size: 5
- Calories: 280
- Sugar: 4 g
- Sodium: 800 mg
- Fat: 10 g
- Saturated Fat: 3 g
- Unsaturated Fat: 5 g
- Trans Fat: 0 g
- Carbohydrates: 30 g
- Fiber: 2 g
- Protein: 15 g
- Cholesterol: 70 mg
Olivia Bennett
Co-Founder & Content Creator
Expertise
Nutritional Analysis, Dietary Accommodations, Food Writing and Blogging,
Education
University of Texas at Austin
Institute of Culinary Education, New York, NY
Olivia Bennett is Cooking Crusade’s go-to expert for nutritious, feel-good food. Based in Austin, she blends her degree in Nutrition from the University of Texas with plant-based culinary training from the Institute of Culinary Education.
Olivia’s recipes are all about balance: vibrant, wholesome, and easy-to-love dishes that work for all kinds of eaters. Her mission is simple: to make healthy eating approachable and genuinely tasty, with tips that support your lifestyle, not complicate it.