Heavenly Homemade Peanut Butter Oreos Recipe

Fluffy Homemade Peanut Butter Oreos Recipe: Pure Bliss!

Baking brings pure joy when you craft these heavenly homemade peanut butter oreos recipe with love and simple ingredients.

Chocolate and peanut butter create an irresistible combination that melts hearts.

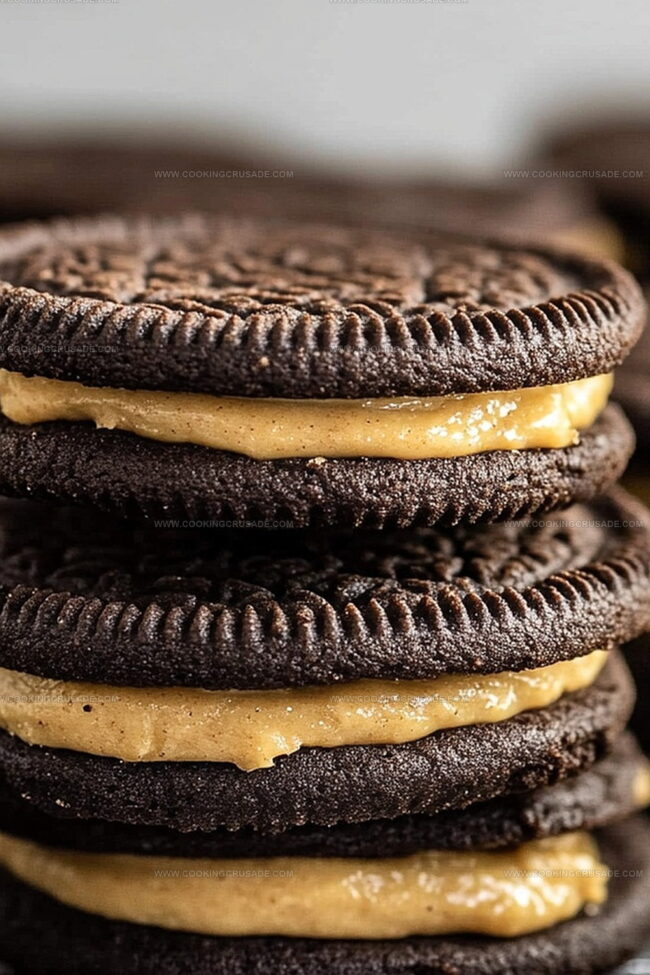
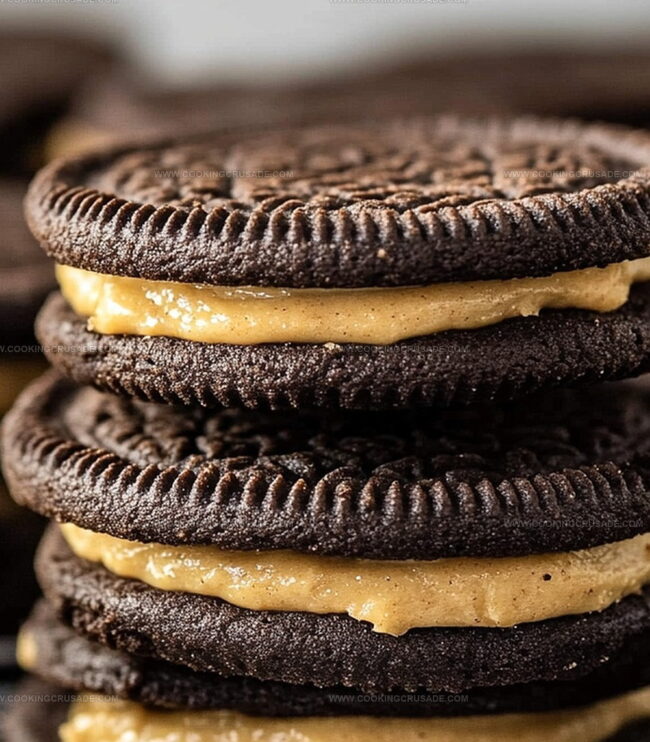
Crisp, dark cookies sandwich a creamy, rich filling that sings with nutty flavor.

Each bite promises a delightful crunch and smooth center that surpasses store-bought treats.

The aroma of freshly baked cookies will draw everyone to the kitchen.

These oreos elevate your dessert game with their perfect balance of sweetness and texture.

Prepare to impress and delight with this crowd-pleasing homemade classic.

Quick Recipe Overview

Prep Time: 10 minutes

Cook Time: 20 minutes

Total Time: 30 minutes

Calories: 227 kcal

Servings: 25

What’s Packed In Soft Homemade Peanut Butter Oreos

For Chocolate Cookie Base:
  • All-Purpose Flour: Essential for creating a tender, rich chocolate cookie that crumbles perfectly with each bite.
  • Cocoa Powder: Delivers intense chocolate depth and dark color, selecting high-quality Dutch-processed cocoa enhances flavor complexity.
  • Granulated Sugar: Provides sweetness and helps create crisp cookie edges with delightful caramelization.
  • Brown Sugar: Adds moisture and deep caramel undertones, ensuring soft and chewy cookie texture.
  • Butter: Contributes rich flavor and helps create a tender crumb, selecting high-fat European-style butter intensifies taste.
  • Eggs: Bind ingredients together and provide structure, room temperature eggs incorporate more smoothly.
  • Baking Soda: Helps cookies rise and spread evenly, creating light and airy texture.
  • Salt: Balances sweetness and enhances overall chocolate flavor profile.
  • Vanilla Extract: Rounds out chocolate notes and adds warm aromatic complexity.
For Peanut Butter Filling:
  • Peanut Butter: Delivers creamy, nutty core flavor, choosing natural unsweetened variety provides authentic taste.
  • Powdered Sugar: Creates smooth, spreadable filling consistency and adds sweetness.
  • Butter: Enhances creaminess and helps stabilize filling texture.
  • Vanilla Extract: Softens peanut butter's intensity and adds subtle depth.
  • Heavy Cream: Adjusts filling's consistency, making it silky and spreadable.
For Optional Finishing:
  • Vanilla Extract: Adds subtle background complexity to final sandwich cookie.

Tools To Make Soft Homemade Peanut Butter Oreos

  • Electric mixer: Essential for beating butter, sugar, and creating smooth fillings.
  • Large mixing bowls: Perfect for combining wet and dry ingredients separately.
  • Whisk: Great for smoothly blending dry ingredients without lumps.
  • Baking sheets: Needed to bake chocolate cookie bases evenly.
  • Parchment paper: Prevents cookies from sticking and makes cleanup easy.
  • Tablespoon or cookie scoop: Helps create uniform cookie sizes.
  • Wire cooling rack: Allows cookies to cool completely without getting soggy.
  • Piping bag or spatula: Optional for spreading peanut butter filling neatly.

Steps To Bake Soft Homemade Peanut Butter Oreos

  • Create Chocolate Cookie Dough

Whip butter and sugars into a dreamy, light mixture. Crack in eggs and splash of vanilla, blending until silky smooth. In a separate container, combine flour, cocoa, baking soda, and salt. Fold dry ingredients into wet mixture, stirring until perfectly combined.

  • Bake Cookie Shells

Scoop dollops of chocolatey dough onto lined baking sheets, leaving space between each. Slide into a preheated oven and bake until edges look set but centers remain tender. Allow cookies to rest briefly on baking sheet before transferring to cooling rack.

  • Whip Up Peanut Butter Filling

Blend peanut butter and butter until creamy and luscious. Gradually incorporate powdered sugar, mixing until light and fluffy. Add a hint of vanilla and splash of cream if needed to achieve perfect spreadable consistency.

  • Craft Delicious Sandwich Cookies

Generously spread peanut butter filling across one cookie’s surface. Gently press a second cookie on top, creating a decadent sandwich. Chill briefly for firmer texture if desired. Devour and enjoy your homemade treat!

Tips For Filling Soft Homemade Peanut Butter Oreos

  • Cocoa Powder Selection: Use high-quality dark cocoa powder for richer, deeper chocolate flavor in cookies. Dutch-processed cocoa works best for intense color and taste.
  • Butter Temperature Matters: Ensure butter is softened, not melted, for perfect cookie texture. Room temperature butter creates fluffy, tender cookies with even mixing.
  • Filling Consistency Control: Add heavy cream gradually to peanut butter filling to prevent runny texture. Chill filling for 15 minutes if too soft for easier spreading.
  • Storage Savvy: Store assembled cookies in an airtight container between parchment layers. Refrigerate up to 5 days for maximum freshness and flavor preservation.
  • Diet-Friendly Adaptations: Swap wheat flour with gluten-free blend for celiac-friendly version. Use alternative nut butters like almond or sunflower seed butter for different flavor profiles.

Serve Soft Homemade Peanut Butter Oreos With Joy

  • Dessert Party Centerpiece: Arrange these homemade Oreos on a beautiful platter with elegant height variations, creating a stunning display that will wow your guests.
  • Milk Pairing Paradise: Serve alongside cold glasses of creamy milk or chocolate milk for the ultimate classic cookie dunking experience that brings nostalgic comfort.
  • Gifting Delight: Package these cookies in clear cellophane bags tied with rustic twine or ribbon, perfect for homemade food gifts or potluck contributions that showcase your baking skills.
  • Decadent Dessert Upgrade: Drizzle melted chocolate over the assembled cookies or roll their edges in crushed peanuts for an extra gourmet touch that elevates the basic recipe.

How To Store Soft Homemade Peanut Butter Oreos Right

  • Fridge-Friendly Storage: Keep homemade peanut butter Oreos in an airtight container inside the refrigerator for up to 5 days. Separate layers with parchment paper to prevent sticking.
  • Make-Ahead Magic: Prepare cookie dough or filling 2-3 days before baking. Store dough in sealed containers in the refrigerator, and filling can be kept in a closed container for quick assembly later.
  • Freezer-Ready Treats: Wrap individual cookies or entire batches in plastic wrap, then place in freezer-safe bags. Frozen cookies maintain quality for 3 months. Thaw at room temperature for 15-20 minutes before serving.
  • Smart Portioning: Divide cookies into smaller containers or zip-lock bags for easy grab-and-go snacks. This method helps control portion sizes and keeps cookies fresh during the week.
Print
clock clock iconcutlery cutlery iconflag flag iconfolder folder iconinstagram instagram iconpinterest pinterest iconfacebook facebook iconprint print iconsquares squares iconheart heart iconheart solid heart solid icon
Heavenly Homemade Peanut Butter Oreos Recipe

Heavenly Homemade Peanut Butter Oreos Recipe


5 Stars 4 Stars 3 Stars 2 Stars 1 Star

4.8 from 37 reviews

  • Total Time: 30 minutes
  • Yield: 25 1x

Description

Classic Homemade Peanut Butter Oreos blend creamy peanut butter with chocolate cookie perfection. Rich sandwich cookies deliver nostalgic comfort with professional bakery-quality taste and texture.


Ingredients

Scale
  • 2 large eggs
  • 1 cup (2 sticks / 227 g) unsalted butter, softened
  • 1 cup (200 g) brown sugar, packed
  • ½ cup (100 g) granulated sugar
  • 2 tsp vanilla extract
  • 2 cups (240 g) all-purpose flour
  • ¾ cup (75 g) unsweetened cocoa powder
  • 1 tsp baking soda
  • ½ tsp salt
  • ¾ cup (190 g) creamy peanut butter
  • ½ cup (113 g) unsalted butter, softened
  • 1 ½ cups (180 g) powdered sugar
  • 1 tsp vanilla extract
  • ½ tbsp (7.5 ml) heavy cream (if needed for consistency)

Instructions

  1. Prepare Dough: Cream softened butter with brown and granulated sugars until light and fluffy, then blend in eggs and vanilla extract until silky smooth.
  2. Combine Dry Ingredients: Whisk flour, cocoa powder, baking soda, and salt in a separate bowl, creating a rich chocolate dry mixture.
  3. Mix Dough: Gently fold dry ingredients into wet mixture, blending until a cohesive chocolate dough forms without overmixing.
  4. Bake Wafers: Preheat oven to 350F (175C), line baking sheets with parchment paper, and drop tablespoon-sized dough portions with ample spacing.
  5. Prepare Cookies: Bake for 8-10 minutes until edges are set but centers remain tender, then rest on baking sheet for five minutes before transferring to a cooling rack.
  6. Create Filling: Whip peanut butter and butter together, gradually incorporating powdered sugar, vanilla extract, and heavy cream until light and fluffy.
  7. Assemble Sandwich Cookies: Spread peanut butter filling onto one chocolate wafer, delicately sandwich with another wafer, applying gentle pressure.
  8. Serve: Enjoy immediately for a soft treat or chill briefly to firm up the sandwich cookies.

Notes

  • Prevent Overmixing: Blend dry and wet ingredients just until combined to maintain a tender, soft cookie texture without developing tough gluten.
  • Temperature Control: Allow butter and eggs to reach room temperature before mixing, ensuring smoother incorporation and consistent cookie structure.
  • Precise Baking Time: Watch cookies closely during the 8-10 minute window, removing them when edges are set but centers remain soft for ultimate chewiness.
  • Filling Consistency Hack: If peanut butter filling seems too thick, add cream incrementally to achieve the perfect spreadable consistency without becoming runny.
  • Prep Time: 10 minutes
  • Cook Time: 20 minutes
  • Category: Desserts, Snacks
  • Method: Baking
  • Cuisine: American

Nutrition

  • Serving Size: 25
  • Calories: 227
  • Sugar: 16 g
  • Sodium: 134 mg
  • Fat: 12 g
  • Saturated Fat: 5 g
  • Unsaturated Fat: 7 g
  • Trans Fat: 0 g
  • Carbohydrates: 27 g
  • Fiber: 1 g
  • Protein: 3 g
  • Cholesterol: 31 mg
Olivia Bennett

Olivia Bennett

Co-Founder & Content Creator

Expertise

Nutritional Analysis​, Dietary Accommodations​, Food Writing and Blogging​,

Education

University of Texas at Austin

  • Degree: Bachelor of Science in Nutrition
  • Focus: Emphasis on dietary planning, food science, and the relationship between nutrition and health.​

Institute of Culinary Education, New York, NY

  • Program: Plant-Based Culinary Arts Certificate
  • Focus: Specialized training in vegetarian and vegan cooking techniques, emphasizing whole foods and sustainability.​

Olivia Bennett is Cooking Crusade’s go-to expert for nutritious, feel-good food. Based in Austin, she blends her degree in Nutrition from the University of Texas with plant-based culinary training from the Institute of Culinary Education.

Olivia’s recipes are all about balance: vibrant, wholesome, and easy-to-love dishes that work for all kinds of eaters. Her mission is simple: to make healthy eating approachable and genuinely tasty, with tips that support your lifestyle, not complicate it.

Leave a Reply

Your email address will not be published. Required fields are marked *

Recipe rating 5 Stars 4 Stars 3 Stars 2 Stars 1 Star