The Creamiest Homemade Caramels Recipe: Sweet Golden Perfection
Sweet memories dance through my kitchen whenever I craft these silky homemade caramels that melt like liquid gold.
Grandma’s treasured recipe whispers secrets from generations past, revealing delicate techniques perfected over decades.
Sugar transforms slowly under watchful eyes, creating amber pools of rich sweetness.
Creamy butter mingles with careful measurements, promising decadent treats that shimmer with golden warmth.
Each batch tells a story of patience and precision, inviting you to savor slow-cooked delights.
Soft textures and deep caramel notes promise an irresistible experience that connects comfort and culinary craft.
Grab your favorite wooden spoon and let magic unfold in delicious moments of pure indulgence.
Why Homemade Caramels Recipe Is A Sweet Classic
What You’ll Need For Homemade Caramels Recipe
Dairy Base:Sweeteners:Finishing Touches:How To Make Homemade Caramels Recipe
Step 1: Prepare Baking Dish
Line an 8-inch baking dish with parchment paper, ensuring the paper extends slightly over the edges. Lightly grease the parchment paper with butter or cooking spray to prevent sticking.
Step 2: Create Caramel Base
In a heavy-bottomed saucepan, combine:Heat the mixture over medium heat, stirring gently until the sugar completely dissolves.
Step 3: Achieve Perfect Caramelization
Stop stirring and let the mixture boil. Watch carefully as the sugar transforms into a golden amber color. Resist the urge to stir during this process.
Step 4: Add Creamy Richness
Carefully whisk in:The mixture will bubble vigorously, so pour slowly and use caution.
Step 5: Reach Soft Ball Stage
Continue cooking without stirring until the caramel reaches 240°F on a candy thermometer. This is the soft ball stage that gives caramels their signature texture.
Step 6: Pour and Cool
Immediately pour the hot caramel into the prepared baking dish. Allow it to cool completely at room temperature, which typically takes 2-3 hours.
Step 7: Cut and Wrap
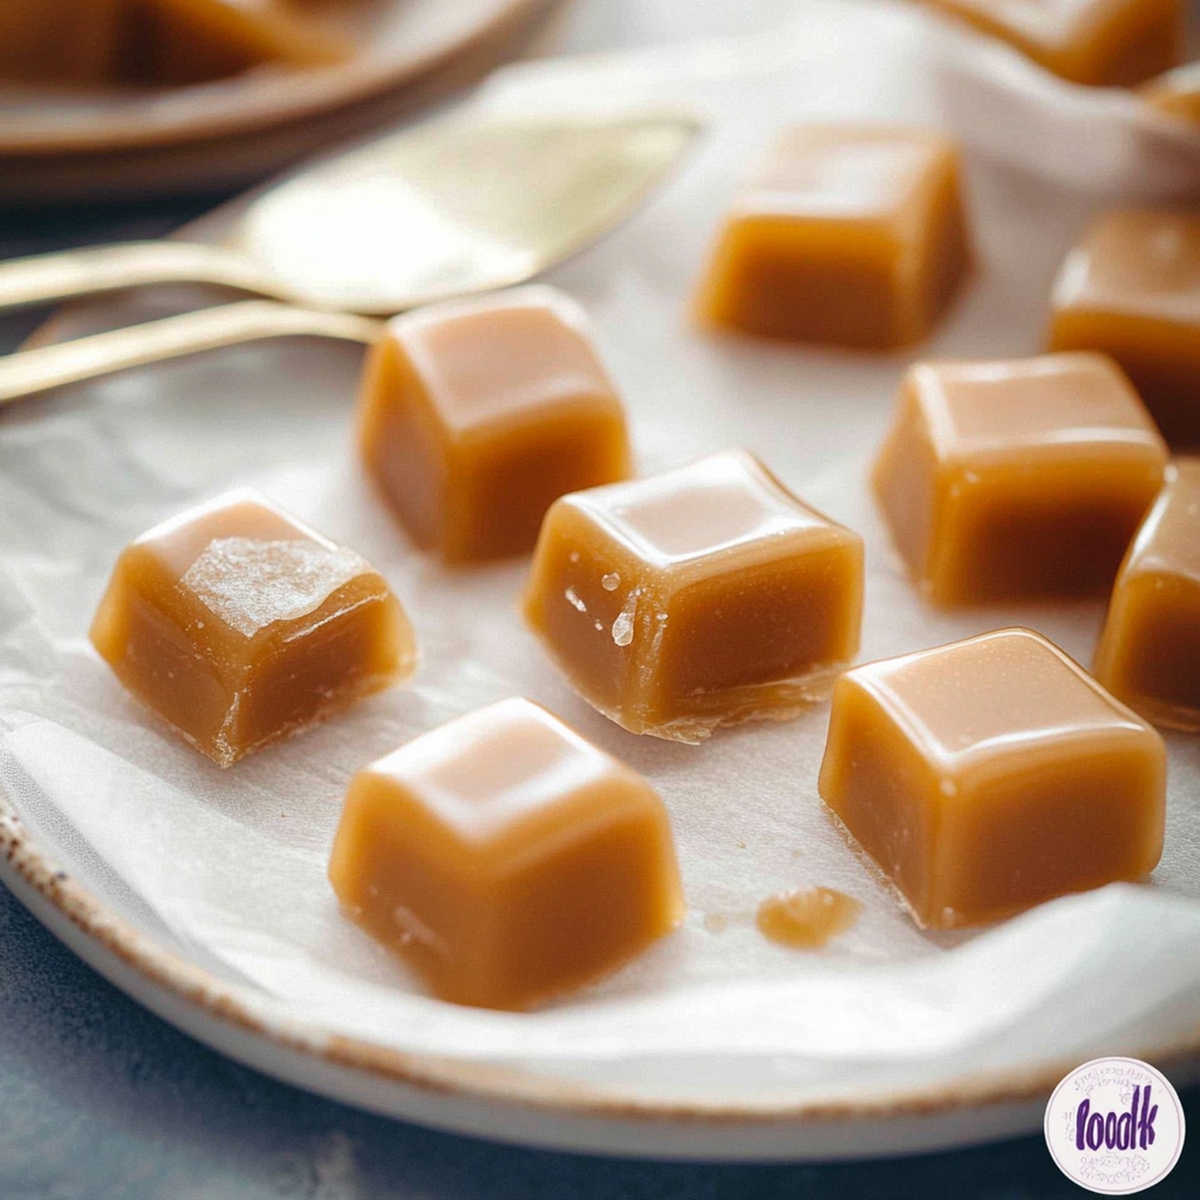
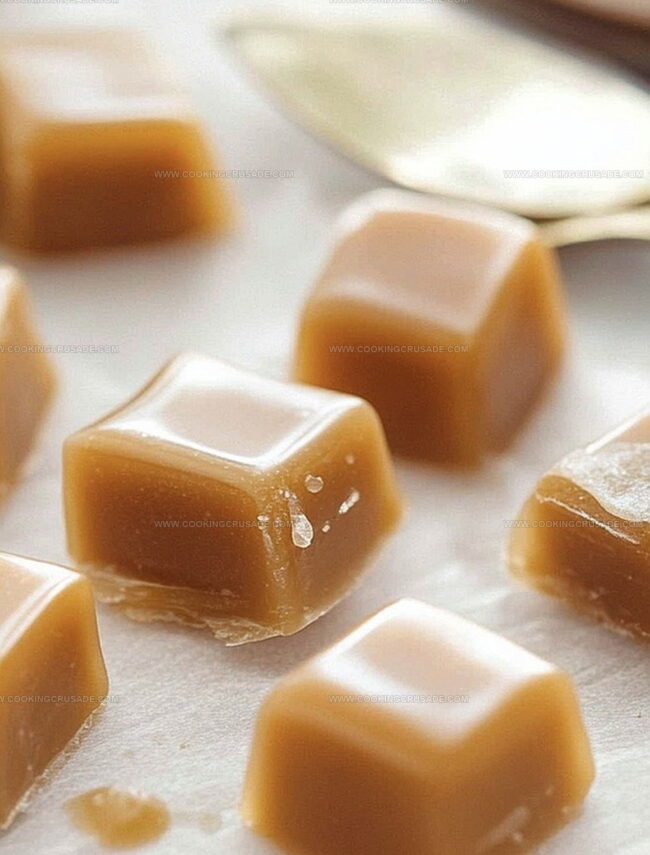
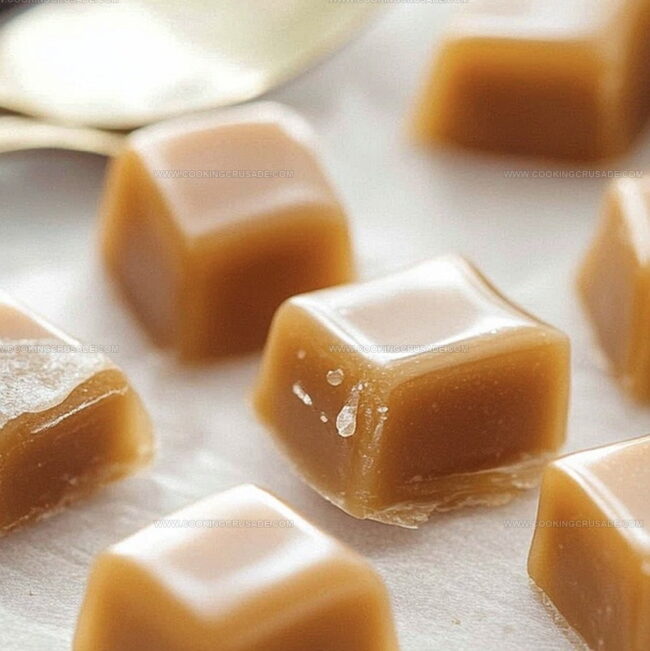
Once fully set, lift the caramel from the dish using the parchment paper. Cut into small squares or rectangles using a sharp knife. Wrap individual pieces in wax paper or cellophane for a classic touch.
Helpful Tips For Homemade Caramels Recipe
How To Store Homemade Caramels Recipe Properly
Perfect Pairings For Homemade Caramels Recipe
Fun Variations Of Homemade Caramels Recipe
Homemade Caramels Recipe FAQs
Homemade caramels offer a richer, fresher taste with pure ingredients and no preservatives. You control the quality and can customize flavors, creating a more authentic and delicious candy experience.
Absolutely! This recipe is beginner-friendly. The key is using a reliable candy thermometer and paying close attention to temperature. Go slow, be patient, and you’ll create perfect caramels on your first try.
Watch for the golden amber color and use a candy thermometer. Aim for 245-250°F (firm ball stage). The caramel should be smooth, rich, and hold its shape when cooled, but still be soft and chewy.
Parchment paper prevents sticking and makes removing and cutting caramels much easier. It ensures your homemade caramels come out cleanly and maintain their beautiful shape without breaking or tearing.
Print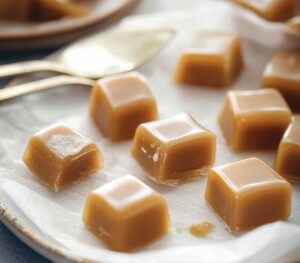
Homemade Caramels Recipe
- Total Time: 3 hours 30 minutes
- Yield: 20 1x
Description
Sweet whispers of golden Homemade Caramels dance across your palate with rich butter and creamy sugar. Silky smooth confections melt effortlessly, promising delightful moments of pure indulgence you’ll savor with each delectable bite.
Ingredients
Main Ingredients:
- 1 cup (200 g) granulated sugar
- 1 cup (220 g) light brown sugar, packed
- 1 cup (240 ml) heavy cream
- ½ cup (115 g) unsalted butter, cut into pieces
- ½ cup (120 ml) light corn syrup
Seasoning and Flavoring:
- ¼ teaspoon salt
- 1 teaspoon vanilla extract
- ½ teaspoon sea salt (for salted caramels)
Optional Topping:
- ½ cup chopped nuts (pecans or almonds)
Instructions
- Prepare a baking dish by carefully lining it with parchment paper, ensuring complete coverage of the bottom and sides, then apply a delicate layer of grease to prevent sticking.
- Combine sugar, corn syrup, and water in a heavy-bottomed saucepan, stirring gently to dissolve the sugar crystals and create a smooth initial mixture.
- Position the saucepan over medium-high heat, allowing the liquid to transform without stirring, watching as it gradually develops a rich golden hue.
- Insert a candy thermometer and monitor the temperature closely, letting the mixture bubble and caramelize until it reaches the precise golden brown stage.
- Carefully remove the pan from heat and swiftly incorporate butter and cream, whisking vigorously to create a silky, homogeneous blend while being cautious of potential splattering.
- Return the mixture to the heat, continuing to cook and stir until the mixture reaches the optimal candy temperature, ensuring a deep, complex caramel flavor develops.
- Immediately pour the molten caramel into the prepared parchment-lined dish, allowing it to spread evenly and settle naturally without additional manipulation.
- Let the caramel cool completely at room temperature, resisting the urge to disturb the surface, which will allow it to set properly and develop a smooth texture.
- Once fully cooled and set, lift the caramel slab from the dish using the parchment paper edges, placing it on a cutting board.
- Slice the caramel into uniform squares or rectangles using a sharp, lightly oiled knife, creating clean, precise cuts.
- Wrap individual caramels in wax paper or cellophane, twisting the ends to create elegant, professional-looking candies ready for serving or gifting.
Notes
- Always use a heavy-bottomed pot to prevent sugar from burning and ensure even heat distribution.
- Invest in a reliable candy thermometer for precise temperature control, which is crucial for achieving the perfect caramel texture.
- Consider adding a pinch of sea salt after pouring the caramel into the pan to create a delightful sweet-and-salty flavor profile.
- Cut caramels into small squares when completely cooled and wrap individually in wax paper to prevent sticking and make them easy to share.
- Prep Time: 5 minutes
- Cook Time: 15-20 minutes
- Category: Desserts, Snacks
- Method: Baking
- Cuisine: American
Nutrition
- Serving Size: 20
- Calories: 117
- Sugar: 16 g
- Sodium: 57 mg
- Fat: 5 g
- Saturated Fat: 3 g
- Unsaturated Fat: 2 g
- Trans Fat: 0 g
- Carbohydrates: 17 g
- Fiber: 0 g
- Protein: 1 g
- Cholesterol: 15 mg
James Mitchell
Founder & Recipe Developer
Expertise
Recipe Creation and Testing, Fusion Cuisine, Food Styling and Photography, Culinary Education
Education
Kendall College, Chicago, IL
The Culinary Institute of America, Hyde Park, NY
James Mitchell is the founder and fearless flavor explorer at Cooking Crusade. With a degree in Culinary Arts from Kendall College and advanced training in global gastronomy from The Culinary Institute of America, James has spent over a decade perfecting the art of recipe creation.
His background includes fine dining, private cheffing, and food styling, but his true joy comes from turning big ideas into doable recipes for home cooks. Every dish he shares is a mix of creativity, culture, and a little kitchen magic, built to bring excitement back to everyday meals.