
DIY Fun: Create Magical Homemade Modeling Clay Recipe Today!
Clay crafting becomes an enchanting home project where homemade modeling clay sparks imagination and creativity.
Mixing simple ingredients creates a magical medium for artistic expression.
Kids and adults alike can enjoy sculpting unique designs without spending much money.
Pantry staples transform into a pliable, colorful material ready for endless crafting possibilities.
Soft and smooth, this clay allows you to shape intricate figures or playful objects.
Minimal effort leads to maximum fun when you start molding your very own masterpiece.
Let your inner artist emerge with this delightful, budget-friendly crafting adventure!
Why Homemade Modeling Clay Brings Joy To Craft Time

What Goes Into Homemade Modeling Clay
Base Ingredients:Optional Shaping Tools:Drying Options:How To Make Homemade Modeling Clay At Home
Step 1: Whisk Magical Ingredients
In a medium saucepan, combine:Slowly pour water into the mixture, stirring until everything blends into a silky smooth texture. Place the saucepan on medium heat, keeping your whisk moving constantly. Watch the magic happen as the mixture transforms! After 2-3 minutes, you’ll notice the blend turning into a soft, dreamy dough with a consistency similar to creamy mashed potatoes. Once it reaches this point, carefully remove from heat.
Step 2: Cool and Massage the Dough
Gently transfer the warm dough onto a clean plate or cutting board. Give it a little breather for 5-10 minutes. Then, dive in and start kneading! Work the dough with your hands, pressing and folding until it becomes wonderfully smooth and super flexible. This is where the clay starts to feel perfect for creating.
Step 3: Craft Your Masterpiece
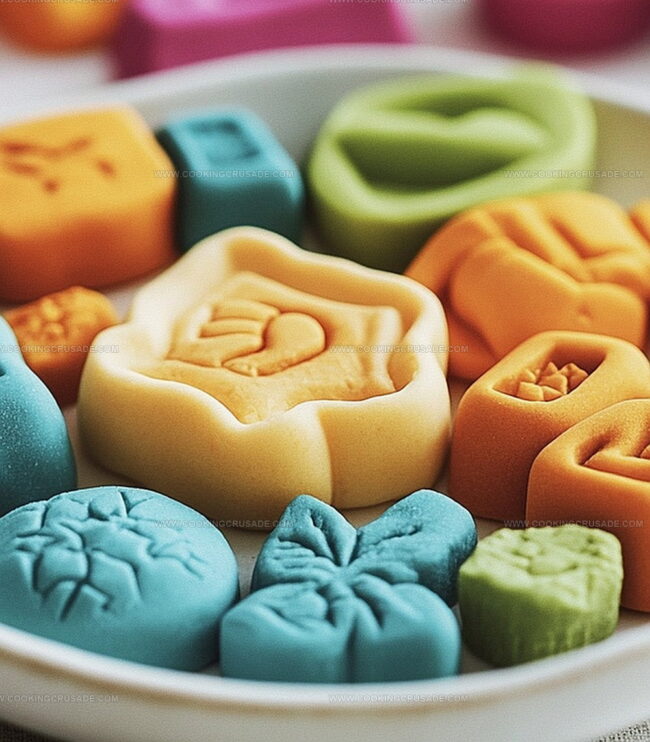
Time to get creative! Roll out the clay, shape it with your hands, or use cookie cutters to create awesome designs. Planning to make handprints or ornaments? Remember to punch a small hole before the drying process begins.
Step 4: Transform Clay into Permanent Art
You have two awesome drying options:
Air Drying Method:Oven Drying Method:Tips For Smooth, Easy-To-Shape Clay
How To Store Homemade Clay Without Drying
Pair Homemade Modeling Clay With These Ideas
Clay Variations With Colors And Scents
Homemade Modeling Clay FAQs For Beginners
This DIY clay is non-toxic, safe for kids, and made with simple kitchen ingredients like baking soda and cornstarch. It’s budget-friendly and allows you to create custom colors by adding food coloring during mixing.
Yes! Mix food coloring directly into the clay while it’s still warm. Start with a few drops and knead thoroughly to create vibrant, even colors. Remember that lighter colors work best and will look more natural.
If properly dried and stored in a cool, dry place, your clay sculptures can last several weeks to months. Avoid humid environments and direct sunlight to prevent cracking or deterioration.
Absolutely! This clay is made from food-grade ingredients, making it completely safe for kids to handle and create with. Adult supervision is recommended during the cooking and initial cooling stages.
Print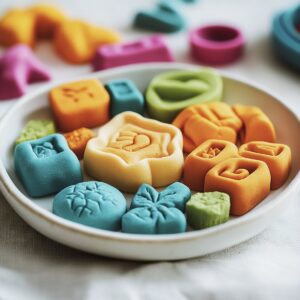
Homemade Modeling Clay Recipe
- Total Time: 10 minutes
- Yield: 8 1x
Description
Crafting homemade modeling clay brings out your inner artist with simple kitchen ingredients. Kids and adults will love creating colorful sculptures that dry into lasting memories without breaking the bank.
Ingredients
Main Ingredients:
- 2 cups (473 ml) baking soda
- 1 cup (236 ml) cornstarch
- 1 ¼ cups (296 ml) water
Optional Texture and Fragrance:
- Food coloring
- 1–2 drops essential oils
- Glitter or fine sand
Instructions
- Prepare the clay base by combining baking soda and cornstarch in a medium saucepan, ensuring no lumps remain.
- Gradually introduce water while whisking, creating a smooth, uniform liquid mixture without any clumps.
- Position the saucepan over medium heat, maintaining constant stirring to prevent sticking or burning.
- Watch carefully as the mixture transforms, gradually thickening into a cohesive mass resembling mashed potato texture.
- Remove the pan from heat immediately when the clay reaches a dense, pliable consistency.
- Transfer the hot clay onto a clean surface like a cutting board or plate, allowing initial steam to dissipate.
- Wait 5-7 minutes for the clay to cool down enough to handle safely without burning your hands.
- Knead the clay thoroughly, working it with your palms to create a smooth, elastic texture without cracks.
- Stretch and manipulate the clay, testing its flexibility and ensuring even consistency throughout.
- Shape the clay using hands, rolling pins, or cookie cutters to create desired designs or sculptures.
- For ornaments or keepsakes, carefully pierce a small hole before the clay begins to dry.
- Choose drying method: either air dry on a flat tray for 24-48 hours, rotating pieces midway, or bake in an oven at low temperature.
- If oven drying, place clay pieces on a baking sheet and monitor closely, checking every 30 minutes to prevent burning.
- Allow finished clay creations to cool completely before handling or painting.
Notes
- Test ingredient ratios carefully to achieve the perfect clay consistency, adjusting water or cornstarch slightly if mixture feels too sticky or dry.
- Wear gloves during kneading to prevent potential skin irritation from the warm mixture and keep hands clean.
- Use food coloring or natural pigments like turmeric or beetroot juice to create vibrant colored clay without harsh chemicals.
- Store unused clay in an airtight container or sealed plastic bag to prevent it from drying out and extend its usability for future crafting projects.
- Prep Time: 5 minutes
- Cook Time: 5 minutes
- Category: None
- Method: Boiling
- Cuisine: American
Nutrition
- Serving Size: 8
- Sugar: 0 g
- Sodium: 0 mg
- Fat: 0 g
- Saturated Fat: 0 g
- Unsaturated Fat: 0 g
- Trans Fat: 0 g
- Carbohydrates: 22.5 g
- Fiber: 0 g
- Protein: 1.5 g
- Cholesterol: 0 mg
James Mitchell
Founder & Recipe Developer
Expertise
Recipe Creation and Testing, Fusion Cuisine, Food Styling and Photography, Culinary Education
Education
Kendall College, Chicago, IL
The Culinary Institute of America, Hyde Park, NY
James Mitchell is the founder and fearless flavor explorer at Cooking Crusade. With a degree in Culinary Arts from Kendall College and advanced training in global gastronomy from The Culinary Institute of America, James has spent over a decade perfecting the art of recipe creation.
His background includes fine dining, private cheffing, and food styling, but his true joy comes from turning big ideas into doable recipes for home cooks. Every dish he shares is a mix of creativity, culture, and a little kitchen magic, built to bring excitement back to everyday meals.