Dreamy Mini Banana Pudding Cheesecakes Recipe For Sweet Lovers
The magic of mini banana pudding cheesecakes dancing on your taste buds with creamy, dreamy goodness.
Sweet memories of childhood desserts collide with elegant cheesecake brilliance in these petite treats.
Each bite promises a delightful journey through silky textures and rich flavors.
Smooth cream cheese mingles with ripe bananas, creating an irresistible symphony of comfort and indulgence.
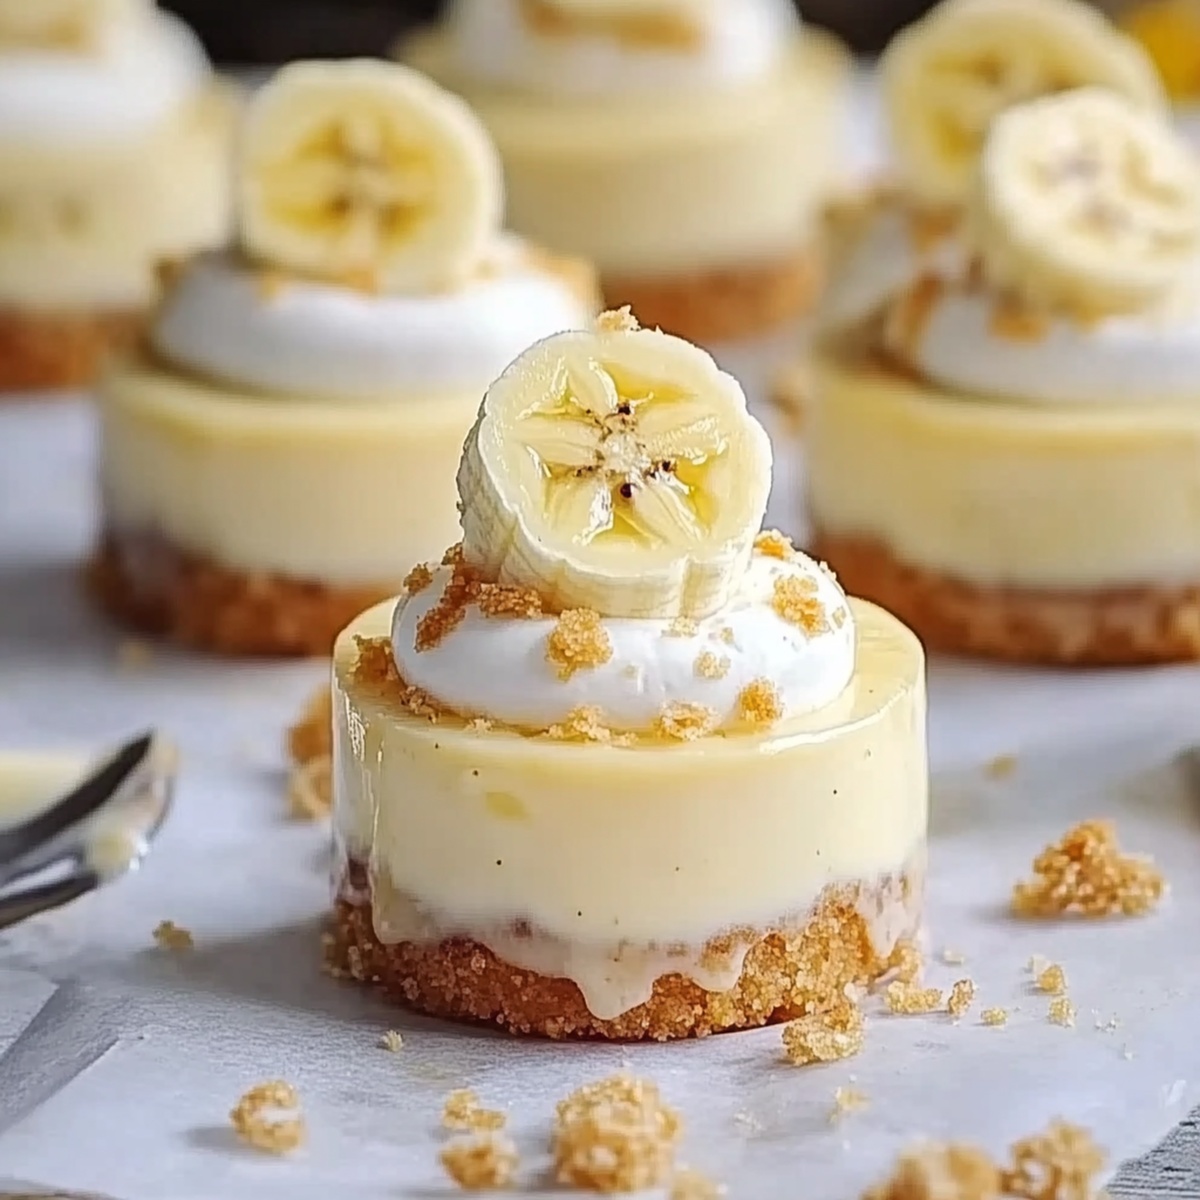
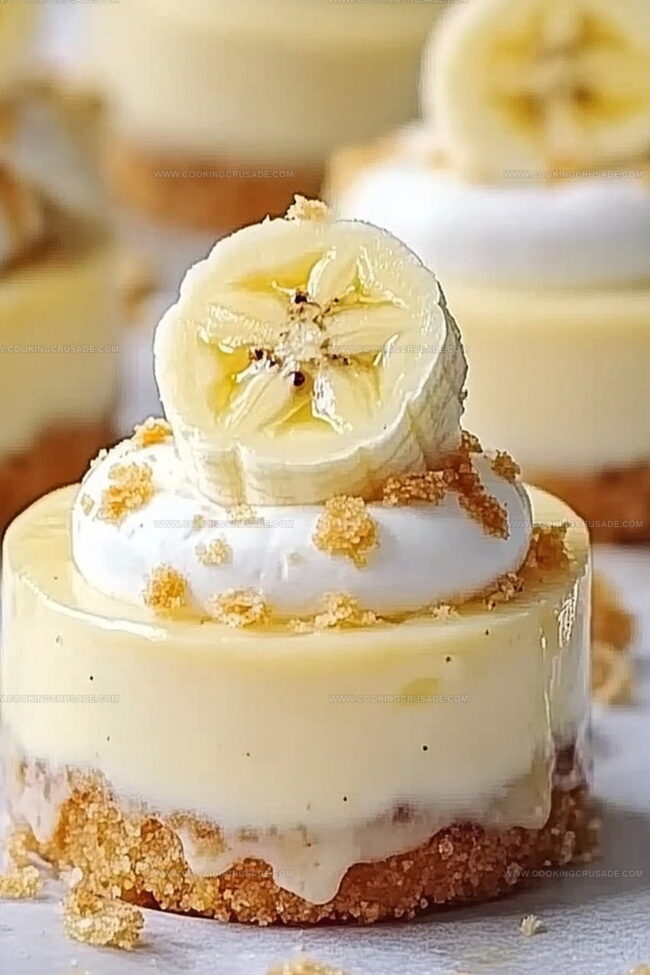
Vanilla wafer crusts add a delightful crunch that elevates the entire experience.
Layers of decadence await you in these perfectly portioned delights.
Serving these charming mini desserts that will instantly spark smiles and conversation around your table.
Why Mini Banana Pudding Cheesecakes Are A Favorite
Mini Banana Pudding Cheesecakes Ingredient List
Crust Base:Cheesecake Filling:Topping and Garnish:Making Mini Banana Pudding Cheesecakes Step By Step

Step 1: Craft The Delectable Crust
Preheat your oven to a cozy 160C (325F). Grab a muffin tin and line it with cute cupcake liners. In a mixing bowl, combine:Blend until the mixture looks like soft, damp sand. Sprinkle this mixture into each muffin cup, pressing down firmly to create a solid base. Pop the tin into the oven for a quick 5-minute toast, then set aside to cool.
Step 2: Whip Up The Creamy Filling
Grab a large mixing bowl and start your cheesecake magic. Blend cream cheese and sugar until silky smooth. Gently incorporate eggs one by one, ensuring each is fully mixed. Fold in:Mix with a light touch – avoid overworking the batter. Divide the luscious mixture evenly among the muffin cups, filling each about three-quarters full.
Step 3: Bake To Perfection
Slide the muffin tin into the oven and bake for 18-20 minutes. You’re looking for centers that are just set with a gentle jiggle. Once done, remove and let them cool completely at room temperature. Chill in the refrigerator for a minimum of 2 hours.
Step 4: Create Dreamy Whipped Topping
In a chilled bowl, whip together:Beat until the mixture forms luxurious, stiff peaks. Transfer to a piping bag with a star tip for that bakery-style finish.
Step 5: Assemble With Flair
Carefully peel away the cupcake liners from your cheesecakes. Pipe a beautiful swirl of whipped cream on top of each mini cheesecake. Crown with a delicate banana slice and a petite Nilla wafer.
Step 6: Serve And Savor
Keep these heavenly treats chilled until you’re ready to indulge. Best enjoyed within two days for maximum deliciousness. Watch as your guests swoon over these miniature banana pudding cheesecakes!
Tips To Nail Mini Banana Pudding Cheesecakes
How To Store Mini Banana Pudding Cheesecakes
What Goes Best With Mini Banana Pudding Cheesecakes
Fun Changes To Mini Banana Pudding Cheesecakes
Mini Banana Pudding Cheesecakes Questions Answered
These mini cheesecakes combine the classic flavors of banana pudding with creamy cheesecake, creating a delightful dessert that’s both nostalgic and indulgent. The Nilla wafer crust and fresh banana topping add extra layers of texture and flavor.
Yes! Thawed frozen bananas work perfectly. Just make sure to drain any excess liquid before mashing them to ensure the right consistency for your cheesecake filling.
Look for slightly jiggly centers that are just set. The edges should be firm, but the middle should have a gentle wobble when you move the pan. This ensures a creamy, smooth texture without overbaking.
No worries! You can simply use a spoon to dollop the whipped cream on top of the cheesecakes. The taste will be exactly the same, and it’ll still look delicious.
Print
Mini Banana Pudding Cheesecakes Recipe
- Total Time: 2 hours 40 minutes
- Yield: 12 1x
Description
Creamy mini banana pudding cheesecakes blend Southern comfort with indulgent dessert magic. Sweet banana and velvety cheesecake layers promise a delightful escape that delights your palate and warms your soul.
Ingredients
Main Components:
- 2 large eggs
- 1 ripe banana, mashed
- 340 g (12 ounces) cream cheese, softened
- 100 g (½ cup) granulated sugar
Crust Ingredients:
- 150 g (1 ½ cups) crushed Nilla wafers (or graham crackers)
- 60 g (¼ cup) unsalted butter, melted
Supporting Ingredients:
- 1 tablespoon all-purpose flour
- 1 teaspoon vanilla extract
Topping Components:
- 120 ml (½ cup) heavy whipping cream
- 2 tablespoons powdered sugar
- ½ teaspoon vanilla extract
- Banana slices (for garnish)
- Mini Nilla wafers (for garnish)
Instructions
- Craft a crumbly foundation by pulverizing Nilla wafers and blending with melted butter until the texture resembles coarse beach sand. Gently press this mixture into each cupcake liner within a muffin tin, creating a compact base. Quick-bake the crust for a crisp preliminary layer that will support the creamy filling.
- Transform cream cheese into a silky smooth canvas by vigorously whisking with granulated sweetener until no lumps remain. Integrate eggs methodically, ensuring each is thoroughly incorporated before adding the next. Fold in mashed ripe bananas, vanilla essence, and flour, stirring with a gentle hand to maintain the batter’s delicate structure.
- Distribute the velvety cheesecake mixture evenly across prepared liners, filling each approximately three-quarters full. Position the pan in a preheated oven and allow the delicate custards to bake until their centers demonstrate a subtle tremor when gently nudged, indicating perfect doneness.
- After removing from the oven, permit the mini cheesecakes to cool completely at room temperature. Transfer to the refrigerator and allow them to chill thoroughly, which will help them set and develop a more intense flavor profile.
- Whip heavy cream with powdered sugar and vanilla until the mixture forms elegant, sturdy peaks. Transfer the airy topping to a piping apparatus fitted with a decorative tip for an elegant finish.
- Liberate the cheesecakes from their paper constraints. Crown each miniature dessert with a luxurious swirl of whipped cream, then garnish with a delicate banana slice and a petite Nilla wafer as a charming final touch.
- Store these elegant individual desserts in the refrigerator, ready to delight guests within a 48-hour window for optimal freshness and flavor integrity.
Notes
- Customize the crust by swapping Nilla wafers with gluten-free graham crackers or almond flour for a dietary-friendly option.
- Prevent cheesecake cracks by avoiding overmixing and gently incorporating eggs at room temperature to maintain a smooth texture.
- Balance banana flavor by using ripe, spotty bananas for deeper sweetness and mashing them thoroughly to distribute evenly throughout the filling.
- Create make-ahead convenience by freezing individual cheesecakes for up to one month, wrapped tightly in plastic wrap and stored in an airtight container.
- Prep Time: 20 minutes
- Cook Time: 20 minutes
- Category: Desserts, Snacks
- Method: Baking
- Cuisine: American
Nutrition
- Serving Size: 12
- Calories: 290
- Sugar: 16 g
- Sodium: 180 mg
- Fat: 18 g
- Saturated Fat: 10 g
- Unsaturated Fat: 8 g
- Trans Fat: 0 g
- Carbohydrates: 30 g
- Fiber: 1 g
- Protein: 3 g
- Cholesterol: 70 mg
James Mitchell
Founder & Recipe Developer
Expertise
Recipe Creation and Testing, Fusion Cuisine, Food Styling and Photography, Culinary Education
Education
Kendall College, Chicago, IL
The Culinary Institute of America, Hyde Park, NY
James Mitchell is the founder and fearless flavor explorer at Cooking Crusade. With a degree in Culinary Arts from Kendall College and advanced training in global gastronomy from The Culinary Institute of America, James has spent over a decade perfecting the art of recipe creation.
His background includes fine dining, private cheffing, and food styling, but his true joy comes from turning big ideas into doable recipes for home cooks. Every dish he shares is a mix of creativity, culture, and a little kitchen magic, built to bring excitement back to everyday meals.