
Sweet Mini Chocolate Chip Cookie Cups with Candy Topping Recipe
These irresistible mini chocolate chip cookie cups combine playful texture with unexpected sweetness.
Sweet tooths will absolutely adore this creative dessert that fits perfectly in one bite.
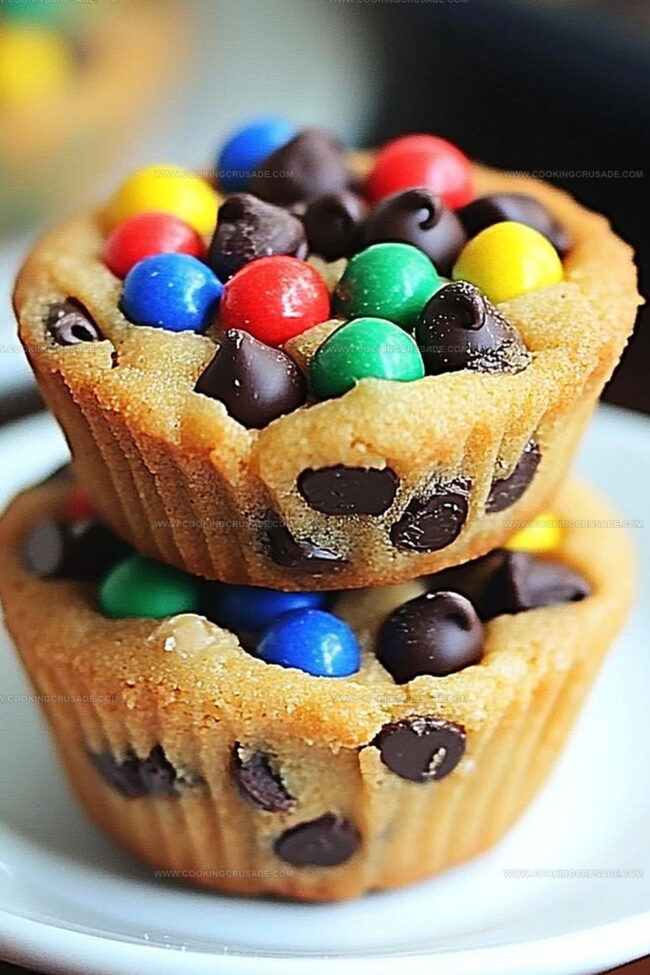
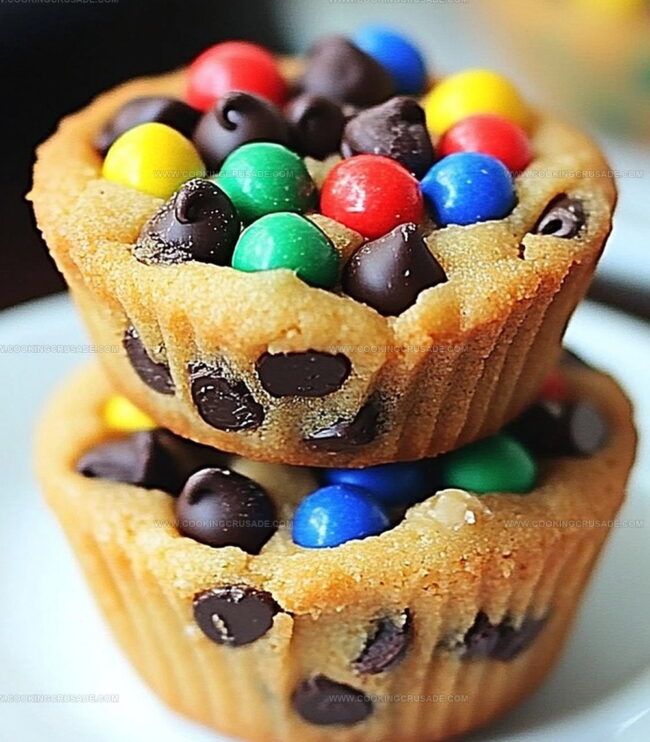
Biting into a tiny cookie shell packed with creamy chocolate and colorful candy pieces.
Compact and adorable, these miniature treats work brilliantly for parties or casual snacking moments.
Each cup delivers a delightful crunch with a smooth chocolate center that melts instantly.
The compact size means you can enjoy multiple without feeling guilty about indulgence.
Grab a batch and watch how quickly they disappear from the serving plate.
What Makes Mini Chocolate Chip Cookie Cups With Candy Topping Fun
All You Need For Mini Chocolate Chip Cookie Cups With Candy Topping
Main Ingredients:
Cookie Base Ingredients:Dry Ingredients:Filling and Topping Ingredients:How To Make Mini Chocolate Chip Cookie Cups With Candy Topping Easily
Step 1: Prepare Baking Space
Warm up your oven to 350F. Grab a mini muffin tin and coat it with cooking spray or butter to prevent sticking.
Step 2: Create Cookie Dough Magic
Gather these ingredients:Blend softened butter with sugars until they transform into a fluffy cloud. Crack in the egg and splash of vanilla, mixing until everything looks smooth. In another bowl, whisk flour, baking soda, and salt. Slowly combine wet and dry mixtures, stirring gently. Sprinkle mini chocolate chips and fold them into the dough.
Step 3: Shape Cookie Cups
Scoop a generous tablespoon of dough into each muffin cavity. Press down softly to create perfect little cups with smooth edges.
Step 4: Bake to Golden Perfection
Slide the tin into the oven. Bake for 8-10 minutes until edges turn golden and centers look slightly puffy.
Step 5: Add Candy Surprise
Pull out the hot cookie cups. Quickly press a fun candy into the center of each warm cup. The heat will help the candy settle perfectly.
Step 6: Cool and Celebrate
Let cookies rest in the tin for 5 minutes. Transfer to a cooling rack. Once completely cool, these treat cups are ready to delight everyone!
Optional: Drizzle with melted chocolate or sprinkle with colorful toppings for extra excitement.
Smart Tips For Mini Chocolate Chip Cookie Cups With Candy Topping
Store Mini Chocolate Chip Cookie Cups With Candy Topping Properly
Great Pairings For Mini Chocolate Chip Cookie Cups With Candy Topping
Cool Changes For Mini Chocolate Chip Cookie Cups With Candy Topping
FAQs On Mini Chocolate Chip Cookie Cups With Candy Topping
A mini muffin tin helps create perfectly portioned, bite-sized treats with uniform shape and even baking. The small cavities ensure each cookie cup is consistent in size and looks adorably cute.
Yes! You can prepare the cookie dough in advance and refrigerate it for up to 3 days before baking. The unbaked dough can also be frozen for up to 2 weeks, making these a convenient make-ahead dessert.
Chocolate candies like Rolos, Reese’s Cups, Hershey’s Kisses, or Revel’s work wonderfully. These candies melt slightly when pressed into the warm cookie, creating a delicious gooey center that adds extra flavor and texture.
Generously grease the mini muffin tin with cooking spray or butter before adding the dough. Alternatively, use paper liners for easy removal. Let the cookie cups cool in the tin for 5 minutes before transferring to prevent breaking.
Print
Mini Chocolate Chip Cookie Cups With Candy Topping Recipe
- Total Time: 20 minutes
- Yield: 12 1x
Description
Delightful mini chocolate chip cookie cups dazzle dessert enthusiasts with their irresistible blend of classic cookie charm and playful candy crunch. Sweet miniature treats invite chocolate lovers to savor each bite-sized morsel of pure indulgence.
Ingredients
Main Cookie Ingredients:
- 1 ¼ cups all-purpose flour
- ¾ cup mini chocolate chips
- ½ cup unsalted butter, softened
- ½ cup granulated sugar
- ¼ cup light brown sugar, packed
Binding and Flavor Ingredients:
- 1 large egg
- 1 teaspoon vanilla extract
- ½ teaspoon baking soda
- ¼ teaspoon salt
Topping Ingredients:
- Assorted candies (mini peanut butter cups, M&Ms, Rolos, or Hershey’s Kisses)
Instructions
- Prepare the baking environment by heating the oven to 350F (175C). Thoroughly coat a mini muffin tin with non-stick spray or line with paper cups to prevent sticking.
- Create a smooth butter mixture by vigorously blending softened butter with granulated and brown sugars until the texture becomes light and airy. Incorporate the egg and vanilla extract, mixing until the ingredients are fully integrated.
- In a separate container, carefully combine flour, baking soda, and salt using a whisk. Gradually introduce the dry ingredients into the butter mixture, stirring gently to maintain a soft, consistent dough. Delicately fold mini chocolate chips throughout the mixture.
- Portion the cookie dough into each muffin cavity, using approximately one tablespoon per cup. Softly press the dough to create an even, compact layer that fills the bottom of each cavity.
- Place the muffin tin in the preheated oven and bake for 8-10 minutes. Look for golden-brown edges and slightly puffy centers as indicators of perfect doneness.
- Immediately after removing from the oven, carefully press a selected candy into the center of each warm cookie cup. Allow the cookie cups to rest in the tin for 5 minutes to set their shape.
- Transfer the cookie cups to a cooling rack, letting them reach room temperature. For an elegant finish, consider drizzling melted chocolate or sprinkling decorative elements on top before serving.
Notes
- Ensure butter is softened at room temperature for smooth, creamy mixing without lumps.
- Press cookie dough gently into muffin tin cavities to create uniform, perfectly shaped cups with crisp edges.
- Choose candies that melt slightly when warm, like Rolos or Reese’s Cups, for an extra gooey center and rich flavor profile.
- For gluten-free version, swap all-purpose flour with a 1:1 gluten-free baking blend to maintain the same tender texture.
- Prep Time: 10 minutes
- Cook Time: 10 minutes
- Category: Desserts, Snacks
- Method: Baking
- Cuisine: American
Nutrition
- Serving Size: 12
- Calories: 160
- Sugar: 10 g
- Sodium: 90 mg
- Fat: 7 g
- Saturated Fat: 4 g
- Unsaturated Fat: 2.5 g
- Trans Fat: 0 g
- Carbohydrates: 22 g
- Fiber: 1 g
- Protein: 2 g
- Cholesterol: 15 mg
James Mitchell
Founder & Recipe Developer
Expertise
Recipe Creation and Testing, Fusion Cuisine, Food Styling and Photography, Culinary Education
Education
Kendall College, Chicago, IL
The Culinary Institute of America, Hyde Park, NY
James Mitchell is the founder and fearless flavor explorer at Cooking Crusade. With a degree in Culinary Arts from Kendall College and advanced training in global gastronomy from The Culinary Institute of America, James has spent over a decade perfecting the art of recipe creation.
His background includes fine dining, private cheffing, and food styling, but his true joy comes from turning big ideas into doable recipes for home cooks. Every dish he shares is a mix of creativity, culture, and a little kitchen magic, built to bring excitement back to everyday meals.