Dreamy Red Velvet Cake in a Jar Recipe for Sweet Moments
Sweet memories often start with an unexpected red velvet cake in a jar that catches your eye unexpectedly.
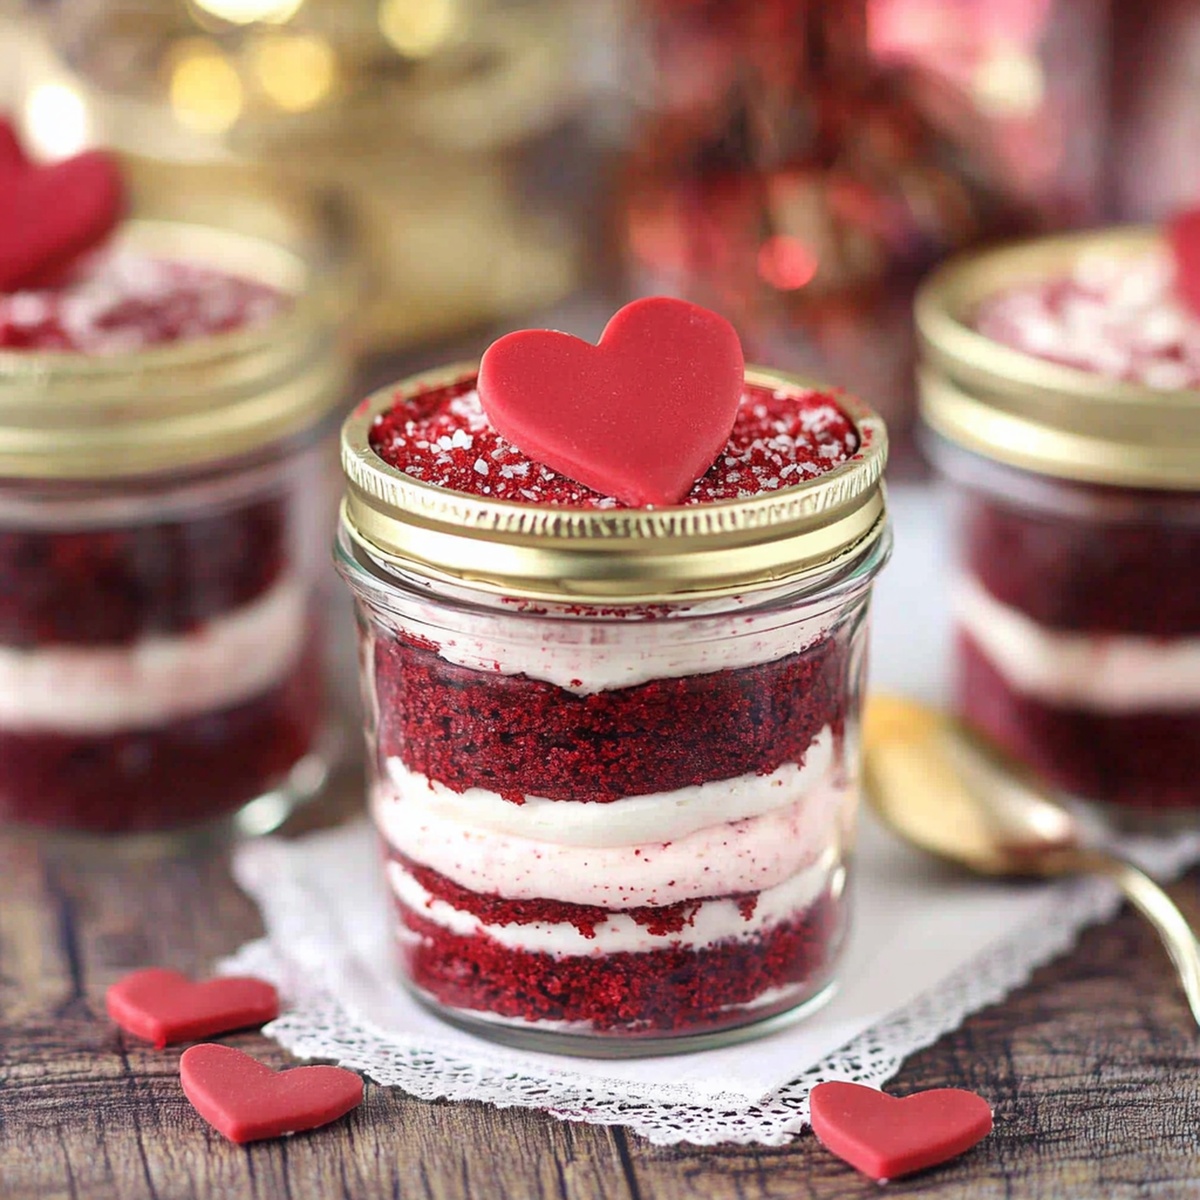
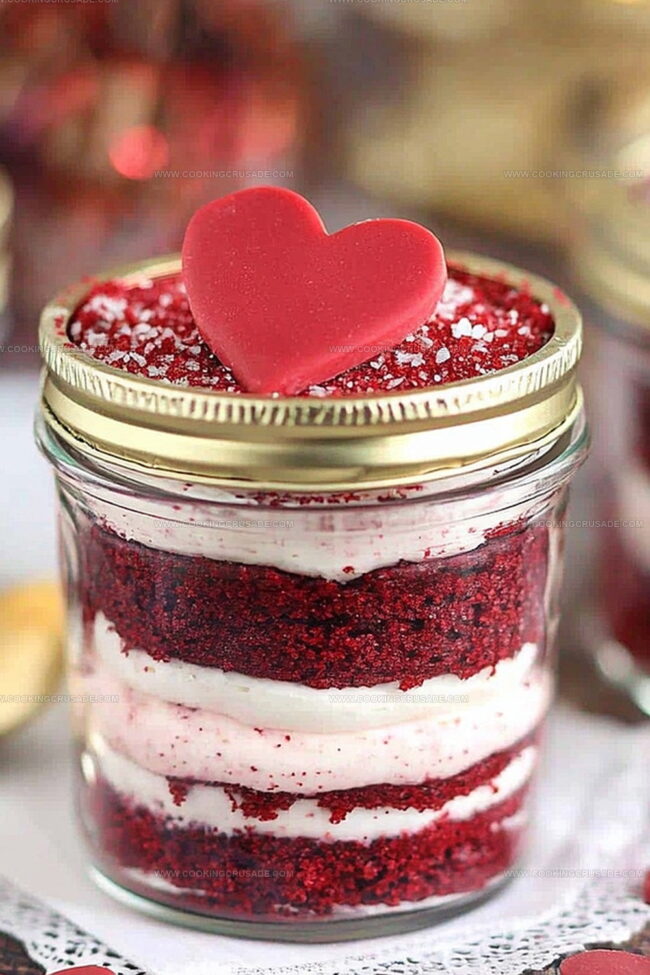
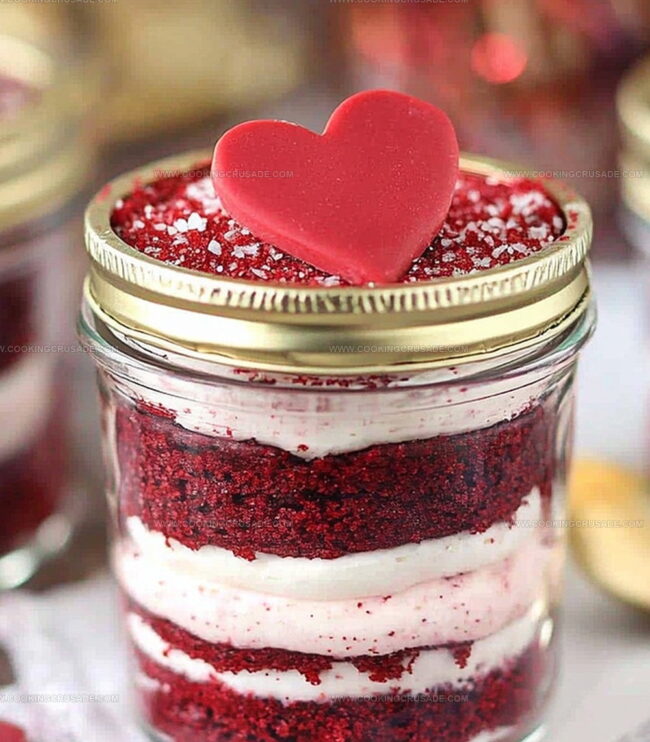
Layers of crimson-hued goodness peek through glass walls, promising a delightful dessert adventure.
Compact and charming, this miniature treat breaks traditional baking boundaries with its playful presentation.
Mason jars become magical vessels that hold rich, velvety cake and smooth cream cheese frosting.
Portable desserts like these make sharing simple and elegant for any gathering or quiet moment of indulgence.
Each spoonful delivers a perfect balance of moist cake and creamy frosting that melts deliciously on your tongue.
You’ll want to whip up these adorable desserts right away and impress everyone with your creative baking skills.
Why Red Velvet Cake In A Jar Feels So Special
What You’ll Need For Red Velvet Cake In A Jar
Main Cake Ingredients:Wet Ingredients:Frosting Ingredients:Easy Instructions For Red Velvet Cake In A Jar
Step 1: Warm Up the Oven
Preheat your oven to a cozy 350°F (175°C). Grab a 9×13-inch baking pan and give it some love with a light grease, then line it with parchment paper.
Step 2: Mix Dry Ingredients
Grab a mixing bowl and whisk together the dry ingredients:Step 3: Blend Wet Ingredients
In a separate bowl, whisk together these magical ingredients:Step 4: Create Cake Batter
Slowly pour the dry ingredients into the wet ingredients. Gently mix until everything just comes together – don’t overmix! The batter should look smooth and vibrant red.
Step 5: Bake the Cake
Pour the batter into the prepared pan. Slide it into the preheated oven and bake for 25-30 minutes. You’ll know it’s done when a toothpick comes out clean. Let the cake cool completely – patience is key!
Step 6: Whip Up Cream Cheese Frosting
In a large bowl, beat cream cheese and butter until they become best friends and look super smooth.
Step 7: Prepare Cake Layers
Use a round cookie cutter or a cup to cut perfect cake circles that fit into your mason jars.
Step 8: Build Jar Masterpieces
Start layering your jar:Step 9: Chill and Enjoy
Pop the jars in the refrigerator for at least 30 minutes. Grab a spoon and dive into your delicious creation!
Tips To Get Red Velvet Cake In A Jar Just Right
How To Store Red Velvet Cake In A Jar
Best Things To Pair With Red Velvet Cake In A Jar
Red Velvet Cake In A Jar With A Twist
Your Red Velvet Cake In A Jar Questions Answered
The signature deep red color and subtle cocoa flavor set red velvet cake apart. It uses a small amount of cocoa powder and vinegar, which creates a unique tangy taste and tender crumb that distinguishes it from traditional chocolate cakes.
The acidic ingredients like buttermilk and vinegar react with baking soda, helping the cake become lighter and more tender. They also enhance the cake’s texture, making it soft and moist with a subtle tanginess that complements the cream cheese frosting.
While red food coloring creates the classic vibrant red color, you can skip it for a more natural look. The cake will still taste delicious and have the traditional red velvet flavor profile without the intense red hue.
Mason jars work best because they’re sturdy and have straight sides, making layering easier. However, you can use clear glasses or small mason-style jars with similar dimensions to create these portable, individual desserts.
Print
Red Velvet Cake In A Jar Recipe
- Total Time: 1 hour 30 minutes
- Yield: 68 1x
Description
Red velvet cake nestled in charming mason jars delivers sweet nostalgia with Southern charm. Rich cocoa-infused layers swirled with cream cheese frosting create irresistible personal desserts for you to savor and share.
Ingredients
cake ingredients:
- 2 ½ cups (300g) all-purpose flour
- 1 ½ cups (300g) granulated sugar
- 1 cup (240ml) buttermilk
- 1 cup (240ml) vegetable oil
- 2 large eggs, room temperature
- 2 tablespoons (30ml) red food coloring
- 1 teaspoon baking soda
- 1 teaspoon cocoa powder
- 1 teaspoon salt
- 1 teaspoon white vinegar
- 1 teaspoon vanilla extract
frosting ingredients:
- 8 ounces (226g) cream cheese, softened
- ½ cup (1 stick or 113g) unsalted butter, softened
- 3 cups (360g) powdered sugar
- 1 teaspoon vanilla extract
additional items:
- 6–8 small mason jars (8 ounces each)
- crushed red velvet cake crumbs for garnish (optional)
Instructions
- Prepare the cake foundation by combining dry ingredients in a mixing vessel, ensuring a uniform blend of flour, cocoa powder, sugar, baking soda, and salt.
- Whisk liquid components separately, integrating buttermilk, vegetable oil, eggs, vanilla extract, white vinegar, and vibrant red food coloring until thoroughly incorporated.
- Gently fold dry ingredients into wet mixture, stirring minimally to prevent overmixing and maintain a tender crumb texture.
- Transfer cake batter into a meticulously greased rectangular baking vessel lined with parchment paper.
- Slide pan into a preheated oven set at 350°F and bake approximately 25-30 minutes, monitoring until a test skewer emerges cleanly from the center.
- Allow cake to cool completely on a wire rack, facilitating easier handling and cutting.
- Craft cream cheese frosting by whipping room-temperature cream cheese and butter until silky and uniform.
- Gradually incorporate powdered sugar, blending thoroughly after each addition to prevent lumps.
- Infuse frosting with vanilla extract, beating until achieving a light, fluffy consistency.
- Select clean mason jars as serving vessels.
- Utilize a circular cutting tool to create precise cake rounds matching jar diameter.
- Layer cake circles and frosting alternately within jars, beginning with cake and concluding with a decorative frosting peak.
- Optionally garnish with delicate cake crumbs or festive sprinkles for visual appeal.
- Refrigerate assembled desserts for minimum 30 minutes to enhance flavor melding and structural stability.
- Serve chilled, encouraging direct jar consumption with a dessert spoon.
Notes
- Swap red food coloring with natural alternatives like beetroot powder or pomegranate juice for a healthier twist.
- Use gluten-free flour blend to make this dessert suitable for those with gluten sensitivities.
- Choose low-fat cream cheese and reduce sugar for a lighter version of the classic recipe.
- Ensure all ingredients are at room temperature to create a smoother, more evenly mixed batter.
- Prep Time: 30 minutes
- Cook Time: 30 minutes
- Category: Desserts, Snacks
- Method: Baking
- Cuisine: American
Nutrition
- Serving Size: 68
- Calories: 310
- Sugar: 30 g
- Sodium: 200 mg
- Fat: 18 g
- Saturated Fat: 6 g
- Unsaturated Fat: 10 g
- Trans Fat: 0 g
- Carbohydrates: 36 g
- Fiber: 0 g
- Protein: 3 g
- Cholesterol: 45 mg
James Mitchell
Founder & Recipe Developer
Expertise
Recipe Creation and Testing, Fusion Cuisine, Food Styling and Photography, Culinary Education
Education
Kendall College, Chicago, IL
The Culinary Institute of America, Hyde Park, NY
James Mitchell is the founder and fearless flavor explorer at Cooking Crusade. With a degree in Culinary Arts from Kendall College and advanced training in global gastronomy from The Culinary Institute of America, James has spent over a decade perfecting the art of recipe creation.
His background includes fine dining, private cheffing, and food styling, but his true joy comes from turning big ideas into doable recipes for home cooks. Every dish he shares is a mix of creativity, culture, and a little kitchen magic, built to bring excitement back to everyday meals.