Simple Irish Scones Recipe: A Fresh Twist on a Classic Treat
Flaky and golden, these traditional irish scones recipe bring a taste of emerald isle comfort straight to your kitchen.
Warm ovens and soft butter beckon with promise of delectable bites.
Every crumb tells a story of generations past, carrying whispers of irish countryside kitchens.
Simple ingredients dance together, creating a pastry that’s both rustic and elegant.
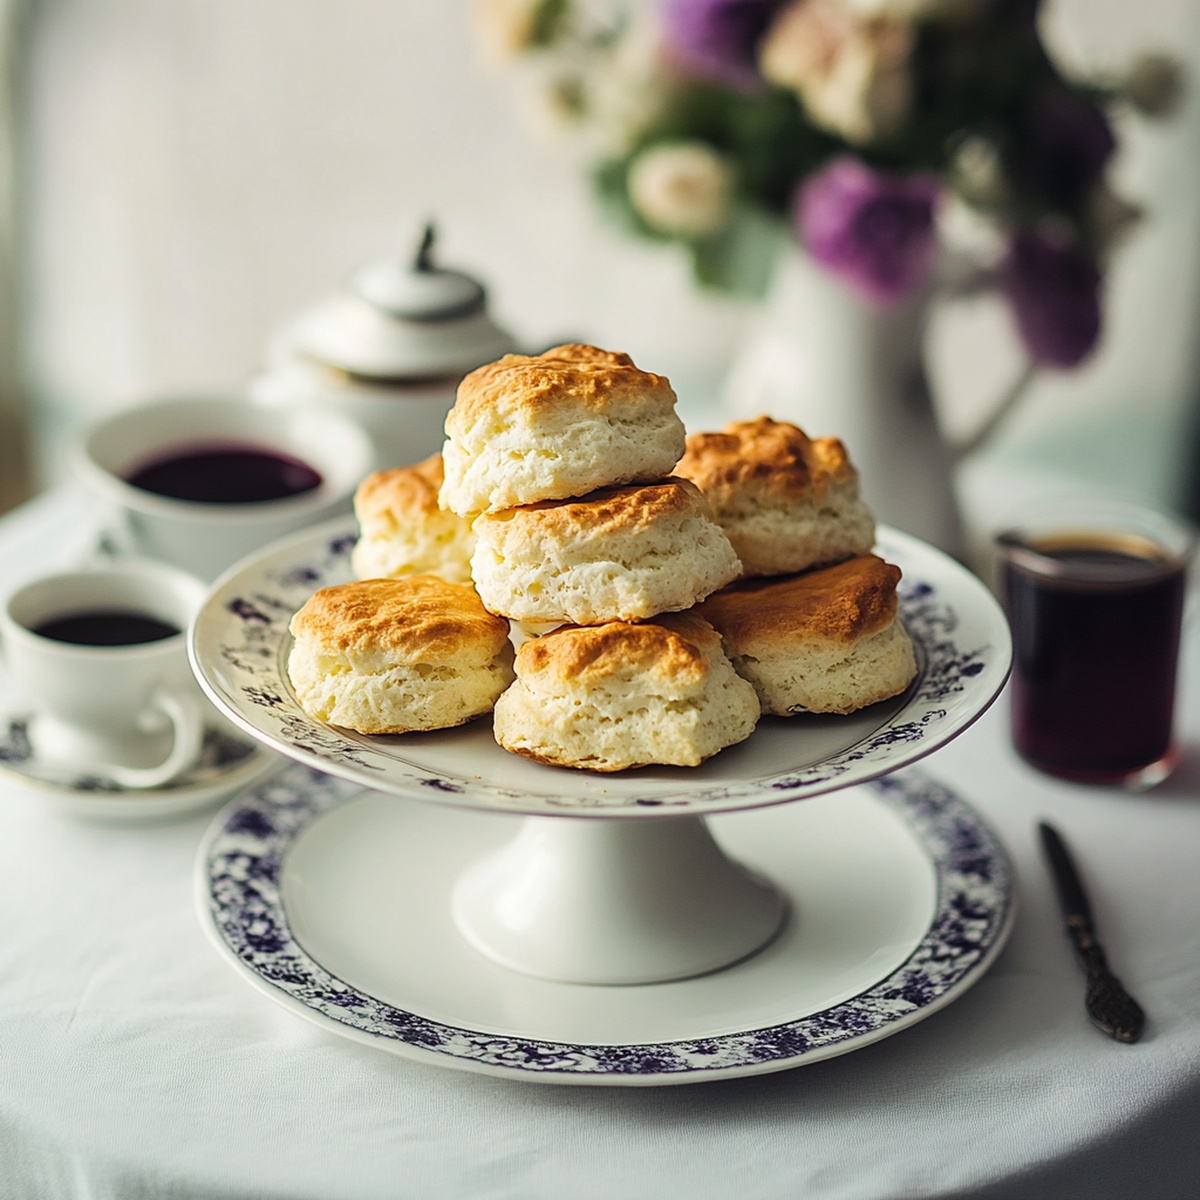
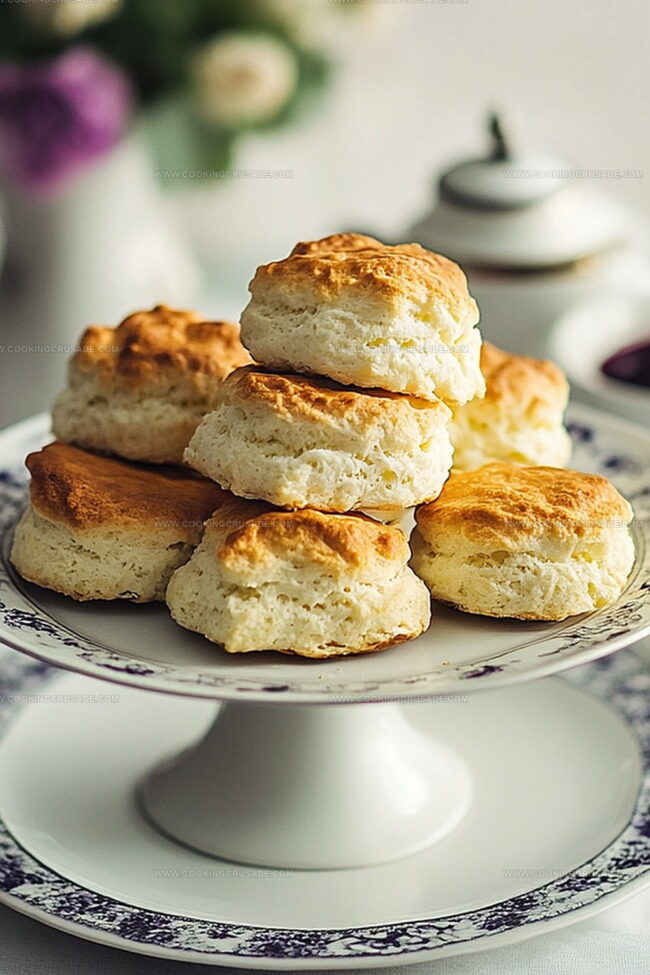
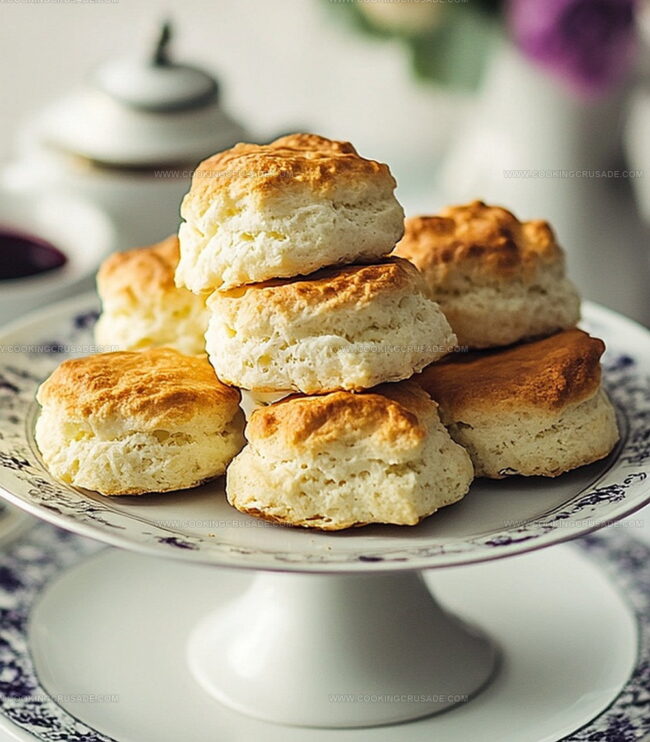
Scones emerge from the oven with a delicate crackled top, promising a tender interior that melts in your mouth.
Fresh cream and a dollop of jam transform these humble treats into a delightful breakfast or afternoon indulgence.
Bake these scones and let your senses travel to the rolling green hills of ireland.
Quick Recipe Overview
What You’ll Need For Irish Scones
For Dry Base:For Moisture and Binding:For Enriching Flavor:Baking Tools For Irish Scones
Steps For Making Irish Scones
Crank the oven to a toasty 400F. Grab a baking sheet and line it with parchment paper.
Toss flour, sugar, baking powder, and salt into a large mixing bowl. Mix them together like you’re preparing for a delicious adventure.
Drop cold, chopped butter into the flour mixture. Use your fingertips or a pastry cutter to blend until the mixture looks like rough, crumbly sand.
Whisk milk and eggs in a separate bowl. Create a little crater in the center of your dry ingredients and pour in the wet mixture. Stir gently until a soft, pillowy dough emerges.
Want to jazz things up? Fold in some raisins for a sweet twist.
Dust a surface with flour. Knead the dough gently for a minute until it feels smooth. Pat it into a circle about an inch thick.
Use a round cutter to transform your dough into perfect little circles. Transfer these beauties onto the prepared baking sheet. Gather up the leftover dough and create more scones.
Brush the tops with egg wash to give them a beautiful golden glow. Slide into the oven and bake for 15-20 minutes until they’re a gorgeous, warm brown.
Extra Baking Tips For Irish Scones
Serving Ideas For Irish Scones
How To Store Irish Scones
Print
Rustic Irish Scones Recipe
- Total Time: 35 minutes
- Yield: 13 1x
Description
Delightful Irish scones blend traditional Irish baking with simple, hearty ingredients that bring comfort to morning tables. Warm butter and fresh cream create a tender crumb that invites you to savor each delectable bite.
Ingredients
- 4 cups (480 g) all-purpose flour
- ¾ cup (170 g) cold unsalted butter, cut into small cubes
- 1 cup (240 ml) cold whole milk (or buttermilk)
- 2 large eggs, lightly beaten
- 1 cup raisins or currants (optional)
- ¼ cup (50 g) granulated sugar
- 2 tbsps baking powder
- ½ tsp salt
- 1 egg, beaten with 1 tbsp milk
Instructions
- Oven Preparation: Preheat the oven to 400F (200C) and line a baking sheet with parchment paper, creating an optimal cooking environment for golden, flaky scones.
- Dry Ingredient Fusion: Combine flour, sugar, baking powder, and salt in a large mixing bowl, whisking thoroughly to establish a uniform dry foundation that ensures consistent texture and flavor.
- Butter Integration: Introduce cold, cubed butter into the dry mixture, using a pastry cutter or fingertips to break down the butter until the texture resembles coarse, sandy crumbs that will provide rich, buttery layers.
- Liquid Incorporation: Whisk milk and eggs in a separate bowl, then create a well in the center of the dry ingredients. Gently fold the wet mixture into the dry components, mixing until a soft, cohesive dough forms without overmixing.
- Flavor Enhancement: Fold raisins or currants into the dough, distributing them evenly to guarantee a delightful burst of sweetness in every bite.
- Dough Shaping: Transfer the dough to a lightly floured surface, knead briefly to achieve a smooth consistency, then shape into a circular disc approximately one inch thick, preparing for precise cutting.
- Scone Formation and Finishing: Use a round biscuit cutter to shape individual scones, placing them on the prepared baking sheet. Brush the tops with egg wash to create a glossy, golden-brown exterior that promises a delectable crunch.
- Baking Process: Bake for 15-20 minutes until the scones develop a rich, warm coloration and achieve a perfectly crisp exterior, signaling their readiness to be enjoyed.
Notes
- Chill Butter Thoroughly: Keep butter extremely cold to create flaky, tender scone texture; freeze for 10-15 minutes before cutting into cubes for optimal results.
- Handle Dough Minimally: Avoid overworking the dough to prevent tough, dense scones; mix just until ingredients combine to maintain a light, delicate crumb.
- Control Moisture Carefully: Add liquid incrementally to achieve perfect dough consistency; too much liquid creates sticky dough, while too little results in dry scones.
- Customize Flavor Creatively: Experiment with mix-ins like orange zest, lavender, chocolate chips, or nuts to transform classic scone recipe and suit personal taste preferences.
- Prep Time: 15 minutes
- Cook Time: 20 minutes
- Category: Breakfast, Snacks, Desserts
- Method: Baking
- Cuisine: Irish
Nutrition
- Serving Size: 13
- Calories: 242
- Sugar: 6 g
- Sodium: 113 mg
- Fat: 10 g
- Saturated Fat: 6 g
- Unsaturated Fat: 4 g
- Trans Fat: 0 g
- Carbohydrates: 34 g
- Fiber: 1 g
- Protein: 5 g
- Cholesterol: 65 mg
Olivia Bennett
Co-Founder & Content Creator
Expertise
Nutritional Analysis, Dietary Accommodations, Food Writing and Blogging,
Education
University of Texas at Austin
Institute of Culinary Education, New York, NY
Olivia Bennett is Cooking Crusade’s go-to expert for nutritious, feel-good food. Based in Austin, she blends her degree in Nutrition from the University of Texas with plant-based culinary training from the Institute of Culinary Education.
Olivia’s recipes are all about balance: vibrant, wholesome, and easy-to-love dishes that work for all kinds of eaters. Her mission is simple: to make healthy eating approachable and genuinely tasty, with tips that support your lifestyle, not complicate it.