
The Perfect Salty Peanut Banana Pudding Recipe for Sweet Cravings
Crafting a delightful salty peanut banana pudding challenges traditional dessert expectations in the most delicious way.
Unexpected flavor combinations often spark culinary magic, creating memorable taste experiences.
Creamy textures blend with surprising salt-infused nuances that dance across your palate.
Nutty crunchiness intertwines with smooth banana sweetness, promising a complex dessert adventure.
Comfort meets excitement in this innovative treat that breaks standard pudding rules.
Rich layers of contrasting flavors will make you rethink traditional dessert boundaries.
Each spoonful delivers a playful balance between sweet, salty, and utterly irresistible elements.
Prepare to embark on a tantalizing journey that transforms simple ingredients into an extraordinary dessert.
Why Peanut Banana Pudding Tastes So Unexpectedly Good
Everything You Need for This Bold Flavor Combo
Pudding Base:Cream and Sweeteners:Layering Ingredients:Steps to Whip Up a Creamy Crunchy Pudding
Step 1: Whip Up the Pudding Base
Grab a medium mixing bowl and pour in the instant pudding mix. Splash in some cold milk and start whisking with enthusiasm. Keep stirring for about 2 minutes until the mixture transforms into a smooth, creamy texture. In another bowl, grab your heavy cream and sprinkle in powdered sugar with a dash of vanilla extract. Whip this concoction until it creates stiff, cloud-like peaks. Gently fold the whipped cream into the pudding, creating a dreamy, velvety mixture. Pop this into the refrigerator to chill for 20-30 minutes.
Step 2: Create Delicious Layers
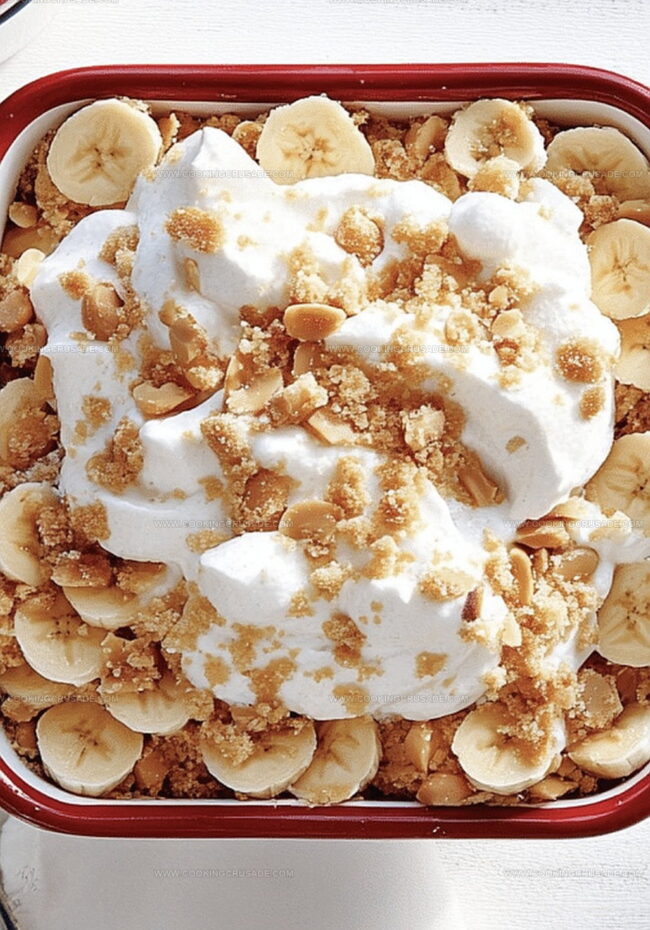
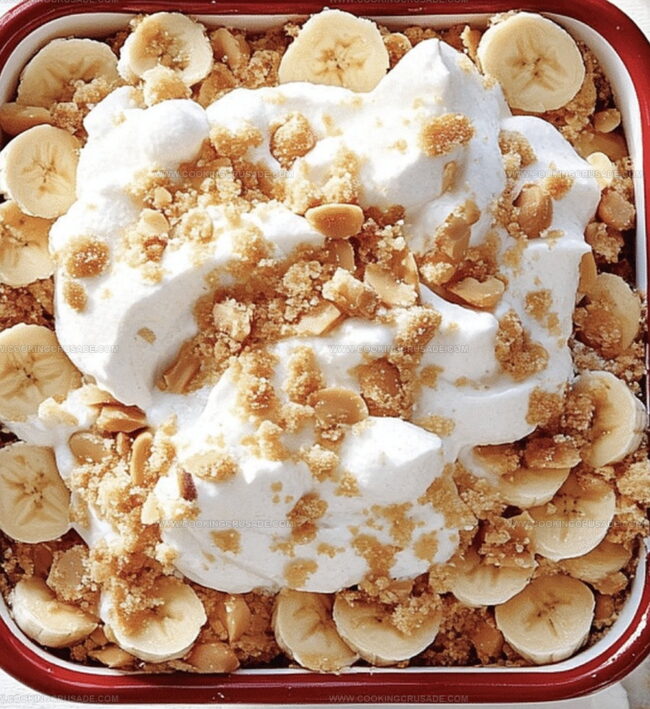
Select your favorite serving dish – a fancy trifle bowl, clear glass container, or individual cute cups work perfectly. Start by spreading a generous layer of the chilled pudding along the bottom. Next, artfully arrange banana slices across the pudding. Crumble vanilla wafers to create a crunchy layer. Sprinkle a handful of salted peanuts for that irresistible salty crunch. Repeat these layers, making sure to end with a final luscious layer of pudding on top.
Step 3: Final Touches and Chilling
Dress up your dessert with some final flourishes. Scatter crushed peanuts across the top. If you’re feeling extra indulgent, add a few fresh banana slices and a dollop of whipped cream. Slide the entire creation into the refrigerator and let it rest for at least 2 hours. This resting time allows all the flavors to mingle and create a magical dessert experience. The longer it chills, the more delicious it becomes – overnight is pure perfection!
Tips for Salty-Sweet Balance
How to Store Without Mushy Layers
Pair With Drinks That Complement the Contrast
Variations With Different Nuts or Fruits
Banana Pudding Questions, Answered Fast
While instant pudding mix provides convenience, you can make a homemade custard pudding. However, the texture and setting time might differ from the original recipe.
Yes! Simply replace vanilla wafers with gluten-free cookies or graham crackers. Make sure all other ingredients are certified gluten-free.
Toss banana slices in a little lemon juice before layering. The citric acid helps slow down oxidation and keeps bananas looking fresh and white.
Absolutely! This pudding actually tastes better when prepared 8-12 hours in advance. The flavors meld beautifully, and the wafers soften perfectly in the refrigerator.
Print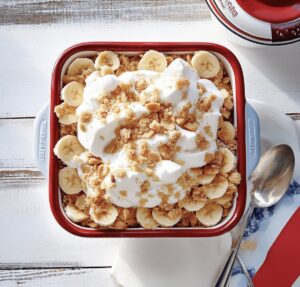
Salty Peanut Banana Pudding Recipe
- Total Time: 2 hours 20 minutes
- Yield: 8 1x
Description
Southern charm meets creamy comfort in this Salty Peanut Banana Pudding, blending rich banana layers with crunchy peanut accents. Nostalgic flavors dance together, inviting you to savor each spoonful of this classic dessert with a salty-sweet twist.
Ingredients
Main Ingredients:
- 4 large bananas, sliced
- 2 cups salted peanuts, roughly chopped
- 1 box (11 ounces/311 grams) vanilla wafers or butter cookies
Dairy and Pudding Base:
- 1 package (3.4 ounces/96 grams) instant vanilla pudding mix
- 2 cups cold milk
- 1 cup heavy cream
- ¼ cup powdered sugar
- 1 teaspoon vanilla extract
Garnish:
- Crushed peanuts
- Banana slices
- Whipped cream
Instructions
- Craft the creamy pudding foundation by whisking instant pudding mix with cold milk until it achieves a luxurious, smooth consistency. Ensure thorough blending to eliminate any potential lumps.
- Prepare a cloud-like whipped cream by vigorously beating heavy cream with powdered sugar and vanilla extract until stiff, glossy peaks form, creating a decadent texture.
- Delicately incorporate the whipped cream into the pudding mixture, folding gently to maintain the airy structure and create a harmonious blend.
- Chill the pudding mixture in the refrigerator for 20-30 minutes to allow flavors to meld and texture to set.
- Select a serving vessel – either a trifle dish, glass bowl, or individual cups – and begin layering your dessert with a generous base of the chilled pudding.
- Arrange a layer of freshly sliced bananas over the pudding, ensuring even coverage and maximum flavor distribution.
- Carefully place vanilla wafers atop the banana layer, creating a delightful textural contrast.
- Sprinkle a crunchy layer of salted peanuts to introduce a savory element that complements the sweet base.
- Repeat the layering process, alternating pudding, bananas, wafers, and peanuts, building a visually appealing and flavor-packed dessert.
- Complete the final layer with a smooth pudding topping, creating an elegant finish.
- Enhance the presentation by garnishing with additional crushed peanuts, delicate banana slices, and an optional dollop of whipped cream.
- Refrigerate the assembled dessert for a minimum of 2 hours, allowing the flavors to harmonize and the texture to become perfectly cohesive.
Notes
- Swap instant pudding mix with homemade vanilla custard for a richer, more authentic flavor profile that elevates the dessert’s complexity.
- Toast peanuts briefly before sprinkling to enhance their nutty aroma and add a delightful crunch that contrasts with the creamy pudding texture.
- Use slightly underripe bananas to prevent browning and maintain structural integrity when layering, ensuring each slice looks fresh and appetizing.
- Prepare this dessert ahead of time for stress-free entertaining, as the overnight chilling allows flavors to develop and intensify, creating a more harmonious taste experience.
- Prep Time: 20 minutes
- Cook Time: 2 hours
- Category: Desserts, Snacks
- Method: Mixing
- Cuisine: American
Nutrition
- Serving Size: 8
- Calories: 320
- Sugar: 18 g
- Sodium: 250 mg
- Fat: 22 g
- Saturated Fat: 8 g
- Unsaturated Fat: 12 g
- Trans Fat: 0 g
- Carbohydrates: 30 g
- Fiber: 2 g
- Protein: 6 g
- Cholesterol: 40 mg
James Mitchell
Founder & Recipe Developer
Expertise
Recipe Creation and Testing, Fusion Cuisine, Food Styling and Photography, Culinary Education
Education
Kendall College, Chicago, IL
The Culinary Institute of America, Hyde Park, NY
James Mitchell is the founder and fearless flavor explorer at Cooking Crusade. With a degree in Culinary Arts from Kendall College and advanced training in global gastronomy from The Culinary Institute of America, James has spent over a decade perfecting the art of recipe creation.
His background includes fine dining, private cheffing, and food styling, but his true joy comes from turning big ideas into doable recipes for home cooks. Every dish he shares is a mix of creativity, culture, and a little kitchen magic, built to bring excitement back to everyday meals.