Velvety Vanilla Bean Cheesecake Recipe: A Sweet Dream Come True
Creamy cheesecakes have always held a special place in dessert lovers’ hearts, and this silky vanilla bean cheesecake recipe delivers pure decadence.
Rich cream cheese melts together with delicate vanilla bean essence, creating an irresistible texture.
Each spoonful promises a luxurious experience that dances across your palate.
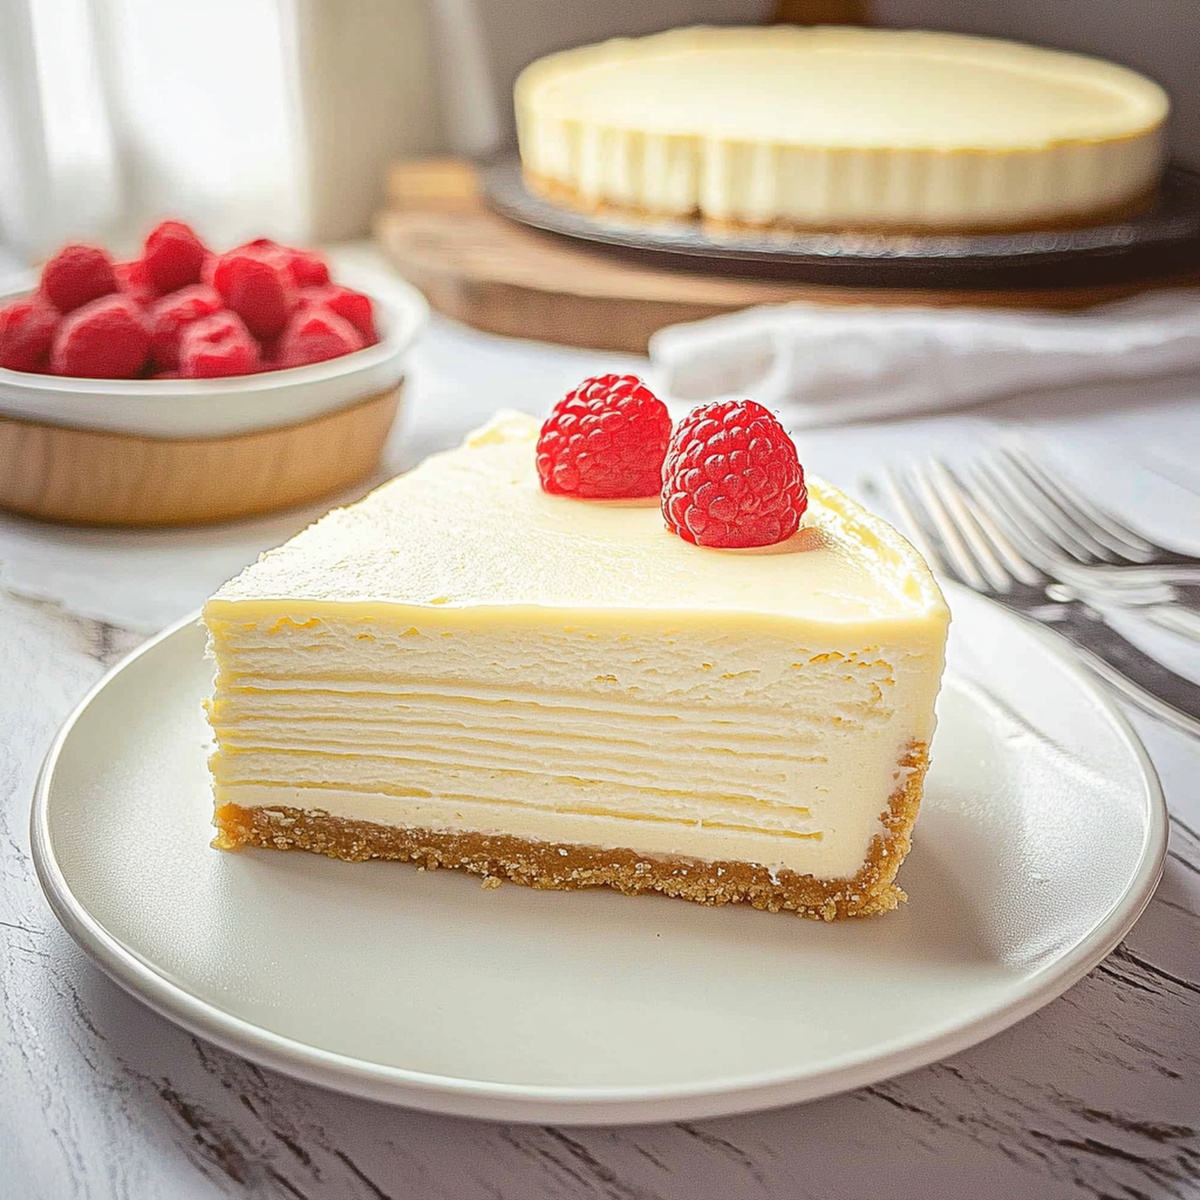
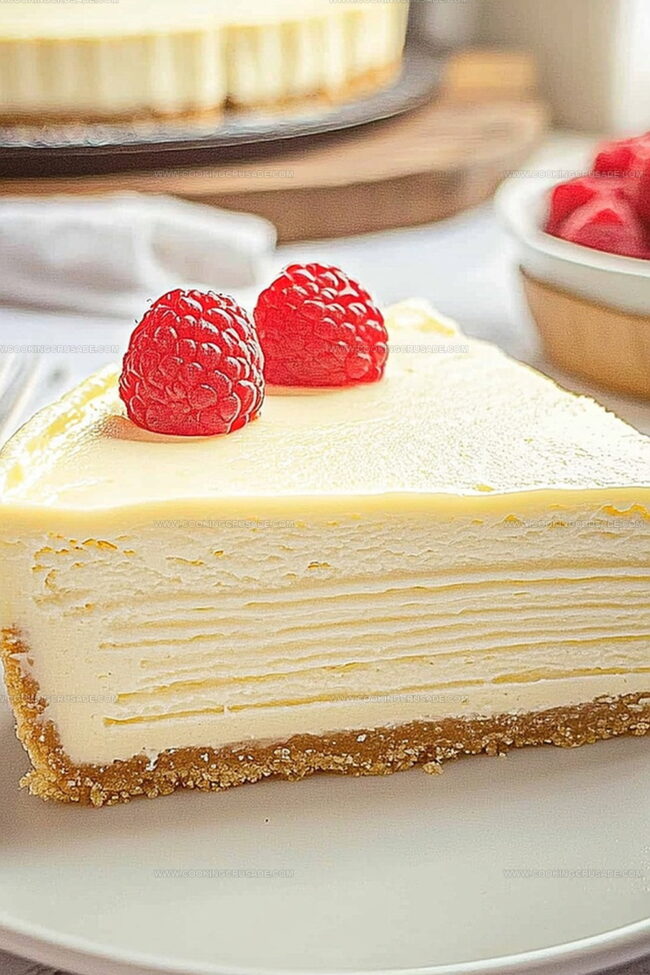
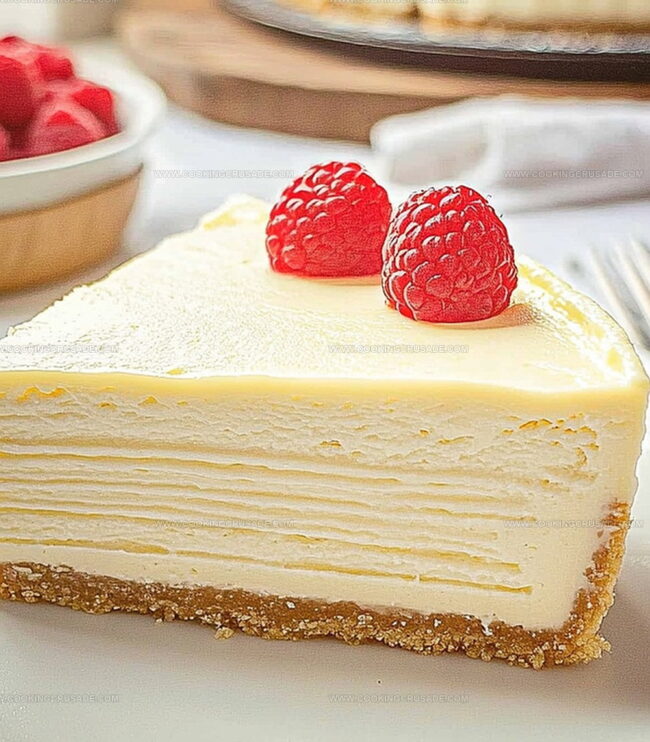
The smooth, velvety filling sits atop a buttery graham cracker crust that crumbles perfectly with every bite.
Delicate vanilla seeds sprinkled throughout add elegant visual appeal and intense flavor depth.
Chilled and perfectly set, this cheesecake transforms an ordinary evening into a gourmet celebration.
Indulge in this heavenly dessert that will undoubtedly become your new favorite sweet escape.
Quick Recipe Overview
Vanilla Bean Cheesecake Ingredient Essentials
For Crust:For Filling:For Topping:Tools You’ll Need For Vanilla Bean Cheesecake
How To Prepare Vanilla Bean Cheesecake
Press graham cracker mixture into the springform pan, creating a smooth, compact base that will hold your cheesecake perfectly.
Blend cream cheese, sugar, and vanilla beans until silky smooth, ensuring no lumps remain for a luxurious texture.
Gently pour the velvety filling over the cooled crust, using a spatula to spread evenly and eliminate air bubbles.
Place the cheesecake in a preheated oven, allowing it to transform into a creamy masterpiece with a golden, delicate surface.
Let the cheesecake rest at room temperature, then refrigerate for several hours, allowing flavors to meld and texture to set.
Carefully remove the springform pan, slice with a clean knife, and garnish with fresh berries or a light dusting of powdered sugar.
Flavor Tips For Vanilla Bean Cheesecake
Serving Vanilla Bean Cheesecake Made Simple
How To Store Vanilla Bean Cheesecake The Right Way
Print
Silky Vanilla Bean Cheesecake Recipe
- Total Time: 6 hours
- Yield: 13 1x
Description
Indulgent vanilla bean cheesecake blends creamy textures with rich Madagascar vanilla notes. Silky smooth layers provide a luxurious dessert experience for passionate bakers seeking classic elegance.
Ingredients
- 3 large eggs
- 3 packages (8 oz / 226 g) cream cheese, softened
- 1 cup granulated sugar
- 1 cup sour cream
- 1 vanilla bean, seeds scraped (or 2 tsp vanilla bean paste)
- ¼ cup (60 ml) heavy cream
- 1 tbsp pure vanilla extract
- 1 ½ cups graham cracker crumbs (about 10–12 full sheets)
- ¼ cup granulated sugar
- ½ cup (113 g) unsalted butter, melted
- 1 cup (240 ml) heavy whipping cream
- 2 tbsps powdered sugar
- 1 tsp vanilla extract
- Fresh berries or white chocolate shavings (optional)
Instructions
- Crust Preparation: Pulverize graham crackers into fine, uniform crumbs, meticulously mixing with granulated sugar and melted butter until the texture mimics damp, compacted sand.
- Pan Layering: Cascade the crumbly mixture into the springform pan, strategically pressing with a spoon or measuring cup to create an impeccably even, densely packed crust foundation.
- Toasting Process: Slide the crust into a preheated oven, allowing it to transform into a golden-kissed base with a tantalizing, toasted aroma that promises depth of flavor and structural integrity.
- Cooling and Stabilization: Extract the crust from the oven, permitting it to cool completely, which establishes a robust, moisture-resistant platform for the forthcoming creamy cheesecake filling, ensuring a flawless textural transition between layers.
Notes
- Crush Carefully: Use a food processor or rolling pin to create uniform graham cracker crumbs, ensuring no large chunks that could disrupt the crust’s smooth texture.
- Press Precisely: Apply consistent, firm pressure when compacting the crust to create a solid, even base that prevents crumbling when serving the cheesecake.
- Toast Strategically: Watch the crust closely during toasting to achieve a golden-brown color without burning, which develops a deeper, nuttier flavor profile.
- Cooling is Crucial: Allow the crust to cool completely at room temperature to set its structure and prevent moisture absorption, guaranteeing a crisp, stable foundation for the cheesecake filling.
- Prep Time: 20 minutes
- Cook Time: 1 hour 40 minutes
- Category: Desserts
- Method: Baking
- Cuisine: American
Nutrition
- Serving Size: 13
- Calories: 350
- Sugar: 25 g
- Sodium: 250 mg
- Fat: 24 g
- Saturated Fat: 15 g
- Unsaturated Fat: 7 g
- Trans Fat: 0 g
- Carbohydrates: 30 g
- Fiber: 1 g
- Protein: 5 g
- Cholesterol: 90 mg
Olivia Bennett
Co-Founder & Content Creator
Expertise
Nutritional Analysis, Dietary Accommodations, Food Writing and Blogging,
Education
University of Texas at Austin
Institute of Culinary Education, New York, NY
Olivia Bennett is Cooking Crusade’s go-to expert for nutritious, feel-good food. Based in Austin, she blends her degree in Nutrition from the University of Texas with plant-based culinary training from the Institute of Culinary Education.
Olivia’s recipes are all about balance: vibrant, wholesome, and easy-to-love dishes that work for all kinds of eaters. Her mission is simple: to make healthy eating approachable and genuinely tasty, with tips that support your lifestyle, not complicate it.