The Magic Butterfinger Candy Bar Poke Cake Recipe to Wow Everyone
Decadent chocolate cake meets irresistible butterfinger candy bar magic in this sinfully delicious poke cake that will make taste buds dance.
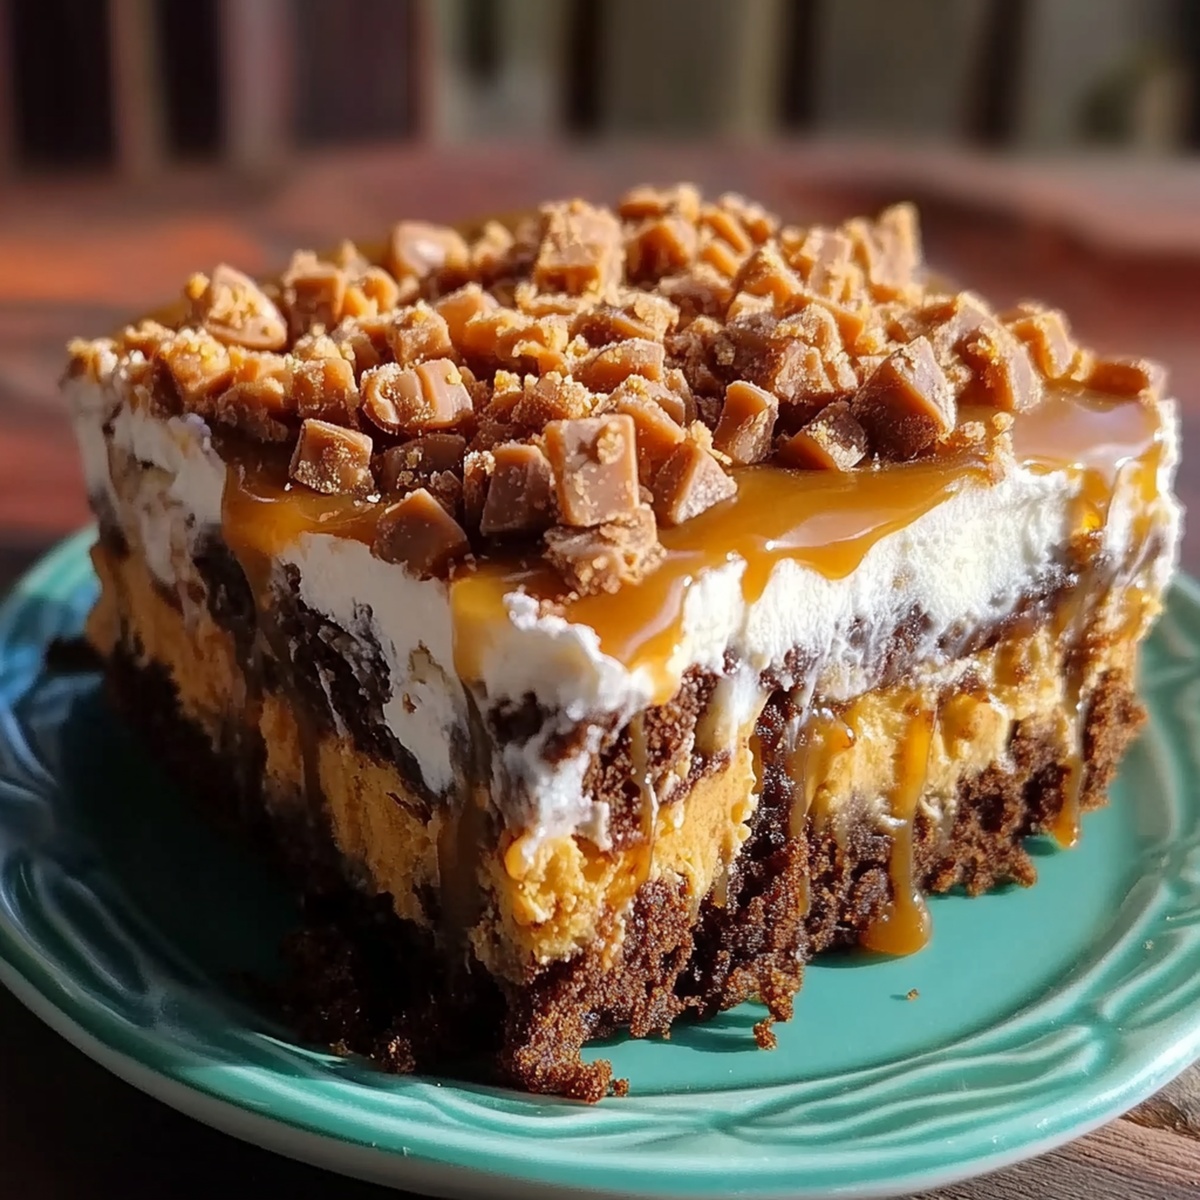
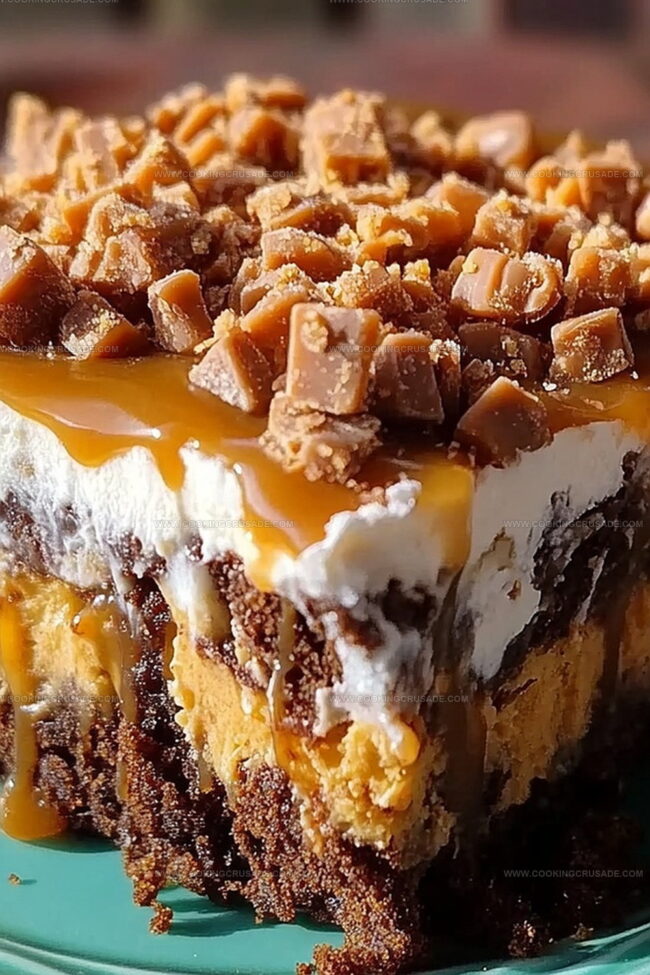
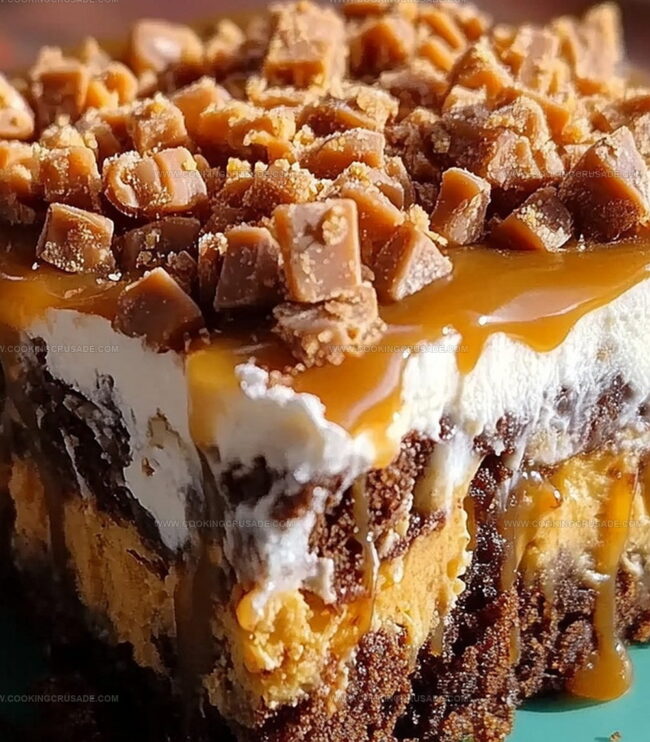
Sweet layers of moist cake dripping with creamy caramel create a dessert that feels like pure indulgence.
Each slice promises a delightful crunch from crushed butterfinger pieces scattered throughout the rich texture.
Chocolatey goodness mingles with buttery candy bar bits, creating a dessert that transforms an ordinary cake into an extraordinary treat.
Creamy and crunchy elements blend seamlessly, offering a symphony of flavors in every single bite.
This crowd-pleasing dessert brings serious wow factor to any gathering, guaranteeing smiles and empty plates.
Prepare to fall in love with a dessert that’s impossible to resist.
Quick Recipe Overview
Stuff Needed For Butterfinger Candy Bar Poke Cake
For Cake Base:For Filling and Moisture:For Topping and Garnish:Equipment To Use For Butterfinger Candy Bar Poke Cake
How To Put Together Butterfinger Candy Bar Poke Cake
Grab your favorite cake mix and bake it in a rectangular pan following the box instructions. Once golden and fragrant, let it rest for a quick 5-10 minutes.
Grab a wooden spoon handle and poke generous holes across the warm cake surface. Pour sweetened condensed milk slowly, watching it seep into every crevice. Splash caramel sauce generously to enhance the flavor.
Spread a cloud-like layer of whipped topping across the entire cake surface. Crush Butterfinger bars and rain them down, creating a crunchy, sweet landscape.
Zigzag extra caramel and chocolate sauces over the top for a final touch of indulgence. Chill in the refrigerator for 1-2 hours to let the flavors mingle and textures set perfectly.
Extra Baking Tips For Butterfinger Candy Bar Poke Cake
Serving Tips For Butterfinger Candy Bar Poke Cake
Keep Butterfinger Candy Bar Poke Cake Fresh
Print
Sinful Butterfinger Candy Bar Poke Cake Recipe
- Total Time: 1 hour 45 minutes
- Yield: 13 1x
Description
Butterfinger candy bar poke cake delivers a delightful dessert experience with rich chocolate and crunchy candy pieces. Sweet layers of moist cake and creamy filling provide a memorable treat you will want to share with friends and family.
Ingredients
- 1 box cake mix (chocolate or yellow)
- 14 oz / 397 g sweetened condensed milk
- 8 oz / 226 g Cool Whip (or 2 cups whipped cream)
- 4 butterfinger candy bars
- ½ cup caramel sauce
- ½ cup hot fudge sauce (optional)
- ¼ cup caramel sauce (for drizzling)
- ¼ cup chocolate sauce (for drizzling, optional)
- Ingredients listed on cake mix box
Instructions
- Cake Preparation: Bake chocolate cake in a rectangular pan according to package instructions, aiming for even golden edges and consistent texture.
- Perforation Process: While cake remains warm, create strategic deep holes across the entire surface using a wooden spoon handle to establish liquid absorption channels.
- Liquid Infusion: Methodically pour sweetened condensed milk over the perforated cake, allowing complete penetration into every crevice and internal pathway.
- Flavor Enhancement: Artfully distribute caramel and chocolate sauces across the cake’s surface, ensuring thorough seepage into the carefully constructed holes to amplify moisture and complexity.
- Cooling and Integration: Let the cake rest until completely cooled, enabling liquid ingredients to harmonize and stabilize within the delicate cake structure.
- Topping Application: Spread a smooth, voluminous layer of whipped topping uniformly across the cake, creating an elegant, cloud-like foundation.
- Candy Embellishment: Crush Butterfinger candy bars into rustic fragments and generously scatter the golden, crispy pieces over the whipped topping for textural contrast.
- Final Decoration: Execute an additional decorative flourish by drizzling complementary caramel and chocolate sauces in elegant, intersecting patterns.
- Chilling Stage: Refrigerate the cake for 1-2 hours, allowing flavors to meld and the dessert to set into a perfectly chilled, decadent presentation.
Notes
- Hole Precision: Poke deep, even holes across the entire cake to ensure uniform sauce distribution and maximum flavor absorption.
- Temperature Control: Cool the cake completely after adding liquid ingredients to prevent soggy texture and maintain structural integrity.
- Candy Bar Crushing: Break Butterfinger bars into varied sizes for textural contrast, avoiding overly fine powder or large chunks.
- Chill for Perfection: Refrigerate the cake for recommended time to allow flavors to meld and create a cohesive, indulgent dessert experience.
- Prep Time: 15 minutes
- Cook Time: 30 minutes
- Category: Desserts
- Method: Baking
- Cuisine: American
Nutrition
- Serving Size: 13
- Calories: 350
- Sugar: 30 g
- Sodium: 250 mg
- Fat: 15 g
- Saturated Fat: 8 g
- Unsaturated Fat: 7 g
- Trans Fat: 0 g
- Carbohydrates: 45 g
- Fiber: 1 g
- Protein: 4 g
- Cholesterol: 30 mg
Olivia Bennett
Co-Founder & Content Creator
Expertise
Nutritional Analysis, Dietary Accommodations, Food Writing and Blogging,
Education
University of Texas at Austin
Institute of Culinary Education, New York, NY
Olivia Bennett is Cooking Crusade’s go-to expert for nutritious, feel-good food. Based in Austin, she blends her degree in Nutrition from the University of Texas with plant-based culinary training from the Institute of Culinary Education.
Olivia’s recipes are all about balance: vibrant, wholesome, and easy-to-love dishes that work for all kinds of eaters. Her mission is simple: to make healthy eating approachable and genuinely tasty, with tips that support your lifestyle, not complicate it.