
Irresistible S’mores Cookie Cups Recipe for Cozy Sweet Treats
Biting into a delightful s’mores cookie cup that transports you straight to campfire nights.
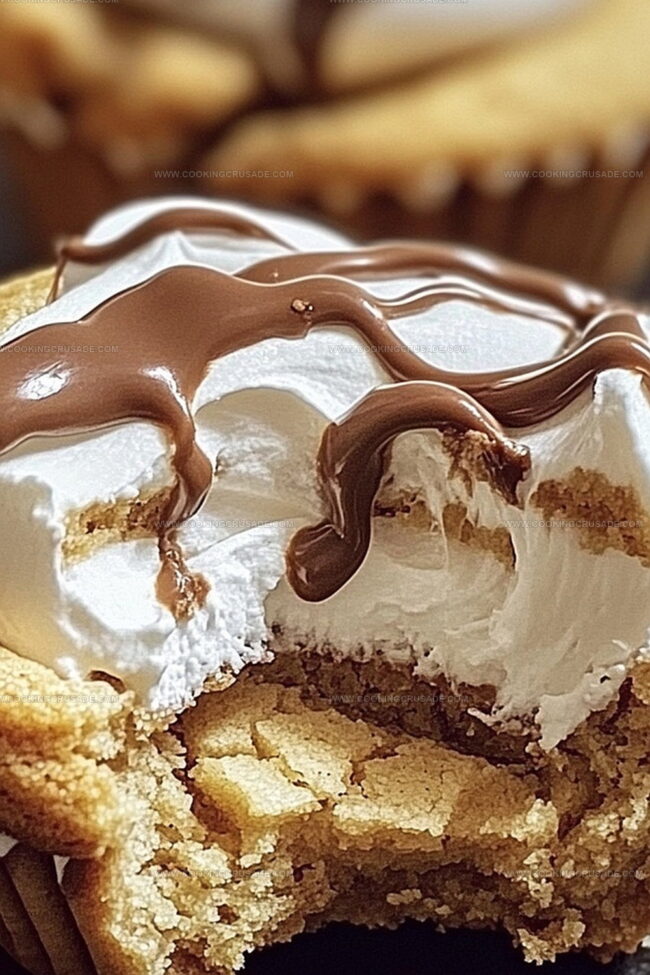
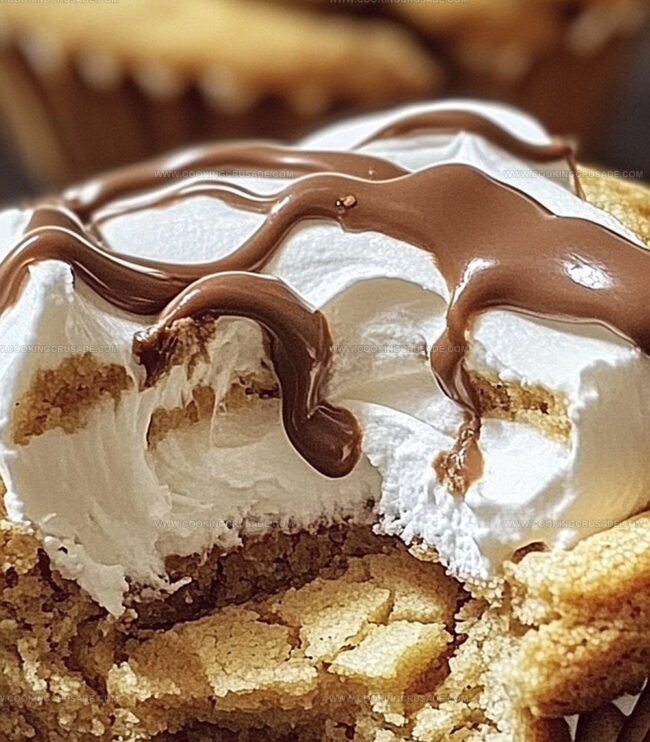
Gooey marshmallows and rich chocolate nestled inside a graham cracker-infused cookie base create pure magic.
Childhood memories come flooding back with each delectable bite of this irresistible treat.
Chocolate lovers and dessert enthusiasts will absolutely adore this ingenious twist on the classic campfire favorite.
Every ingredient has been carefully selected to capture that nostalgic s’mores experience in a handheld form.
These cute little cookie cups promise to be the star of any gathering or sweet moment.
Trust me, one taste and you’ll be completely hooked on this incredible dessert that combines comfort and creativity.
What People Enjoy About Smores Cookie Cups
What To Grab For Smores Cookie Cups
Cookie Base:Sweeteners and Binding:Chocolate and Topping Ingredients:Preparation Ingredients:Steps To Make Smores Cookie Cups Easily
Step 1: Prepare Baking Space
Warm up your oven to 350F. Grab a muffin tin and give it a light spray of cooking oil so nothing sticks.
Step 2: Create Cookie Base
In a big mixing bowl, whip together:Blend until super fluffy. Crack in an egg and splash of vanilla, mixing until smooth. In another bowl, combine:Slowly fold dry ingredients into wet mixture until a perfect dough forms.
Step 3: Shape Delicious Cups
Scoop dollops of dough into each muffin pocket. Press gently to create cute little cookie cups that reach slightly up the sides. The goal is a cozy nest for marshmallow magic.
Step 4: First Baking Round
Slide the tin into the oven. Bake until edges turn a gorgeous golden brown, around 8-10 minutes. Watch carefully to prevent burning.
Step 5: Chocolate and Marshmallow Magic
Pull out the tin and immediately drop:Top each cup with half a marshmallow, cut side facing down.
Step 6: Final Toasting
Return to oven for another 2-3 minutes. You want marshmallows soft and slightly caramelized.
Step 7: Cool and Decorate
Let cookie cups rest for 5-10 minutes. Gently transfer to a cooling rack. For extra wow, drizzle melted chocolate and sprinkle crushed graham crackers on top.
Step 8: Indulge and Enjoy
Serve these heavenly treats warm or at room temperature. Each bite promises a delightful explosion of campfire memories!
Helpful Tricks For Smores Cookie Cups
Storing And Rewarming Smores Cookie Cups
Smores Cookie Cups Go Well With These
New Ways To Make Smores Cookie Cups
Smores Cookie Cups Common Questions
These cookie cups bring the classic campfire treat indoors with a delicious twist. Instead of roasting marshmallows over a fire, you bake the entire treat in a muffin tin, creating a perfectly portable and mess-free dessert that captures all the original s’mores flavors.
Absolutely! You can prepare the cookie dough base in advance and refrigerate it for up to 2 days. When you’re ready to bake, simply scoop the dough into the muffin tin and follow the remaining steps. The cookie cups are best enjoyed fresh but can be stored at room temperature for 1-2 days.
Yes! You can substitute the all-purpose flour and graham cracker crumbs with gluten-free alternatives. Use gluten-free graham cracker-style cookies or graham cracker crumbs and a gluten-free flour blend to create a similar texture and taste.
Milk chocolate chips or chunks work perfectly, but you can also use dark chocolate or semi-sweet chocolate depending on your preference.
Print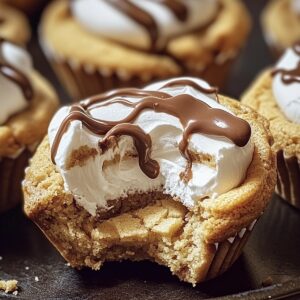
Smores Cookie Cups Recipe
- Total Time: 27 minutes
- Yield: 12 1x
Description
Rich chocolate chip cookie bases cradle gooey marshmallow and melted chocolate in these irresistible s’mores cookie cups. Graham cracker crumbles and toasted marshmallow tops complete this classic campfire dessert, inviting you to savor summer’s sweetest memories in one delightful bite.
Ingredients
Main Ingredients:
- 1 cup all-purpose flour
- ½ cup graham cracker crumbs
- ½ cup unsalted butter, softened
Sweeteners and Binding Ingredients:
- ½ cup granulated sugar
- ¼ cup brown sugar, packed
- 1 large egg
- 1 teaspoon (5 milliliters) vanilla extract
Baking and Seasoning Ingredients:
- ½ teaspoon (2.5 milliliters) baking powder
- ¼ teaspoon (1.25 milliliters) salt
Filling Ingredients:
- ½ cup (85 grams) semi-sweet chocolate chips or chopped chocolate
- 12 large marshmallows, cut in half
Optional Garnishes:
- Crushed graham crackers
- Melted chocolate drizzle
Instructions
- Prepare the cooking environment by heating the oven to 350F (175C) and lightly coating a 12-cup muffin tin with cooking spray.
- Create the cookie base by thoroughly blending softened butter with granulated and brown sugars until achieving a creamy consistency. Incorporate the egg and vanilla extract, mixing until smooth.
- Combine graham cracker crumbs, flour, baking powder, and salt in a separate bowl. Gradually fold the dry ingredients into the butter mixture, gently forming a cohesive dough.
- Distribute approximately 1 1/2 tablespoons of dough into each muffin cavity, carefully pressing the mixture to form cup-like shapes that extend slightly up the sides.
- Bake the cookie cups for 8-10 minutes, watching for edges to turn a delicate golden hue, indicating they are perfectly crisp.
- Immediately after removing from the oven, nestle chocolate chips or chopped chocolate pieces into each cup’s center. Position a marshmallow half, cut side down, atop the chocolate.
- Return the muffin tin to the oven, allowing the marshmallows to soften and develop a light golden color over 2-3 minutes.
- Allow the cookie cups to rest in the tin for 5-10 minutes, enabling them to set and cool slightly before transferring to a wire rack.
- Optional: Enhance the presentation by drizzling melted chocolate and sprinkling crushed graham crackers over the tops.
- Serve these delectable treats either warm or at room temperature, inviting everyone to savor the gooey, nostalgic smores experience.
Notes
- Cold butter works best when creaming, ensuring a smoother, more consistent cookie dough texture that holds its shape perfectly.
- Graham cracker crumbs can be substituted with ground oats for a gluten-free alternative, making the recipe accessible to more dietary needs.
- Silicone muffin cups provide easier removal and prevent sticking, creating cleaner and more uniform cookie cups with minimal effort.
- Chilling the dough for 30 minutes before shaping helps prevent spreading and maintains the cup’s structured shape during baking.
- Prep Time: 15 minutes
- Cook Time: 12 minutes
- Category: Desserts, Snacks
- Method: Baking
- Cuisine: American
Nutrition
- Serving Size: 12
- Calories: 180
- Sugar: 14 g
- Sodium: 100 mg
- Fat: 8 g
- Saturated Fat: 5 g
- Unsaturated Fat: 3 g
- Trans Fat: 0 g
- Carbohydrates: 24 g
- Fiber: 1 g
- Protein: 2 g
- Cholesterol: 20 mg
James Mitchell
Founder & Recipe Developer
Expertise
Recipe Creation and Testing, Fusion Cuisine, Food Styling and Photography, Culinary Education
Education
Kendall College, Chicago, IL
The Culinary Institute of America, Hyde Park, NY
James Mitchell is the founder and fearless flavor explorer at Cooking Crusade. With a degree in Culinary Arts from Kendall College and advanced training in global gastronomy from The Culinary Institute of America, James has spent over a decade perfecting the art of recipe creation.
His background includes fine dining, private cheffing, and food styling, but his true joy comes from turning big ideas into doable recipes for home cooks. Every dish he shares is a mix of creativity, culture, and a little kitchen magic, built to bring excitement back to everyday meals.