Dreamy Red Velvet Chocolate Chip Cheesecake Bars Recipe
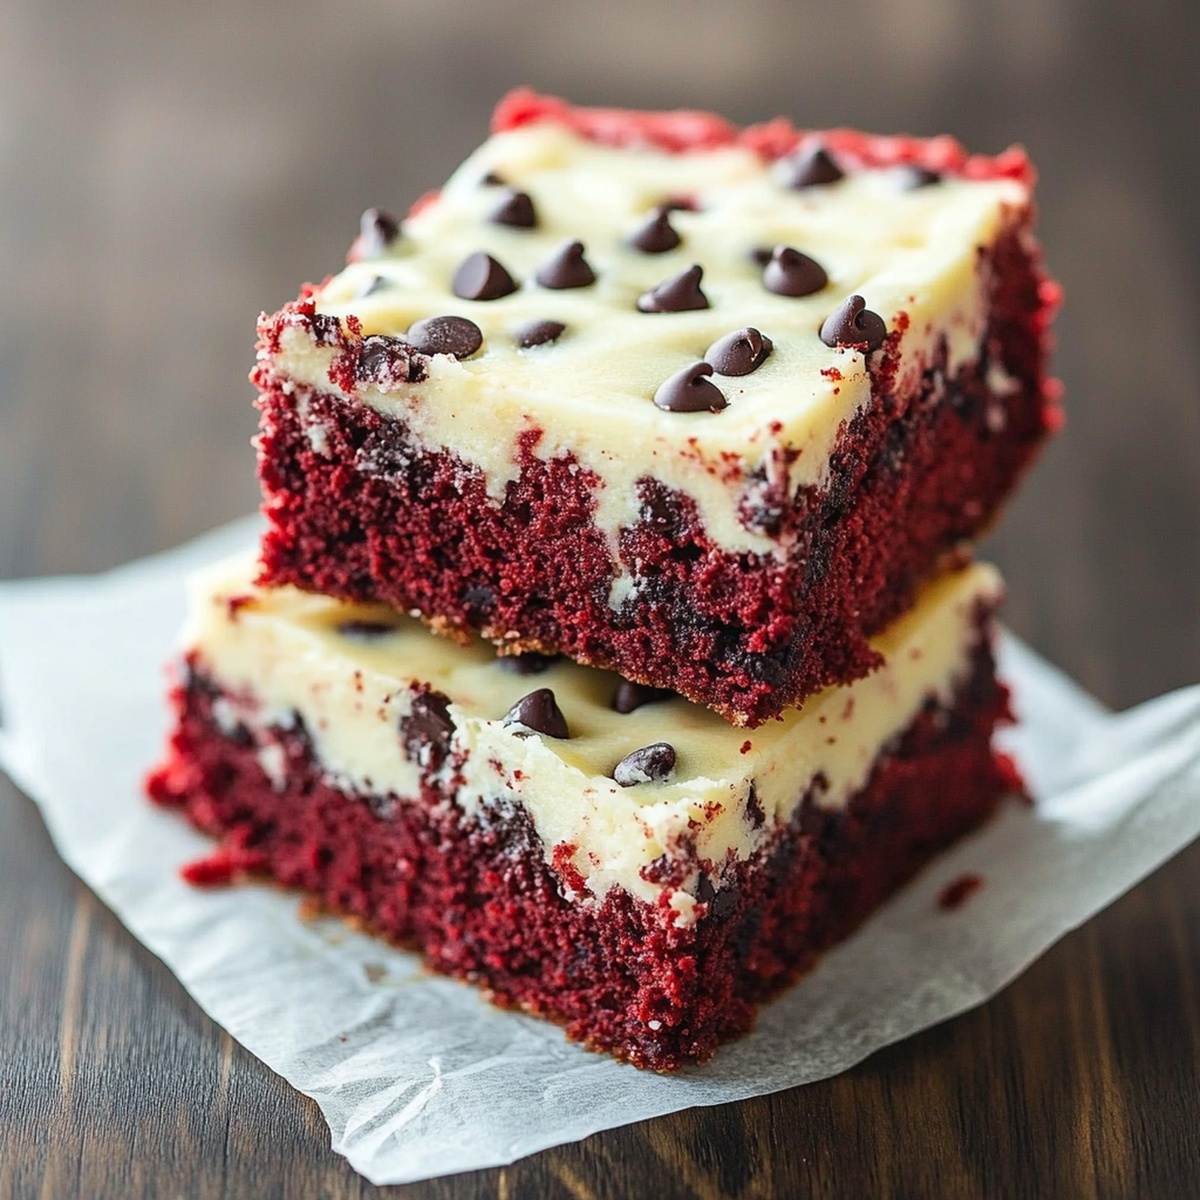
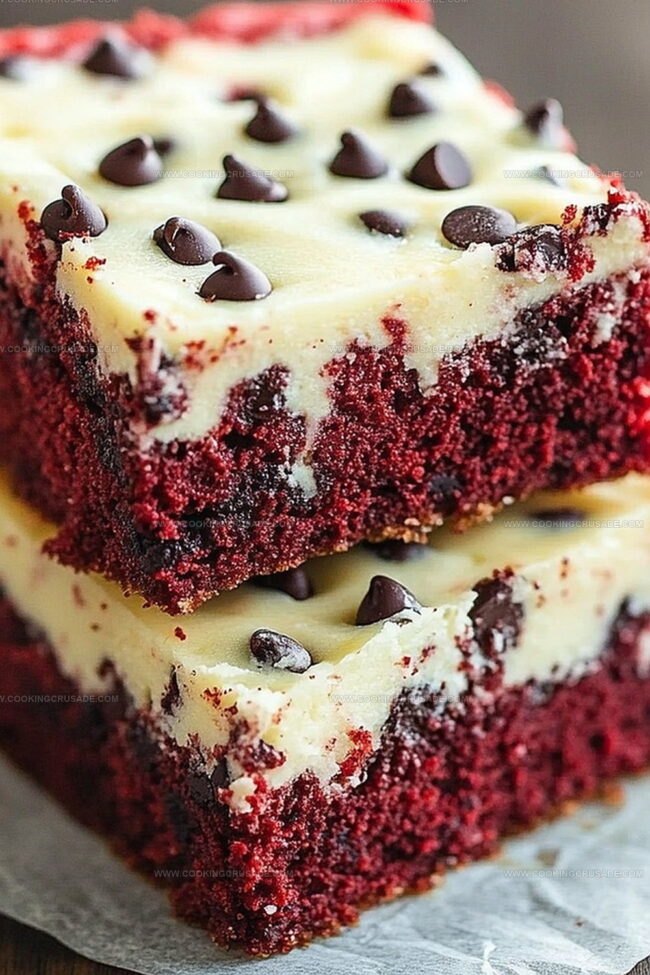
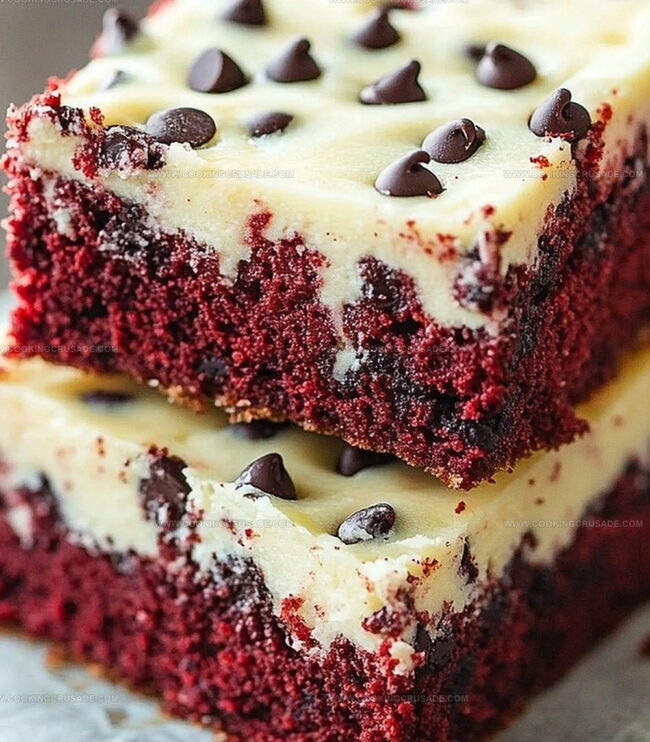
Decadent desserts often spark joy at gatherings, and these red velvet chocolate chip cheesecake bars elevate every sweet moment with their rich, velvety texture.
Layers of crimson cake merge seamlessly with creamy cheesecake and scattered chocolate chips for an irresistible treat.
The contrast between soft cake and smooth filling creates a mouthwatering experience that tempts even the most disciplined sweet tooth.
Each bar promises a perfect balance of flavors, blending classic red velvet warmth with indulgent cheesecake richness.
Chocolate chips add delightful bursts of intensity throughout the dessert.
These bars are not just a recipe but a celebration of luxurious flavors and textures.
One bite promises to transport you to dessert paradise, making every occasion feel special and deliciously memorable.
Quick Recipe Overview
Everything In Red Velvet Chocolate Chip Cheesecake Bars
For Red Velvet Layer:For Cheesecake Layer:For Baking Essentials:Tools For Baking Red Velvet Cheesecake Bars
Steps To Make Red Velvet Cheesecake Bars Sweet
Crank up the oven to 350F and line your baking dish with parchment paper for easy removal.
Blend melted butter with sugars until silky smooth. Splash in egg, vibrant food coloring, vanilla, and a touch of vinegar. Sift together dry ingredients in a separate bowl, then fold into the wet mixture. Sprinkle in chocolate chips and spread most of the batter into the pan.
Whisk cream cheese with sugar, egg yolk, and vanilla until luxuriously smooth. Gently spread this dreamy mixture over the red velvet foundation.
Dot the remaining red velvet batter across the cheesecake layer. Use a knife to create beautiful marble patterns. Scatter extra chocolate chips on top for extra pizzazz.
Pop into the oven for 30-35 minutes until the center looks set. Let the bars cool completely in the pan before slicing into irresistible squares. Enjoy your decadent dessert!
Tips To Layer Red Velvet Cheesecake Bars Right
Serve Red Velvet Cheesecake Bars Fancy Or Fun
Store Red Velvet Cheesecake Bars Smartly
Print
Sumptuous Red Velvet Chocolate Chip Cheesecake Bars Recipe
- Total Time: 50 minutes
- Yield: 17 1x
Description
Red velvet chocolate chip cheesecake bars blend creamy cheesecake with classic red velvet flavors for an indulgent dessert. Rich layers of velvety texture and chocolate chips promise a delightful experience you’ll savor with each delectable bite.
Ingredients
- 8 oz (226 g) cream cheese, softened
- 1 cup all-purpose flour
- ½ cup mini chocolate chips
- ¼ cup mini chocolate chips
- 2 tbsps unsweetened cocoa powder
- ½ cup (1 stick or 113 g) unsalted butter, melted
- ¾ cup granulated sugar
- ¼ cup brown sugar, packed
- 1 large egg
- 1 large egg yolk
- 1 tbsp red food coloring
- 1 tsp vanilla extract
- ½ tsp vanilla extract
- 1 tsp white vinegar
- ¼ tsp salt
- ½ tsp baking powder
- ¼ cup granulated sugar
Instructions
- Oven Preparation: Preheat oven to 350°F and line an 8×8-inch pan with parchment paper, ensuring complete coverage for effortless extraction.
- Red Velvet Base Creation: Whisk melted butter with granulated and brown sugars until achieving a glossy, homogeneous mixture.
- Wet Ingredient Integration: Blend egg, vibrant red food coloring, vanilla extract, and vinegar into the butter mixture, stirring until uniformly combined.
- Dry Ingredient Preparation: Sift flour, cocoa powder, salt, and baking powder in a separate bowl to eliminate potential lumps.
- Batter Assembly: Fold dry ingredients into wet mixture gently, maintaining a light texture and avoiding overmixing, then incorporate mini chocolate chips evenly.
- Base Layer Composition: Spread approximately three-quarters of the red velvet batter into the prepared pan, creating an even foundation.
- Cheesecake Layer Development: Beat cream cheese until smooth, then gradually add sugar, egg yolk, and vanilla extract, mixing until silky and perfectly integrated.
- Layer Arrangement: Carefully spread cheesecake mixture over the red velvet base, ensuring complete and uniform coverage.
- Decorative Swirling: Dollop remaining red velvet batter across the cheesecake layer and use a knife to create elegant swirls without fully combining the batters.
- Final Touches: Sprinkle additional mini chocolate chips on top for enhanced texture and visual appeal.
- Baking Process: Bake for 30-35 minutes, monitoring for a set center and clean toothpick indication of doneness.
- Cooling and Serving: Allow bars to cool completely in the pan, then lift out using parchment paper and slice into neat, uniform squares.
Notes
- Prevent Color Bleeding: Add food coloring gradually and mix thoroughly to ensure an even, vibrant red color without streaks or uneven patches.
- Soften Cream Cheese Correctly: Leave cream cheese at room temperature for 30-45 minutes before mixing to achieve a smooth, lump-free cheesecake layer that blends effortlessly.
- Control Chocolate Chip Distribution: Toss mini chocolate chips in a light dusting of flour before folding into the batter to prevent sinking and ensure even spread throughout the bars.
- Master the Swirl Technique: Use a clean knife or toothpick to create gentle, delicate swirls without overmixing, maintaining distinct red velvet and cheesecake layers for a stunning visual effect.
- Prep Time: 15 minutes
- Cook Time: 35 minutes
- Category: Desserts, Snacks
- Method: Baking
- Cuisine: American
Nutrition
- Serving Size: 17
- Calories: 259
- Sugar: 17 g
- Sodium: 170 mg
- Fat: 14 g
- Saturated Fat: 8 g
- Unsaturated Fat: 6 g
- Trans Fat: 0 g
- Carbohydrates: 29 g
- Fiber: 1 g
- Protein: 3 g
- Cholesterol: 47 mg
Olivia Bennett
Co-Founder & Content Creator
Expertise
Nutritional Analysis, Dietary Accommodations, Food Writing and Blogging,
Education
University of Texas at Austin
Institute of Culinary Education, New York, NY
Olivia Bennett is Cooking Crusade’s go-to expert for nutritious, feel-good food. Based in Austin, she blends her degree in Nutrition from the University of Texas with plant-based culinary training from the Institute of Culinary Education.
Olivia’s recipes are all about balance: vibrant, wholesome, and easy-to-love dishes that work for all kinds of eaters. Her mission is simple: to make healthy eating approachable and genuinely tasty, with tips that support your lifestyle, not complicate it.