Heavenly Jam Cookies Recipe: Sweet Bites of Pure Joy
Grandma’s secret jam cookies have been a cherished tradition that brings pure delight to every gathering.
Soft, buttery dough cradles sweet fruit preserves in a tender embrace.
Memories of childhood rush back with each delectable bite.
These simple yet irresistible treats connect generations through their comforting flavor.
Baking becomes an intimate dance of ingredients, blending nostalgia and love.
Crisp edges and soft centers promise a magical experience you’ll absolutely adore.
Master this recipe, and you’ll create moments of pure happiness that linger long after the last crumb disappears.
Why These Jam Cookies Are Always a Hit
Key Ingredients for That Buttery Finish
Base Ingredients:Dry Ingredients:Filling and Topping:Instructions for Picture-Perfect Cookies

Step 1: Whip Up the Silky Dough
In a spacious mixing bowl, blend butter and sugar until they transform into a cloud-like, creamy mixture. Gently fold in:Mix until everything harmonizes perfectly. In a separate bowl, combine:Gradually incorporate the dry ingredients into the wet mixture, stirring until a soft, pillowy dough emerges.
Step 2: Chill and Relax the Dough
Lovingly wrap the dough in plastic wrap and tuck it into the refrigerator. Let it rest and firm up for at least 30 minutes.
Step 3: Craft the Cookie Foundations
Fire up the oven to 350 degrees Fahrenheit (175 degrees Celsius). Dress baking sheets with parchment paper. Roll the chilled dough into delicate one-inch spheres. For an extra crunch, roll the balls in finely chopped nuts if you’re feeling adventurous. Arrange the cookie balls on the prepared sheets, giving them some breathing room about 2 inches apart.
Step 4: Create Jammy Centers
With gentle pressure, use your thumb or the back of a small spoon to create a cozy little well in the center of each cookie ball. Carefully spoon your favorite jam into these little nooks, being mindful not to overflow.
Step 5: Bake to Golden Perfection
Slide the baking sheets into the preheated oven. Bake for 12-15 minutes until the edges turn a beautiful golden brown. Let the cookies rest on the baking sheets for 5 minutes, then transfer them to a wire rack to cool completely.
Step 6: Final Flourish and Storage
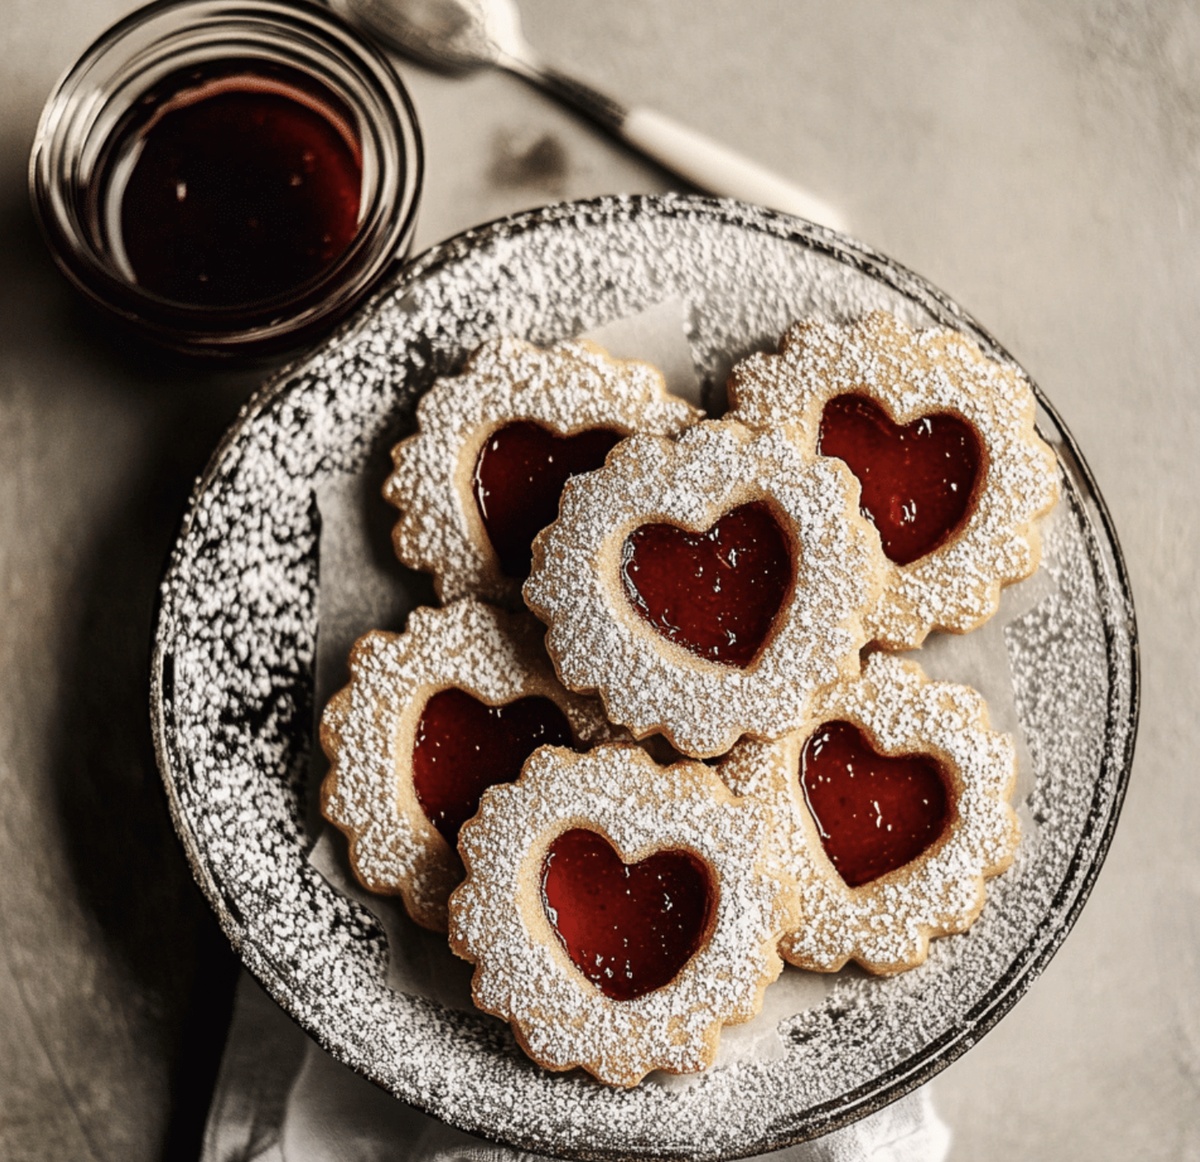
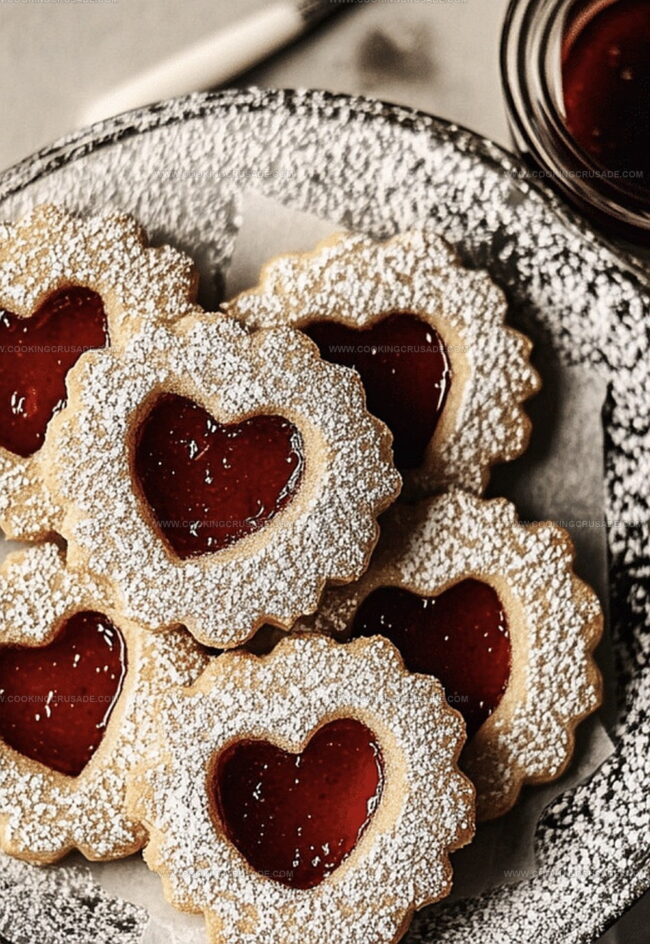
If you’re feeling fancy, dust the cooled cookies with a delicate snowfall of powdered sugar. These delightful treats will stay fresh in an airtight container at room temperature for up to 5 days – if they last that long!
Tips for Shaping and Filling Without Mess
Best Ways to Store for Softness
Sips and Snacks to Match
Jam Cookie Flavor Combos to Try
Jam Cookie FAQs Made Easy
Yes! You can prepare the cookie dough up to 2-3 days in advance and keep it refrigerated. Just wrap it tightly in plastic wrap to prevent drying out.
Any smooth, thick jam works great. Raspberry, strawberry, and apricot are classic choices. Avoid runny or watery jams that might spread too much during baking.
Make a clean, deep indentation without breaking the dough’s bottom. Use a small spoon or your thumb and don’t overfill the center with jam. A shallow well helps contain the jam.
Absolutely! These cookies freeze wonderfully. Place them in a single layer in an airtight container, separating layers with parchment paper. They’ll stay fresh for up to 3 months.
Print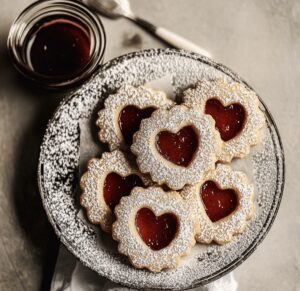
The Best Jam Cookies Recipe
- Total Time: 1 hour
- Yield: 24 1x
Description
Irresistible jam cookies showcase sweet simplicity with delightful berry-filled centers. Homemade comfort arrives perfectly crisp, inviting warm memories of grandma’s kitchen that wrap your senses in pure deliciousness.
Ingredients
Main Ingredients:
- 2 ¼ cups (280 g) all-purpose flour
- 1 cup (227 g) unsalted butter, softened
- ⅔ cup (133 g) granulated sugar
- ½ cup (170 g) fruit jam or preserves (e.g., raspberry, strawberry, apricot)
Binding Ingredients:
- 1 large egg yolk
- 1 teaspoon (5 ml) vanilla extract
- ¼ teaspoon (1.5 g) salt
Finishing Ingredients:
- Powdered sugar for dusting
- Finely chopped nuts for rolling
Instructions
- Craft a velvety dough by blending softened butter and sugar until airy and pale. Incorporate egg yolk and vanilla, stirring until harmoniously combined.
- Sift flour and salt into a separate vessel, then gradually fold into the butter mixture. Knead gently until a supple, cohesive dough emerges.
- Encase the dough in plastic film and refrigerate for a minimum of 30 minutes, allowing it to firm and develop robust flavor.
- Preheat the oven to 350F (175C) and line baking sheets with parchment paper.
- Delicately roll the chilled dough into uniform spheres. Optional: coat the balls in finely chopped nuts for a delightful textural dimension.
- Arrange the dough balls on prepared sheets, maintaining generous spacing to prevent merging during baking.
- Using your thumb or a small spoon, create gentle wells in the center of each cookie, forming a perfect cradle for jam.
- Carefully spoon jam into the indentations, ensuring a balanced fill without overflowing.
- Slide the baking sheets into the preheated oven, baking for 12-15 minutes until edges transform into a golden, crisp hue.
- Allow cookies to rest on the baking sheet for 5 minutes, then transfer to a wire rack for complete cooling.
- For an elegant finish, dust the cooled cookies with a delicate veil of powdered sugar.
- Store the completed jam cookies in an airtight container, where they will remain fresh for up to 5 days.
Notes
- Softening butter to room temperature ensures smooth, creamy mixing without lumps, creating a perfectly blended cookie base.
- Chilling the dough helps prevent spreading during baking, resulting in beautifully shaped, compact cookies with clean edges.
- Experiment with different jam flavors like raspberry, apricot, or strawberry to customize the cookies and surprise your taste buds with unique combinations.
- For gluten-free options, substitute all-purpose flour with a high-quality gluten-free flour blend, maintaining the same delicate texture and rich taste.
- Prep Time: 15 minutes
- Cook Time: 30 minutes
- Category: Desserts, Snacks
- Method: Baking
- Cuisine: American
Nutrition
- Serving Size: 24
- Calories: 134
- Sugar: 4 g
- Sodium: 47 mg
- Fat: 7 g
- Saturated Fat: 4 g
- Unsaturated Fat: 2 g
- Trans Fat: 0 g
- Carbohydrates: 18 g
- Fiber: 0.5 g
- Protein: 1 g
- Cholesterol: 20 mg
James Mitchell
Founder & Recipe Developer
Expertise
Recipe Creation and Testing, Fusion Cuisine, Food Styling and Photography, Culinary Education
Education
Kendall College, Chicago, IL
The Culinary Institute of America, Hyde Park, NY
James Mitchell is the founder and fearless flavor explorer at Cooking Crusade. With a degree in Culinary Arts from Kendall College and advanced training in global gastronomy from The Culinary Institute of America, James has spent over a decade perfecting the art of recipe creation.
His background includes fine dining, private cheffing, and food styling, but his true joy comes from turning big ideas into doable recipes for home cooks. Every dish he shares is a mix of creativity, culture, and a little kitchen magic, built to bring excitement back to everyday meals.