
Whip Up Rainbow Magic: Easy Tie Dye Cookies Recipe
Swirling colors make this tie dye cookies recipe a delightful culinary adventure that sparks joy in every kitchen.
Transforming simple sugar cookies into vibrant, artistic masterpieces with just a few easy techniques.
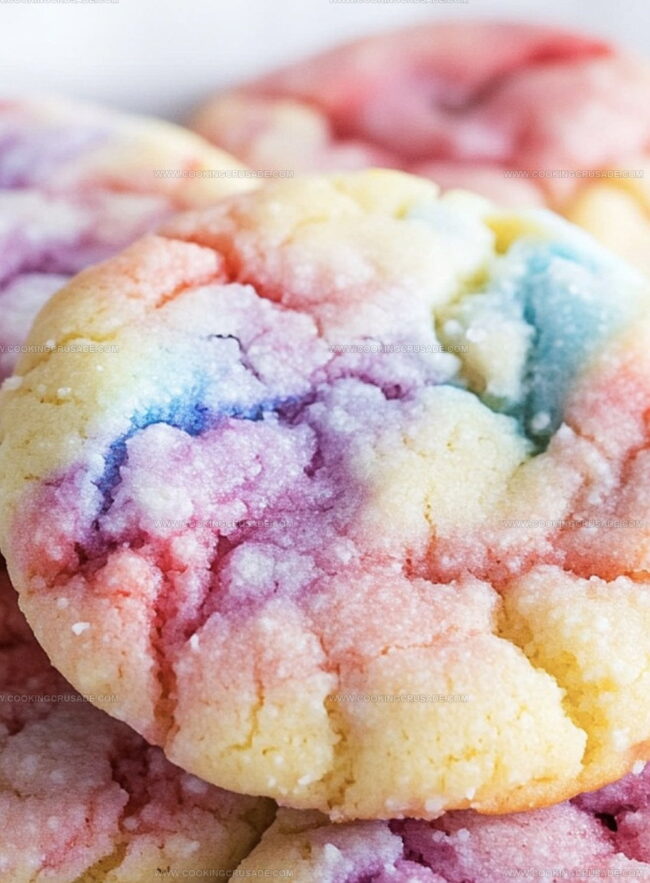
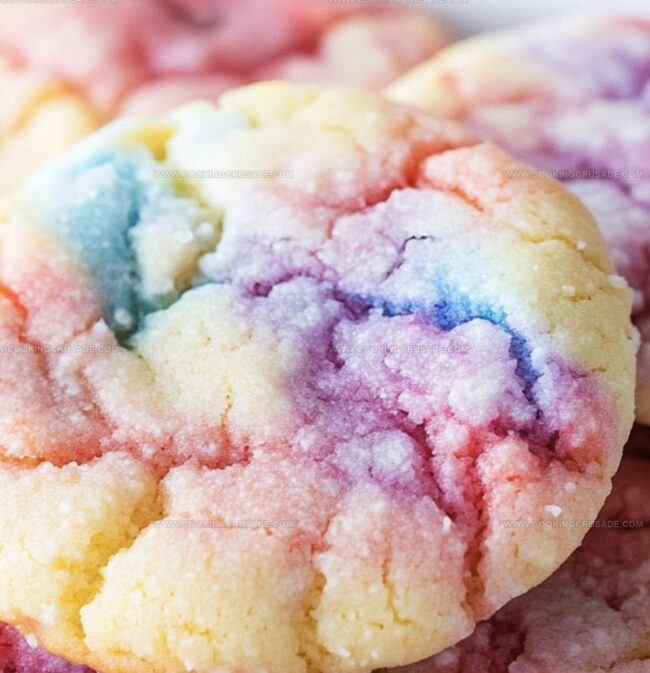
Each cookie becomes a canvas of bright, playful hues that dance together like a sweet celebration.
The magic happens when you mix food coloring into classic cookie dough, creating edible art that surprises and delights.
Professional bakers and home cooks alike will love how simple it is to craft these eye-catching treats.
Kids especially adore helping mix colors and create unique patterns that reflect their creativity.
You’ll want to snap a few photos before devouring these colorful confections that are sure to impress at any gathering.
Grab your apron and let’s make some seriously cool cookies that taste as amazing as they look!
Why Tie Dye Cookies Are So Fun And Bright
What You’ll Need For Tie Dye Cookies
Base Ingredients:Dry Ingredients:Moisture and Flavor Ingredients:Decorative Ingredients:Optional Glaze Ingredients:Baking Accessories:How To Make Tie Dye Cookies Easily
Step 1: Whip Up The Cookie Base
Mix flour, baking powder, and salt in a crisp bowl. In another bowl, cream butter and sugar until they transform into a fluffy cloud. Crack in the egg and splash vanilla, blending until smooth. Gently fold dry ingredients into the wet mixture, creating a soft, pliable dough that’s ready for magic.
Step 2: Unleash The Color Explosion
Slice the dough into playful segments. Grab your gel food colors and go wild!
Knead each color into a separate dough portion until the colors sing with intensity.
Step 3: Create Swirling Cookie Artwork
Get ready for the fun part! Grab pinches of different colored doughs and smoosh them together like a paint palette. Roll the colorful chunks into a ball, then gently flatten and twist to create mesmerizing swirl patterns. Don’t overwork the dough – let the colors dance naturally.
Step 4: Bake To Perfection
Crank up the oven to 350°F. Line baking sheets with parchment paper. Arrange your color-swirled cookie masterpieces about two inches apart. Slide into the oven and bake for 10-12 minutes until edges look set but not burnt. Transfer to a cooling rack and let them chill out completely.
Step 5: Optional Glaze Glamour
Whip up a quick glaze by mixing:Split the glaze into small bowls and add a splash of food coloring. Drizzle or brush over cooled cookies for an extra pop of excitement.
Tips For Colorful Tie Dye Cookies
How To Store Tie Dye Cookies Properly
Best Matches With Tie Dye Cookies
Fun Variations On Tie Dye Cookies
Questions About Tie Dye Cookies
Tie dye cookies are unique because they feature vibrant, swirled colors mixed directly into the dough, creating a fun and artistic design that looks like the classic tie dye fabric pattern.
Not at all! These cookies are beginner-friendly. You just need to mix food coloring into different dough portions and gently swirl them together. No professional baking experience required.
Gel food coloring is recommended because it provides more intense colors and doesn’t add extra liquid to the dough. Liquid food coloring might make the dough too wet and change the cookie texture.
The key is to avoid overmixing. Gently press and roll the colored dough pieces together, creating swirls without completely combining the colors. This helps maintain distinct color sections and creates the tie dye effect.
Print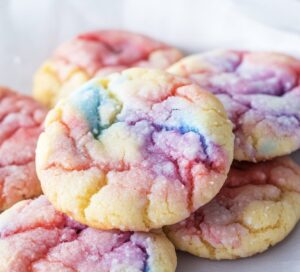
Tie Dye Cookies Recipe
- Total Time: 32 minutes
- Yield: 24 1x
Description
Colorful tie dye cookies splash pure joy across your dessert plate with whimsical swirls of rainbow hues. Sweet baking magic meets playful creativity, delivering delightful treats sure to spark smiles and conversations at any gathering.
Ingredients
Main Ingredients:
- 2 ¾ cups (660 ml) all-purpose flour
- 1 cup (227 grams) unsalted butter, softened
- 1 cup (200 grams) granulated sugar
- 1 large egg
Leavening and Seasoning:
- 1 teaspoon baking powder
- ½ teaspoon salt
Flavoring and Coloring:
- 1 teaspoon vanilla extract
- Gel food coloring (assorted colors: red, blue, yellow, green)
Optional Glaze Ingredients:
- 1 cup (120 grams) powdered sugar
- ⅔ tablespoons (30–45 ml) milk
- ½ teaspoon vanilla extract
- Gel food coloring (optional for colorful drizzle)
Instructions
- Craft the foundational cookie mixture by thoroughly blending dry ingredients in one bowl while creaming butter and sugar in another. Incorporate egg and vanilla extract, ensuring smooth integration. Gradually fold dry ingredients into wet components until a cohesive, soft dough emerges.
- Fragment the unified dough into multiple sections, allocating one portion per desired color palette. Massage gel food coloring into each segment, kneading meticulously until pigmentation distributes uniformly throughout the dough.
- Unleash creativity by randomly assembling miniature fragments from different colored dough sections. Gently manipulate these pieces, pressing and rolling to generate mesmerizing swirled patterns. Strategically intertwine colors without overworking the dough to preserve distinctive marbled aesthetics.
- Preheated oven at 350F (175C) awaits these chromatic confections. Arrange transformed dough clusters on parchment-lined baking sheets, maintaining generous spacing. Bake approximately 10-12 minutes, monitoring until cookie edges stabilize without excessive browning. Transfer to cooling rack, allowing complete temperature reduction.
- Elevate visual appeal with optional luminescent glaze. Whisk powdered sugar, milk, and vanilla into silky consistency. Partition glaze into separate containers, experimenting with additional food coloring. Delicately drizzle or brush vibrant layers across cooled cookies, transforming them into edible artwork.
Notes
- Work with chilled dough to prevent colors from blending too much and maintain distinct swirls during shaping.
- Use gel food coloring for vibrant, concentrated colors that won’t thin out cookie dough or create soggy texture.
- Gently press colored dough pieces together without overworking to keep tie-dye pattern clean and visually striking.
- Experiment with complementary color combinations like purple-blue-pink or green-yellow-orange for unique cookie designs.
- Prep Time: 20 minutes
- Cook Time: 12 minutes
- Category: Desserts, Snacks
- Method: Baking
- Cuisine: American
Nutrition
- Serving Size: 24
- Calories: 183
- Sugar: 14 g
- Sodium: 78 mg
- Fat: 8 g
- Saturated Fat: 5 g
- Unsaturated Fat: 3 g
- Trans Fat: 0 g
- Carbohydrates: 25 g
- Fiber: 0.5 g
- Protein: 1.5 g
- Cholesterol: 29 mg
James Mitchell
Founder & Recipe Developer
Expertise
Recipe Creation and Testing, Fusion Cuisine, Food Styling and Photography, Culinary Education
Education
Kendall College, Chicago, IL
The Culinary Institute of America, Hyde Park, NY
James Mitchell is the founder and fearless flavor explorer at Cooking Crusade. With a degree in Culinary Arts from Kendall College and advanced training in global gastronomy from The Culinary Institute of America, James has spent over a decade perfecting the art of recipe creation.
His background includes fine dining, private cheffing, and food styling, but his true joy comes from turning big ideas into doable recipes for home cooks. Every dish he shares is a mix of creativity, culture, and a little kitchen magic, built to bring excitement back to everyday meals.