Sweet Dreams: Dreamy Chocolate Peanut Butter Pie Recipe
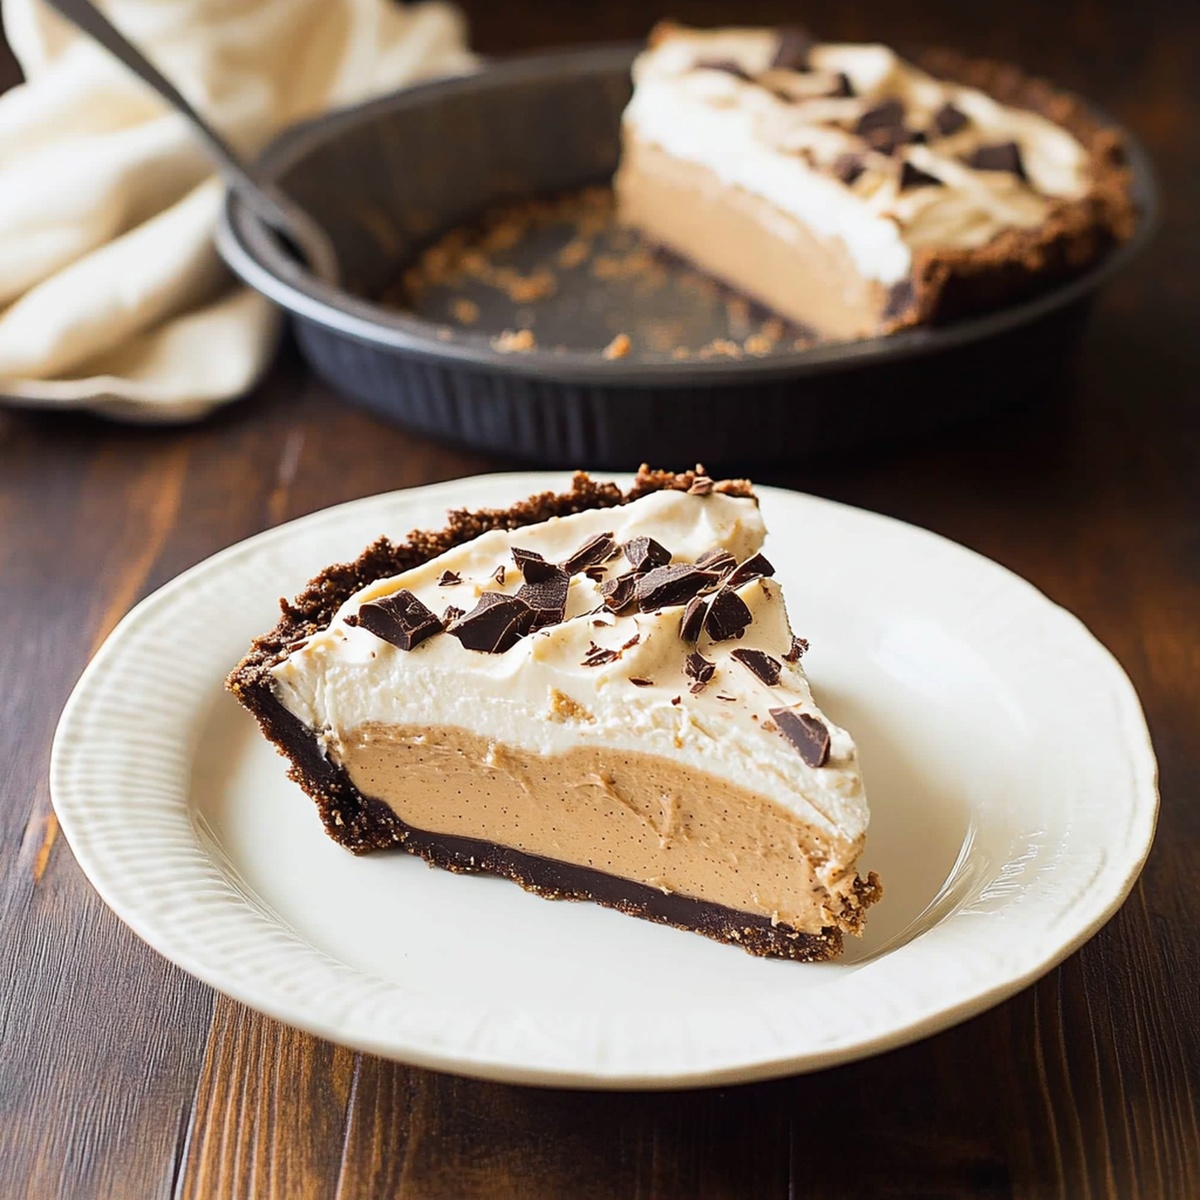
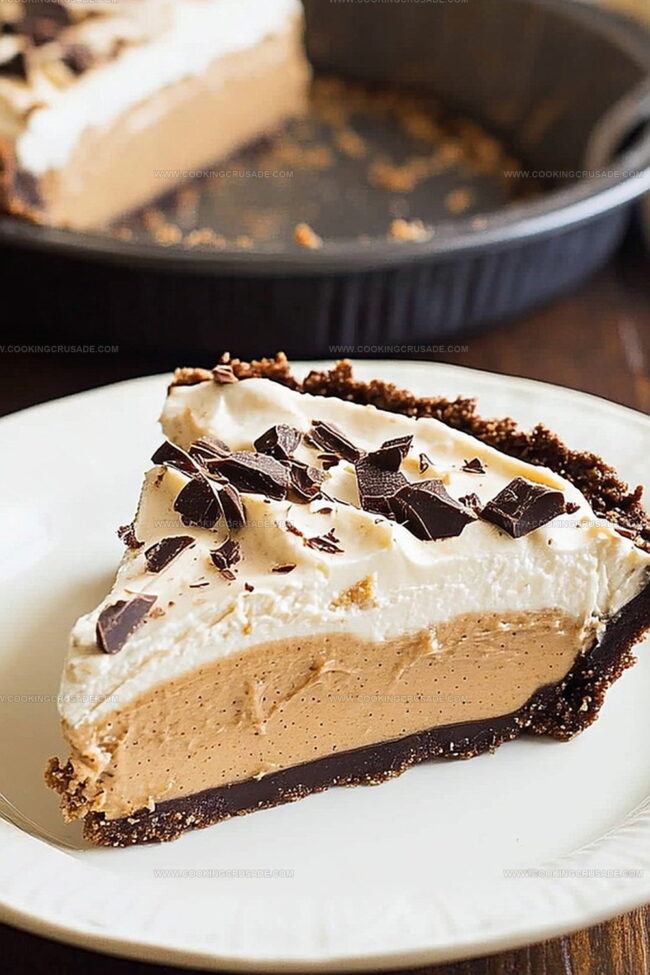
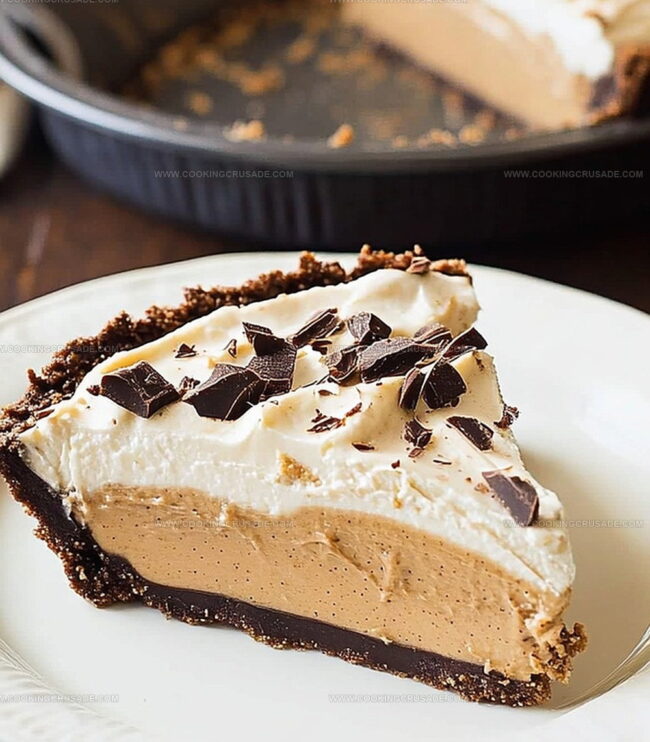
Creamy desserts have a magical way of stealing hearts, and this velvety chocolate peanut butter pie recipe offers pure indulgence.
Rich chocolate and smooth peanut butter create an irresistible flavor combination that melts in your mouth.
The silky texture promises a decadent experience for every sweet tooth.
Layers of intense chocolate complement the nutty peanut butter perfectly.
Each slice delivers a luxurious balance of sweet and savory notes that dance across your palate.
The simple yet elegant dessert comes together with minimal effort but maximum deliciousness.
Treat yourself to a slice of pure comfort that will have everyone asking for seconds.
Quick Recipe Overview
What You’ll Need For Chocolate Peanut Butter Pie
For Crust Base:For Filling:For Topping:Tools To Make Chocolate Peanut Butter Pie Smooth
How To Put Together Chocolate Peanut Butter Pie
Grab your Oreos and crush them into fine powder using a food processor or by placing them in a ziplock bag and rolling with a pin. Blend the cookie crumbs with melted butter until they stick together perfectly.
Press the buttery crumb mixture firmly into a 9-inch pie dish, creating an even layer that covers the bottom and sides. Make sure the crust looks smooth and compact.
Pop the crust into the refrigerator to set while you get ready to make the filling. The cool environment will help the crust firm up and hold its shape.
Whip together cream cheese, peanut butter, powdered sugar, and vanilla until the mixture becomes silky smooth and fully blended. The texture should be light and fluffy.
Gently fold whipped cream into the peanut butter mixture, creating a luxurious and airy filling that will melt in your mouth.
Pour the creamy filling into the chilled crust, spreading it evenly. Top with a drizzle of chocolate sauce and sprinkle of chopped peanuts for extra crunch.
Refrigerate the pie for at least 4 hours or overnight. When ready, slice and enjoy this decadent dessert that combines rich chocolate and creamy peanut butter.
Flavor Twists For Chocolate Peanut Butter Pie
Serving Chocolate Peanut Butter Pie Sweetly
Chilling And Storage For Chocolate Peanut Butter Pie
Print
Velvety Chocolate Peanut Butter Pie Recipe
- Total Time: 4 hours
- Yield: 9 1x
Description
Rich chocolate peanut butter pie blends creamy textures with irresistible flavors from classic American dessert traditions. Chocolate lovers will savor this indulgent treat with its smooth filling and crumbly graham cracker crust that promises pure delight.
Ingredients
- 1 cup (240 milliliters) creamy peanut butter
- 1 cup (120 grams) powdered sugar
- 1 (8 oz/226 grams) package cream cheese, softened
- 1 ½ cups (360 milliliters) heavy whipping cream (or 1 (8 oz/226 grams) tub Cool Whip)
- 1 tsp (5 milliliters) vanilla extract
- 24 Oreo cookies, crushed (or 1 ½ cups chocolate cookie crumbs)
- 5 tbsps (75 milliliters) unsalted butter, melted
- ½ cup (85 grams) semi-sweet chocolate chips
- ¼ cup (60 milliliters) heavy cream
- 1 tbsp (15 milliliters) peanut butter (optional, for extra flavor)
- Whipped cream
- Chopped peanuts
- Chocolate shavings
Instructions
- Cookie Transformation: Crush chocolate sandwich cookies into fine crumbs using a food processor or by sealing in a plastic bag and rolling with a pin until completely pulverized.
- Crust Formation: Combine cookie crumbs with melted butter, mixing thoroughly until the mixture achieves a consistent, moldable texture that holds together when pressed.
- Base Preparation: Evenly distribute and firmly pack the buttery crumb mixture into a circular baking pan, creating a smooth, compact crust layer with uniform thickness and compressed edges.
- Chill Setting: Refrigerate the prepared crust for 15-20 minutes to enhance structural integrity and ensure a solid foundation for the upcoming pie filling.
Notes
- Crush Cookies Precisely: Use a food processor for uniform, fine crumbs that create a smooth, consistent crust with no large chunks.
- Control Butter Moisture: Add melted butter gradually to cookie crumbs, ensuring just enough to bind without making the crust too greasy or soggy.
- Press Crust Evenly: Use the back of a measuring cup or flat-bottomed glass to compact the crust firmly and create a stable, well-distributed base layer.
- Chill for Stability: Refrigerate the crust for at least 15-20 minutes before adding fillings to help it maintain structural integrity and prevent crumbling.
- Prep Time: 30 minutes
- Cook Time: 1 hour
- Category: Desserts
- Method: Mixing
- Cuisine: American
Nutrition
- Serving Size: 9
- Calories: 420
- Sugar: 26 g
- Sodium: 250 mg
- Fat: 30 g
- Saturated Fat: 14 g
- Unsaturated Fat: 16 g
- Trans Fat: 0 g
- Carbohydrates: 34 g
- Fiber: 2 g
- Protein: 7 g
- Cholesterol: 40 mg
Olivia Bennett
Co-Founder & Content Creator
Expertise
Nutritional Analysis, Dietary Accommodations, Food Writing and Blogging,
Education
University of Texas at Austin
Institute of Culinary Education, New York, NY
Olivia Bennett is Cooking Crusade’s go-to expert for nutritious, feel-good food. Based in Austin, she blends her degree in Nutrition from the University of Texas with plant-based culinary training from the Institute of Culinary Education.
Olivia’s recipes are all about balance: vibrant, wholesome, and easy-to-love dishes that work for all kinds of eaters. Her mission is simple: to make healthy eating approachable and genuinely tasty, with tips that support your lifestyle, not complicate it.