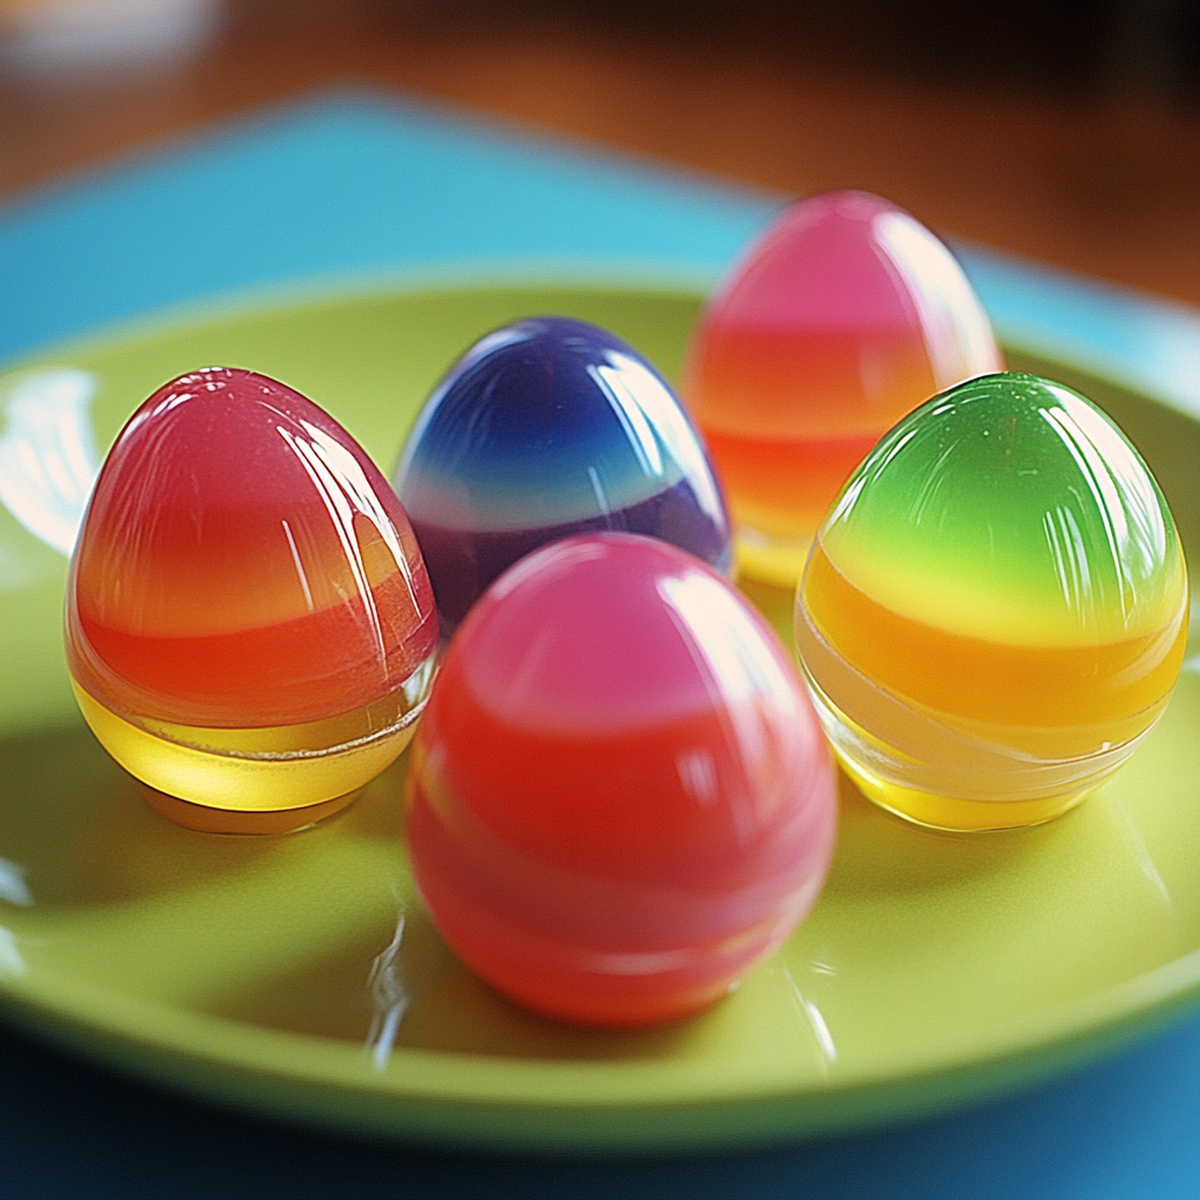
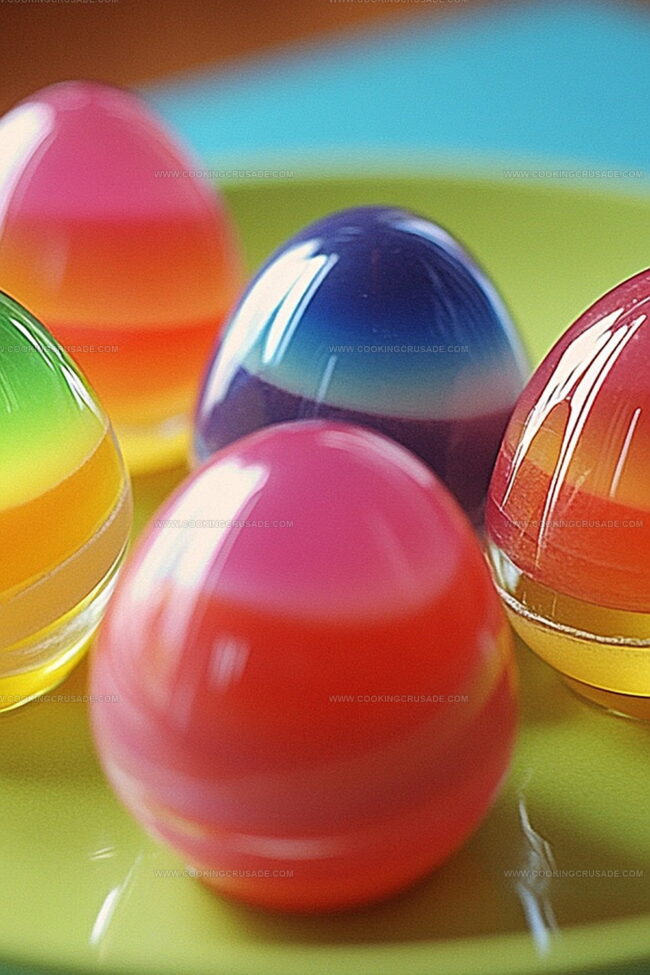
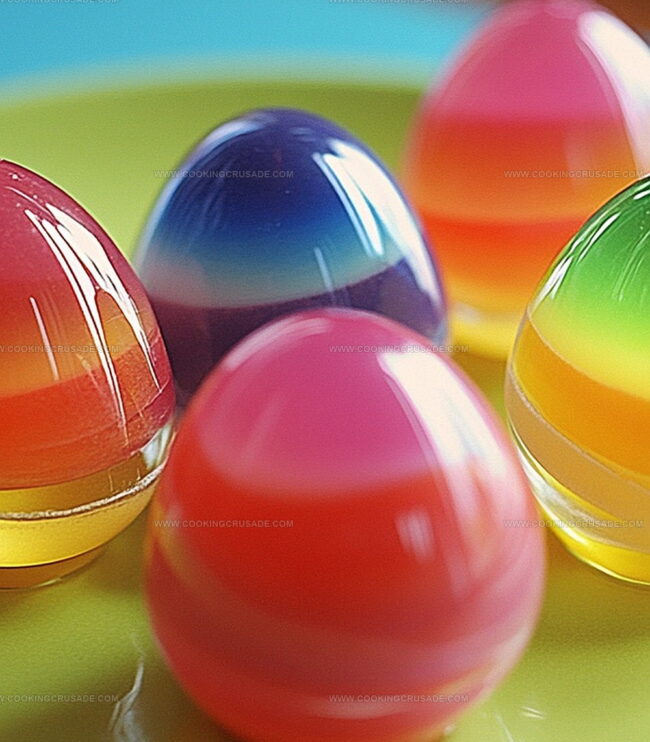
Springtime Magic: Colorful Jello Easter Eggs Recipe
Sweet and colorful jello easter eggs bring springtime magic right to your dessert table.
These playful treats sparkle with bright jello colors that capture the joy of the season.
Crafting these delightful easter jello eggs takes just a few simple ingredients and some creative technique.
Families love how these festive desserts light up holiday gatherings with their cheerful appearance.
Kids especially adore helping to mix and mold these wiggly, jewel-toned delights.
Each bite delivers a burst of fruity flavor that makes celebrations extra special.
Whip up these stunning eggs and watch smiles bloom around your table.
Quick Recipe Overview
List Of Ingredients For Jello Easter Eggs
For Mold Preparation:For Base Mixture:For Filling and Setting:Gear You Need For Jello Easter Eggs
How To Make Jello Easter Eggs
Grab your egg-shaped molds and give them a quick spray of cooking oil. Make sure the molds close tightly and are positioned facing upward on a flat tray. For plastic eggs, check they have an opening wide enough to pour gelatin inside.
Boil water and pour it over your favorite gelatin flavor. Whisk thoroughly until the powder completely dissolves, creating a smooth, vibrant liquid. Let the mixture sit for a moment to ensure no clumps remain.
Gently transfer the colorful gelatin into each egg container using a steady hand. Pour slowly to prevent spills and fill each mold right to the top, creating a perfect egg shape.
Place the filled molds in the refrigerator. Let them rest undisturbed for several hours until the gelatin transforms into firm, wiggly eggs. Once set, carefully separate the molds to reveal your festive treats.
Tips And Ideas For Jello Easter Eggs
Best Ways To Share Jello Easter Eggs
Storage Help For Jello Easter Eggs
Print
Vibrant Jello Easter Eggs Recipe
- Total Time: 3 hours 10 minutes
- Yield: 13 1x
Description
Colorful Easter jello eggs bring festive cheer to holiday celebrations. Gelatin-based treats provide a playful dessert perfect for family gatherings and springtime parties.
Ingredients
- 1 package (6 oz / 170 g) JELL-O gelatin, any flavor
- 1.5 cups (360 ml) boiling water
- 1 cooking spray (as needed)
Instructions
- Preparation: Lightly coat egg-shaped molds or clean plastic egg shells with non-stick spray, ensuring easy gelatin release. Select containers with wide openings for seamless filling.
- Gelatin Activation: Boil water and pour over powdered gelatin, whisking vigorously until completely dissolved into a smooth, clear liquid without any granular traces.
- Molding and Chilling: Carefully transfer liquid gelatin into prepared molds using a precision pouring tool, filling each cavity to the brim. Place molds upright in the refrigerator’s coldest section and allow to set completely for approximately three hours.
- Unmolding: After gelatin has solidified, delicately separate mold halves or extract gelatin eggs from plastic shells. Examine each egg for pristine surface quality and intact shape before serving these decorative, vibrant treats.
Notes
- Choose the Right Mold: Select smooth, clean egg-shaped molds or plastic egg shells with wide openings to ensure easy gelatin release and perfect egg shape.
- Whisk Thoroughly: Eliminate gelatin powder granules completely by whisking vigorously when mixing with hot water, creating a smooth, clear liquid for perfect texture.
- Control Pouring Technique: Use a narrow-spouted measuring cup or culinary syringe to fill molds precisely, preventing spills and achieving uniform, professional-looking Easter eggs.
- Chill Strategically: Place molds in the coldest refrigerator section, keeping them upright to maintain structural integrity and allow complete, even setting for flawless gelatin eggs.
- Prep Time: 10 minutes
- Cook Time: 3 hours
- Category: Desserts, Snacks
- Method: Mixing
- Cuisine: American
Nutrition
- Serving Size: 13
- Calories: 60
- Sugar: 14 g
- Sodium: 0 mg
- Fat: 0 g
- Saturated Fat: 0 g
- Unsaturated Fat: 0 g
- Trans Fat: 0 g
- Carbohydrates: 15 g
- Fiber: 0 g
- Protein: 1 g
- Cholesterol: 0 mg
Olivia Bennett
Co-Founder & Content Creator
Expertise
Nutritional Analysis, Dietary Accommodations, Food Writing and Blogging,
Education
University of Texas at Austin
Institute of Culinary Education, New York, NY
Olivia Bennett is Cooking Crusade’s go-to expert for nutritious, feel-good food. Based in Austin, she blends her degree in Nutrition from the University of Texas with plant-based culinary training from the Institute of Culinary Education.
Olivia’s recipes are all about balance: vibrant, wholesome, and easy-to-love dishes that work for all kinds of eaters. Her mission is simple: to make healthy eating approachable and genuinely tasty, with tips that support your lifestyle, not complicate it.